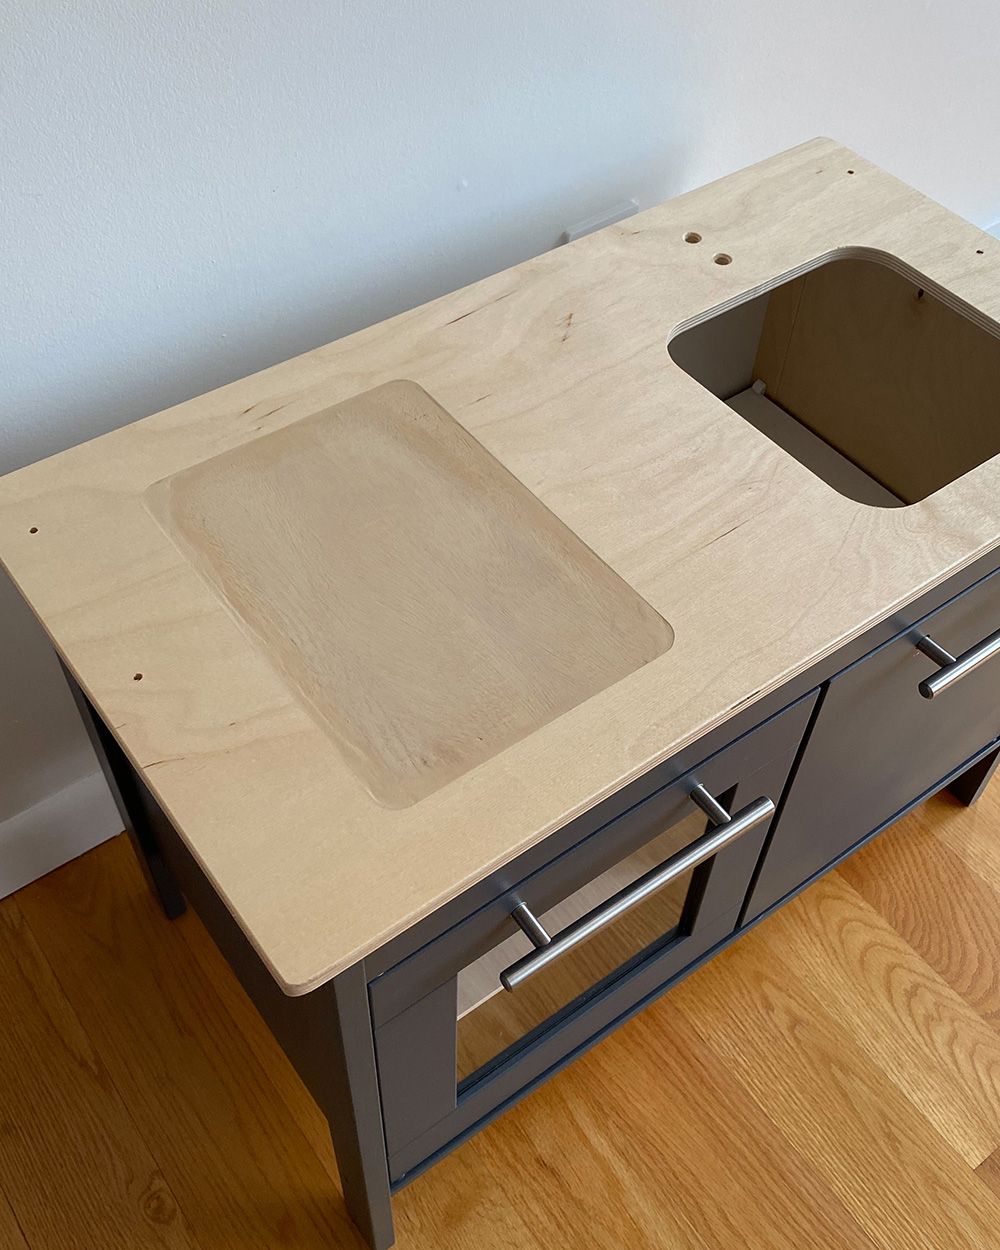
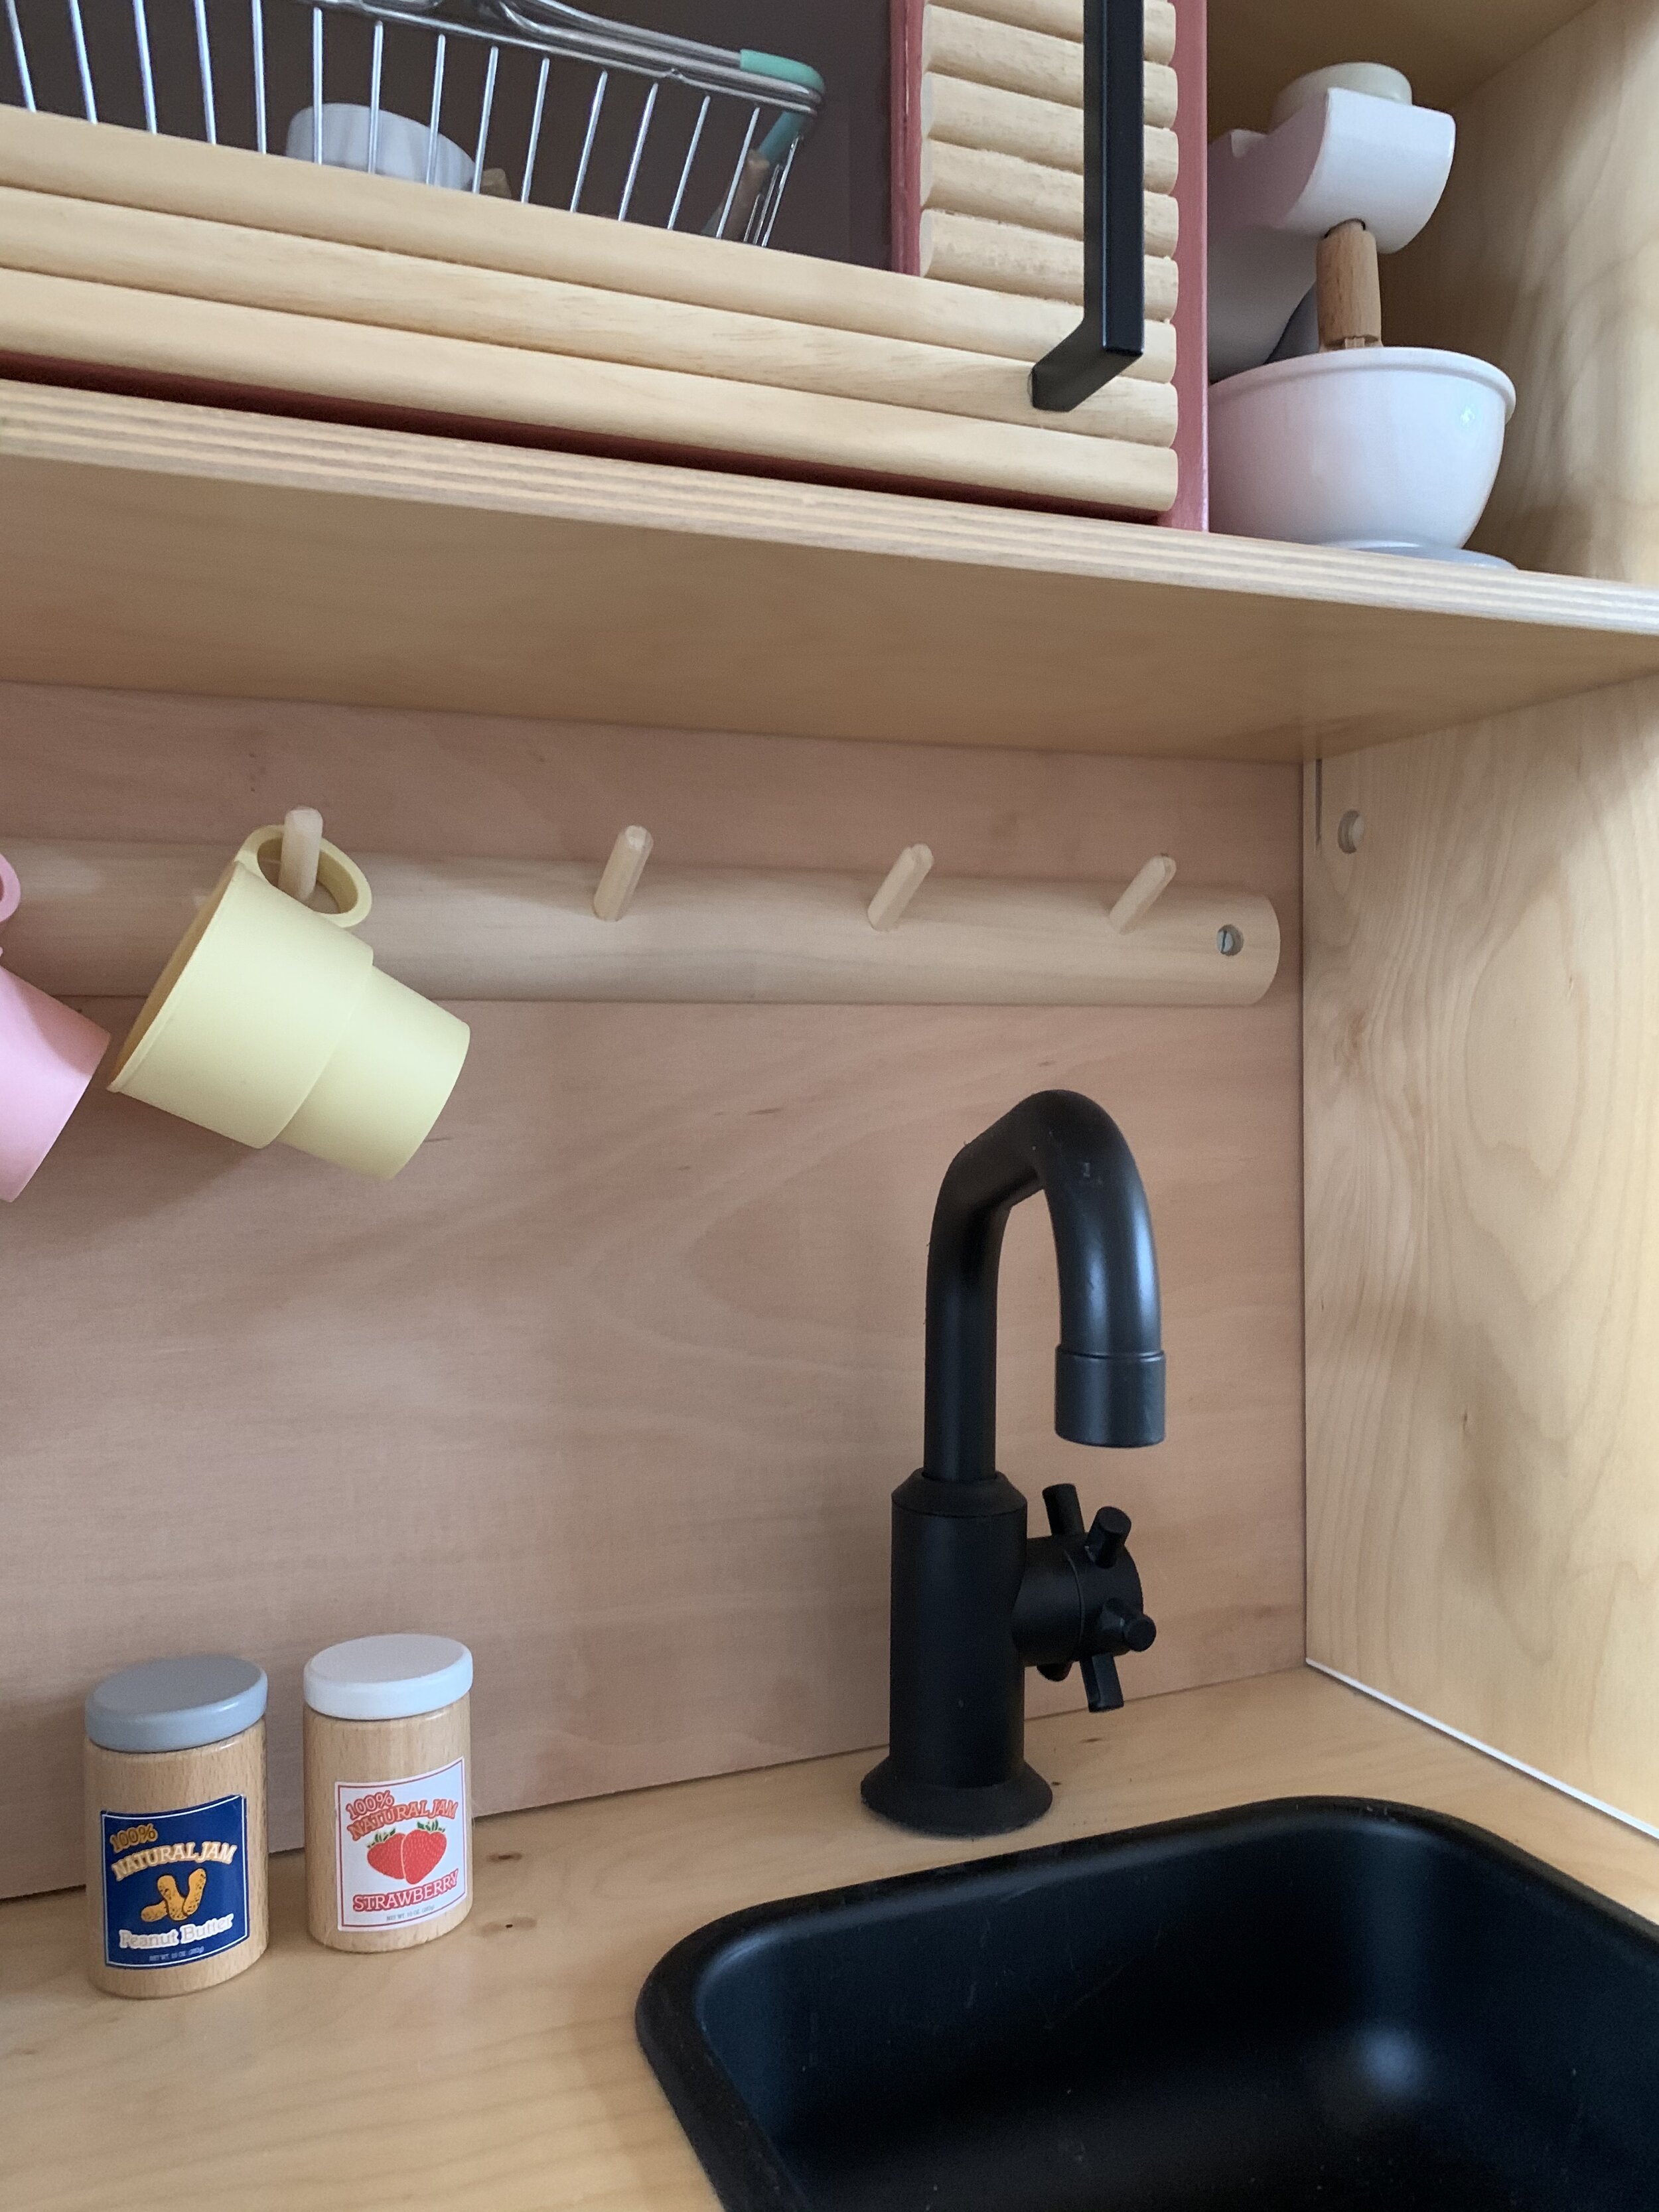
The easiest Ikea play kitchen sink replacement is a compatible basin that matches your kitchen’s opening, depth, and shape. If the original DUKTIG sink is missing or damaged, measure the opening first, compare replacement options, and secure the new basin without creating sharp edges or loose parts.
Across homes in the United States, the IKEA DUKTIG play kitchen is a familiar sight in playrooms, bedrooms, and family rooms. Children use it for pretend meals, tea parties, and make-believe dishwashing. After years of play, though, the small sink can crack, go missing during a move, or look worn while the rest of the kitchen still works well. Replacing the basin can be a practical way to refresh the toy without buying a whole new kitchen.
The main challenge is finding a sink that fits the existing countertop. A basin that looks right in a photo may be too wide, too deep, or shaped differently from the original. IKEA parts and product details can also change, so check the exact model and current US support options before ordering. This guide explains how to measure the opening, compare replacement choices, install a suitable basin, and check the finished toy for safety. The examples focus on the DUKTIG-style wooden play kitchen, but the same measuring principles can help with other toy kitchens.
Source: storage.googleapis.com
What Is the Best Ikea Play Kitchen Sink Replacement?
For most owners, the best replacement is a basin that fits the existing countertop opening with minimal modification. Start by checking whether the original sink can be replaced through IKEA customer support. If the correct part is unavailable, compare a compatible toy sink, a simple plastic basin, or a carefully adapted container. The right option depends on the opening size, the condition of the countertop, and how the kitchen will be used.
The DUKTIG is a wooden pretend kitchen, not a full-size kitchen fixture. Its sink is meant for imaginative play, so a replacement does not need working plumbing. A basin that sits firmly in the countertop can be enough for pretend washing and cooking. Avoid adding water unless the toy and all nearby materials are suitable for it and the setup can be kept dry afterward.
There is no single substitute that fits every homemade or modified IKEA play kitchen. Some owners alter their kitchens with new countertops, faucets, or working-water features. Those changes can affect the original opening and support beneath it. Check the actual kitchen in front of you instead of relying on a photo or another owner’s measurements.
Source: storage.googleapis.com
Best first step
Contact IKEA US with the product name, model information, and purchase details if available. Ask whether the original basin or a compatible replacement part can be supplied.
Best low-effort alternative
Look for a smooth, sturdy basin with a matching rim and dimensions. Confirm that it sits securely and does not leave a gap where a child’s fingers could become trapped.
Best for a custom makeover
Choose a basin only after measuring the countertop and checking the space underneath. Plan any cutting or fastening before changing the wooden panel.
Check Whether Your Kitchen Is an IKEA DUKTIG
Before shopping, confirm that your toy kitchen is a DUKTIG or another model. Check the original product documents, labels, assembly instructions, or purchase history. A secondhand kitchen may have a replaced countertop or a sink opening that no longer matches its original design.
Take a clear photo of the whole kitchen and another of the empty sink opening. Include the underside if you can reach it safely. These details can help customer support or a seller understand what you need, but measurements are still necessary.
Record the model
Write down the product name and any model or article number shown in your paperwork or product label.
Check for past changes
Look for a new countertop, enlarged opening, extra faucet holes, or repairs that could affect fit.
How to Measure the Sink Opening Correctly
Measure the hole in the countertop before you choose a replacement. The outer rim of a basin may be wider than the opening, while the body below the rim must fit through the hole. Confusing these two measurements is a common reason a new sink will not sit flat.
Use a tape measure or ruler and write down each result. Measure the opening from left to right and from front to back. Then measure the depth available beneath the countertop, taking care not to pull or loosen any attached parts. If the opening is not square or rectangular, record its shape and the size at more than one point.
Do not assume that two sinks with the same length and width will fit equally well. A rounded basin can have a different usable opening from a square one. The lip, corners, depth, and underside shape all affect the fit. A cardboard template can help you compare the shape without repeatedly placing a candidate basin in the opening.
Source: storage.googleapis.com
Opening width
Measure from the inner left edge to the inner right edge of the countertop cutout.
Opening depth
Measure from the front inner edge to the back inner edge of the cutout.
Basin depth
Check how far the replacement extends below the rim and compare that with the clear space underneath.
Rim size
Confirm that the outer rim covers the opening and rests on the countertop without rocking.
Shape and clearance
Check corners, curves, faucet position, and any support rails or panels beneath the countertop.
Make a Simple Sink Measurement Record
Write down the measurements in inches, which are commonly used for US household projects. If you also measure in millimeters, label the units clearly so you do not mix them up. Measure twice and compare your notes before placing an order.
If a seller lists only the outside dimensions, ask for the dimensions below the rim as well. If those details are unavailable, treat compatibility as unconfirmed. Do not force a basin into the opening or sand away large sections of the countertop just to make an uncertain fit work.
Record the opening
Width, front-to-back depth, shape, and any uneven edges.
Record the available space
Maximum depth below the counter and distance from nearby supports or other parts.
Compare both sides of the fit
The basin body must fit through the opening, while the rim must rest securely on top.
Where to Find a Replacement Sink in the USA
Start with IKEA US support, then compare secondhand parts and suitable replacement basins. The original sink may be easier to match than a generic container, but separate-part availability can vary. Check current stock and support guidance rather than assuming that every piece of a discontinued or older toy is still available.
When shopping online, search for the exact model alongside terms such as replacement basin, sink insert, or play kitchen sink. Search results may include handmade upgrades, custom inserts, and sinks made for other toy kitchens. A similar appearance does not prove that a part will fit the DUKTIG countertop.
Secondhand marketplaces can be useful when a family is selling an incomplete play kitchen or spare parts. Ask for exact measurements and close-up photos of the rim and underside. Check the item’s condition and the seller’s return terms before paying, especially if the listing does not confirm a specific model.
Source: Ikea Hacker
IKEA US support
Ask about a replacement part using your model details and purchase information. Confirm the part number, availability, price, and shipping options directly with IKEA.
Secondhand marketplaces
Look for a matching original basin from an incomplete or used DUKTIG kitchen. Request dimensions rather than relying on the listing title.
Custom or handmade parts
Consider a made-to-fit insert only when the seller provides clear measurements, material information, and safe, smooth edges.
Household containers
A sturdy, clean container may serve as a pretend sink if it fits without unsafe gaps, sharp edges, or loose fittings.
Search With More Than One Phrase
A search for IKEA play kitchen sink replacement may return DIY makeovers instead of products for sale. Try adding DUKTIG, replacement basin, sink insert, or spare part to narrow the results. For a secondhand item, include the words used, incomplete, or parts when appropriate.
Read the product description carefully. Check whether the seller is offering the basin alone, a full toy kitchen, a faucet accessory, or instructions for making a replacement. If a listing shows a modified countertop, its dimensions may not match an unmodified kitchen.
Confirm what is included
Make sure the price covers the sink itself, not just a photo, a digital plan, or another accessory.
Ask about the material
Find out what the basin is made of and whether its edges and finish are suitable for children’s pretend play.
Check the return policy
A return option is useful if the item arrives with different measurements or a shape that does not match the listing.
How to Install an Ikea Play Kitchen Sink Replacement
Install a replacement only after you confirm that it fits the existing opening and can be held securely. For a straightforward swap, you may need a ruler, a soft cloth, and the fastening parts designed for the basin. A custom insert may need a different method, so follow the part maker’s directions where available.
Work on a clear, stable surface. Remove toys and loose accessories from the kitchen, and have an adult handle tools and any changes to the wooden countertop. Do not let a child use the kitchen while the sink is loose or the repair is in progress.
Test the basin before returning the toy to normal play. The rim should sit flat, the body should not rock, and the surrounding wood should remain intact. If the replacement needs force, leaves an unstable edge, or requires cutting that you cannot do accurately, stop and choose another option.
Source: theottohouse.com
Prepare the area
Move the kitchen to a stable work area and remove loose parts. Keep tools, screws, and small fittings away from children.
Remove the old basin
Lift it out gently if it is designed to be removable. If it is fixed in place, inspect the attachment method before trying to release it.
Clean the opening
Wipe away dust and dirt with a soft cloth. Let the area dry fully before fitting the replacement.
Test the replacement
Lower the basin into place without force. Check that the rim covers the opening and the body clears the space below.
Secure the basin
Use suitable, manufacturer-approved fittings when available. Do not leave loose screws, exposed sharp points, or detachable pieces within a child’s reach.
Inspect the finished repair
Press lightly around the rim and check for rocking, movement, gaps, cracks, or rough edges before the kitchen is used again.
What If the New Sink Does Not Fit?
If the basin will not drop into the opening, do not push it down. First check whether you measured the opening rather than the old sink’s outside rim. Then compare the new basin’s lower body, corner shape, and depth with your notes.
If the rim falls through the opening or does not cover it, the basin is also unsuitable. A loose fit can move during play and may expose gaps around the countertop. Return the item if possible or look for another basin with dimensions that better match the kitchen.
Do not enlarge the countertop simply because a replacement is slightly too large. Cutting can weaken the panel, damage its finish, or create splinters. A custom modification should be an adult-led project with suitable tools and a clear plan for restoring smooth, stable edges.
Too wide or too deep
Compare the lower body dimensions and look for a smaller basin that still has a rim wide enough to cover the opening.
Too shallow or unstable
Check the support method and rim shape. A basin that tilts or slides should not be left in place.
Damaged countertop
Stop if the wood cracks, splinters, or becomes loose. Repair the panel properly before installing another sink.
Can You Use a Different Basin or Make a DIY Sink?
Yes, a different basin can work if it matches the opening and is safe for the child’s age and style of play. Some families prefer a plain plastic insert because it is easy to wipe clean. Others want a metal-look basin or a custom insert that matches a remodeled countertop. These are design choices, not proof that a particular product fits.
Choose a material that is sturdy, smooth, and easy to clean. Avoid glass, brittle containers, sharp metal edges, and items with peeling coatings. A basin that can crack into sharp pieces or shed small parts is not a suitable choice for a toy used by young children.
A DIY insert may cost less than a custom-made part, but the lowest price is not always the best value. A container that slides out or leaves wide gaps can create more work and may need replacing. Compare the total cost, time, fit, and ease of cleaning before deciding.
Source: www.pinterest.com
Rigid plastic basin
Can be light and easy to clean, but check for cracks, thin walls, rough molding seams, and a stable rim.
Custom-made insert
Can suit a nonstandard opening, provided the maker supplies accurate measurements and a safe, durable finish.
Metal container
May offer a sink-like appearance, but reject any option with sharp edges, exposed seams, or a rim that can cut skin.
Reused household bowl
May work for dry pretend play if it fits securely and is free of cracks, detachable pieces, and unsafe edges.
A Simple DIY Approach Without Cutting the Countertop
The simplest DIY route is to find a basin that fits the existing opening instead of changing the wooden panel. Make a paper or cardboard template of the opening, then compare it with the basin’s lower body and top rim. This helps you spot a mismatch before you buy or adapt anything.
If the basin needs support, use a method suited to the material and the toy’s construction. Avoid relying on a loose stack of cardboard or a temporary wedge that can slip out during play. Any adhesive or fastener must be suitable for the materials, fully set before use, and inaccessible to the child.
Once fitted, check the basin after gentle use and during routine toy inspections. If it loosens, develops a crack, or starts to expose a rough edge, remove it from play until you can repair it or replace it.
Keep the original opening
Choose a basin that fits the existing cutout whenever practical. This reduces the need for woodworking and preserves the countertop.
Avoid improvised loose supports
Do not use parts that can shift, break, or become small loose objects during play.
Check after fitting
Confirm that the insert stays in place during ordinary pretend play and remains easy for an adult to remove for cleaning if needed.
Safety Checks Before Children Use the Repaired Kitchen
A replacement sink must be stable, smooth, and appropriate for the child who uses the toy. A basin that looks neat can still pose a problem if its rim shifts, a fastener sticks out, or a gap catches small fingers. Inspect the full area around the sink, not just the visible bowl.
Follow the toy’s age guidance and supervise play as needed. Keep small screws, clips, washers, and other loose hardware out of reach. If you have changed the countertop, faucet, or supports, inspect those parts too because the modification may affect more than the basin alone.
Treat a working-water conversion as a separate project from a simple sink replacement. Water can wet the wooden panels, affect adhesives, and create a mess around nearby electrical toys or outlets. Do not add a pump, wiring, or real plumbing unless the design is appropriate and the work can be completed safely.
Source: avofoogu.blogspot.com
Smooth edges
Run an adult hand carefully around accessible edges and remove the toy from use if any edge is sharp, cracked, or splintered.
Secure parts
Check that the basin and all fittings remain in place and cannot be pulled free during normal play.
No accessible hardware
Make sure screws, sharp fasteners, and small removable parts cannot be reached by the child.
Keep the kitchen dry
Unless the setup is specifically designed for water, use it for pretend play and wipe up accidental spills at once.
Routine inspection
Check for movement, cracks, moisture damage, loose supports, and peeling finishes as part of normal toy care.
When to Stop the Repair and Get Help
Stop if the countertop splits, the opening becomes too large, or the replacement cannot be secured without an improvised attachment. These signs suggest that a simple basin swap may no longer be enough. An adult with suitable woodworking skills can assess the panel, or you can choose a replacement that does not require cutting.
If the toy is unstable as a whole, check its assembly and supports before focusing on the sink. A well-fitted basin will not make an unstable kitchen safe. Follow the manufacturer’s assembly instructions where available and keep children away until the full toy is stable.
Cracked or splintered wood
Do not cover the damage with the sink rim and assume the repair is complete. Address the damaged panel first.
Unstable attachment
Remove a basin that shifts or can be pulled free. Find a better fit or a suitable fastening method.
Water or electrical additions
Do not improvise powered pumps or electrical connections near water. Use an appropriate purpose-built setup or leave the toy as a dry-play kitchen.
Common Replacement Mistakes and How to Avoid Them
The biggest mistake is buying by appearance alone. Two basins may look almost identical in a photo while differing in depth, rim width, or corner shape. Measure the countertop and ask for the dimensions that are missing from the listing before you commit.
Another mistake is modifying the kitchen before testing the replacement. Cutting or sanding the opening can be hard to reverse and may damage the finish. Try to find a basin that works with the current cutout first, and only consider changes when the benefit clearly outweighs the extra work.
It is also easy to overlook cleaning and long-term care. A basin with narrow gaps or rough seams can trap dirt. A loose insert can collect moisture beneath its rim. Choose a design that an adult can inspect and clean without leaving hidden wet areas or accessible loose parts.
Source: avofoogu.blogspot.com
Mistake: using the old sink’s outer size
Measure the countertop opening and compare it with the new basin’s lower body and top rim.
Mistake: assuming every DUKTIG kitchen is unchanged
Check for custom countertops, repairs, and previous alterations before using another owner’s measurements.
Mistake: forcing a tight fit
Stop if the basin catches on the wood. Find a compatible shape instead of risking cracks or splinters.
Mistake: ignoring loose hardware
Inspect all attachments and keep small parts away from young children.
Mistake: adding water without a plan
Keep the play kitchen dry unless the complete setup is suitable for water and can be cleaned and dried safely.
How to Keep the Replacement Sink in Good Shape
Clean the basin with a soft cloth and a mild cleaner that is suitable for its material. Follow the product maker’s care instructions, and avoid harsh products that could damage the surface or leave a residue. Dry the rim and countertop after cleaning.
Check the basin regularly, especially after the toy has been moved or used heavily. Look for new cracks, a loose rim, peeling finishes, and moisture marks on the wood. Fix small issues before they lead to a larger repair, and remove the kitchen from play if a safety problem appears.
Clean gently
Use a soft cloth and a suitable cleaner rather than an abrasive pad that may scratch the basin.
Dry the surrounding wood
Do not leave spills beneath the rim or around the faucet area.
Recheck the fit
Make sure the basin remains level and secure after cleaning and ordinary play.
Replacement Options Compared
The right replacement depends on the condition of the toy, how closely you want to match its original look, and how much work you are willing to do. The table below compares common approaches in practical terms. These are general trade-offs, not verified prices or guarantees that any particular basin will fit a DUKTIG kitchen.
Source: avofoogu.blogspot.com
Original IKEA part
Best for preserving the original design when the exact part is available. Availability must be confirmed with IKEA.
Secondhand original sink
Useful for matching the original shape, but condition and fit depend on the specific item.
Generic basin or container
May be easy to source, but dimensions, rim design, materials, and secure placement need careful checking.
Custom insert
Can suit an altered countertop, but may cost more and requires reliable measurements and a safe finish.
Choose Based on Fit, Effort, and Safety
If preserving the original look matters most, look for an original part or a matching secondhand basin. If your priority is a quick repair, a compatible off-the-shelf insert may be easier, provided the dimensions are confirmed. If the countertop has been changed, a custom insert may be worth considering.
Do not compare options on price alone. Include shipping, the chance of a poor fit, any tools or materials required, and the time needed to finish the repair. A slightly more costly basin that fits securely may be more practical than a cheap container that needs repeated adjustments.
Choose original parts when
You want the closest match and IKEA or a reputable seller can confirm the correct part.
Choose a generic insert when
Its dimensions and material are documented, and it fits without risky changes to the countertop.
Choose a custom solution when
The opening has been altered or standard basins do not fit, and the finished installation can be made stable and smooth.
Frequently Asked Questions
Q
Can I buy a replacement sink directly from IKEA?
Possibly, but separate-part availability can vary by model and location. Contact IKEA US support with the kitchen’s product details and ask whether the original sink or a compatible spare part is available. Confirm the part number and fit before ordering.
Q
Will any small stainless steel sink fit an IKEA DUKTIG?
No. A small sink may have the wrong opening dimensions, rim width, depth, or corner shape. Measure the countertop cutout and the clear space beneath it, then compare those measurements with the sink’s specifications. Also check that its edges are smooth and safe for pretend play.
Q
Can I use a plastic bowl as a replacement play kitchen sink?
A sturdy plastic bowl may work for dry pretend play if it fits securely, has smooth edges, and cannot crack or come loose during ordinary use. Do not rely on a loose bowl that slides around or leaves gaps where fingers can become trapped. Check the fit often.
Q
Do I need to cut the countertop to replace the sink?
Usually, the first choice should be a replacement that fits the existing opening. Cutting may damage the wood, create splinters, or weaken the countertop. Consider modifying it only when necessary and when an adult can complete the work with suitable tools and restore a smooth, stable finish.
Q
Is it safe to add running water to the IKEA play kitchen?
A standard pretend kitchen should not be assumed to support real plumbing or powered water features. Water may damage wooden panels, loosen adhesives, or reach nearby electrical items. Keep the setup dry unless the full design is suitable for water, can be cleaned and dried properly, and has no unsafe electrical or structural features.
Q
How do I know whether the replacement sink is secure?
The rim should rest flat, the basin should not rock, and the opening should have no unsafe gaps. Check for exposed fasteners, rough edges, cracks, and loose parts. If the sink moves when pressed lightly or can be pulled free, remove it from play until the fit is corrected.
✦ Wrapping Up
Conclusion
Replacing an IKEA play kitchen sink does not have to mean replacing the whole toy. For a DUKTIG kitchen, start by checking IKEA US for the original part. If that is not an option, a compatible basin or carefully chosen insert may restore the sink area without major changes.
The most useful step is measuring the opening before buying anything. Check the basin’s lower body, top rim, depth, and shape, then test the fit without force. Keep the countertop intact whenever possible, use suitable fasteners, and inspect the finished repair for loose parts and sharp edges.
A neat sink is only part of a good repair. The basin must stay secure, the surrounding wood must remain sound, and the kitchen must suit the child’s age and style of play. With careful measuring and a few basic checks, you can give a well-loved toy kitchen more life without taking on an unnecessary project.
💡 Key Takeaway
Measure the countertop opening in both directions, check the available depth underneath, and contact IKEA US or compare compatible basins using those exact measurements before purchasing a replacement.