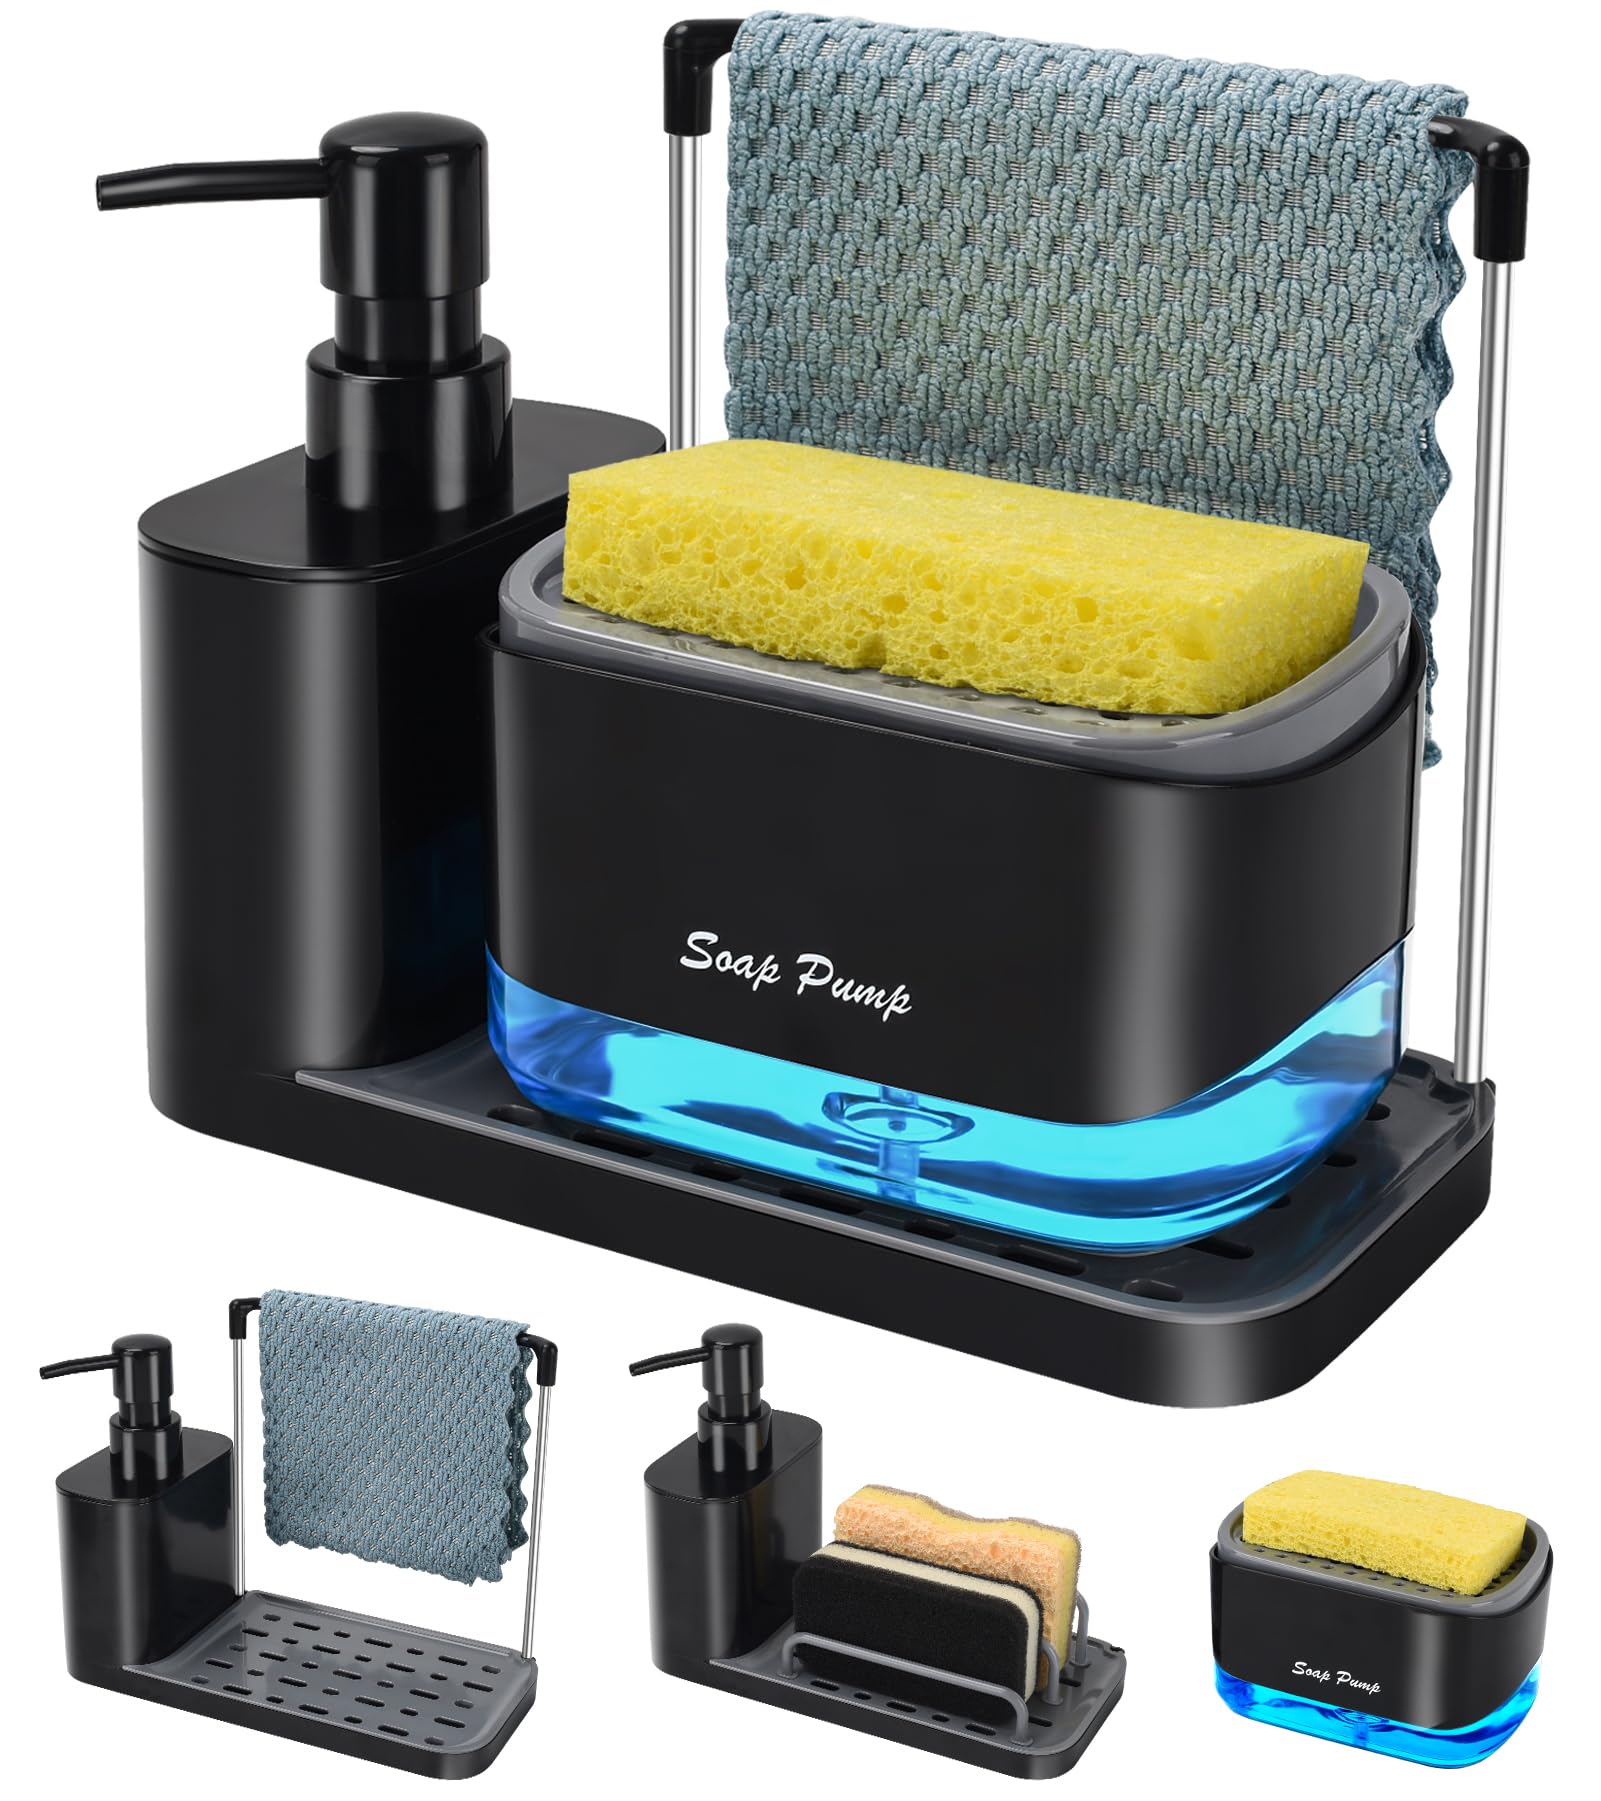
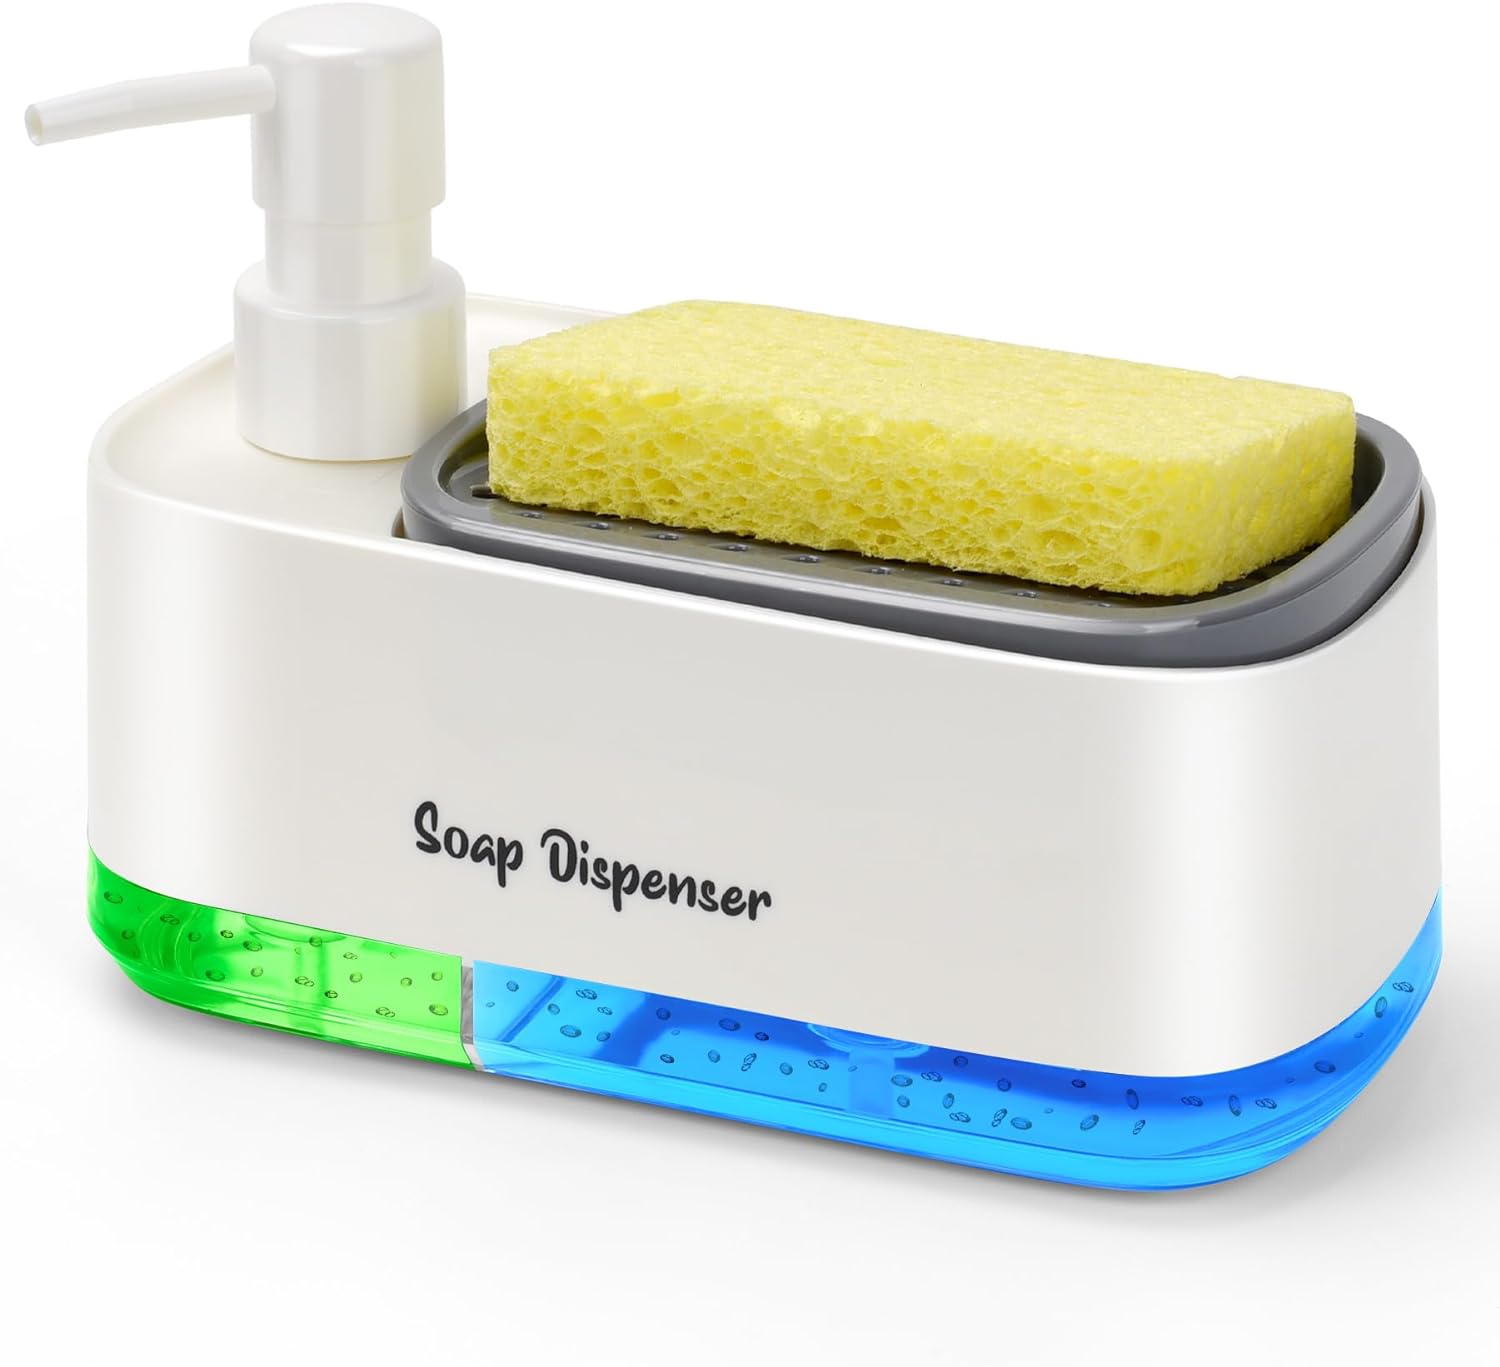
A kitchen soap dispenser set with sponge holder keeps dish soap, hand soap, and a sponge together near the sink. The right set saves counter space, makes daily cleanup easier, and gives wet sponges a place to drain. Choose one based on sink space, soap capacity, material, drainage, and ease of cleaning.
In a typical American kitchen, the sink handles a lot of daily work. It is where people rinse produce, wash plates, clean pans, and scrub coffee cups after breakfast. Dish soap bottles and damp sponges can soon take over the counter. A kitchen soap dispenser set with sponge holder offers a simple way to keep these items in one spot without adding a large storage rack.
These sets come in many styles. Some hold one bottle of dish soap and a sponge. Others have two dispensers for dish soap and hand soap, plus a tray for scrubbers. You can find countertop sets made from plastic, stainless steel, glass, ceramic, and mixed materials. The best choice depends on how you use your sink, how much room you have, and how much cleaning you want to do.
A tidy sink setup should also work well when your hands are wet. The dispenser needs to release soap without much effort, while the sponge holder should allow water to drain or be easy to empty. No single design suitsevery kitchen. Checking these details before buying can help you avoid leaks, clutter, and extra cleaning.
Source: m.media-amazon.com
What Is a Kitchen Soap Dispenser Set With Sponge Holder?
A kitchen soap dispenser set with sponge holder is a sink accessory that combines soap storage with a small place for dishwashing tools. Depending on the design, it may include one or two refillable bottles, a pump, a sponge tray, and a base that catches drips. Some sets also include a brush holder or a small compartment for a scrub pad.
The main goal is to keep everyday cleaning supplies close at hand. Instead of moving a large dish soap bottle each time you wash a pan, you can use a pump beside the sink. After washing, you can return the sponge to its holder rather than leaving it flat on the counter.
These sets do not clean the sink or kill germs on their own. They are storage tools. Their value comes from easier access, less scattered clutter, and a place to keep a wet sponge between uses.
Source: m.media-amazon.com
Soap dispenser
A refillable bottle with a pump that releases liquid soap. Some designs hold dish soap, while others are made for hand soap.
Sponge holder
A small rack, cup, or tray that supports a sponge or scrub pad between washing tasks.
Drip tray or base
A surface that catches small drips and helps keep the counter from getting wet. It must be emptied or cleaned when water collects.
Dual-dispenser design
A set with two bottles, often used for dish soap and hand soap. The bottles may share a base or sit in separate holders.
How Is a Set Different From a Basic Soap Bottle?
A basic soap bottle stores one liquid and usually sits wherever counter space is available. A dispenser set adds a defined place for the sponge and may provide room for a second soap. This can make the sink area look more organized, especially when several cleaning items are used each day.
The trade-off is that a set takes up a fixed amount of space. A single bottle may be easier to move, refill, and clean. If your sink has a narrow ledge or a small counter, a compact holder or separate wall-mounted accessory may work better.
Choose a set
Consider one when you want soap and sponge storage together and have a stable surface beside the sink.
Choose a single dispenser
Consider one when space is tight or you already have a useful sponge rack.
Benefits of Keeping Soap and Sponges Together
The biggest benefit is convenience. Dish soap, hand soap, and the sponge stay near the place where you use them. You do not need to reach across the counter or move several bottles to find a scrub pad. A well-placed set can make routine cleanup feel less cluttered.
A combined holder may also make it easier to keep the counter clear. Loose sponges can leave wet marks, while large store-bought soap bottles can crowd the area around a faucet. Putting these items in a small, organized space gives each one a clear place.
There is a practical limit, though. A crowded set can collect food bits, soap residue, and water. The design helps only when the parts are easy to clean and the sponge can dry between uses. A tidy appearance should not come at the cost of poor drainage or trapped moisture.
Source: m.media-amazon.com
Faster access
The soap pump and sponge are close together, which can make washing dishes easier during busy meals.
Less visual clutter
A shared base can replace several loose items spread around the faucet.
Clear storage spots
A holder gives sponges and scrub pads a set place after use.
Simple sink routine
The set can help family members return supplies to the same spot after washing dishes.
Can a Sponge Holder Keep the Counter Dry?
It can help, but it cannot guarantee a dry counter. A holder with open sides or drainage holes may let water run into a removable tray or back toward the sink. A solid cup can hold water instead, so the sponge may sit in moisture for longer.
Check where the water goes before choosing a design. If a tray collects drips, empty it often and wash away soap film. If the holder drains straight onto the counter, place it where the water will not damage a wood surface or stain a porous material.
Look for drainage
Open slots, raised supports, or a removable drip tray can make water management easier.
Check the surface
Keep standing water away from unfinished wood, damaged laminate, and other surfaces that may be harmed by moisture.
Types of Kitchen Soap Dispenser Sets
The main differences between sets are the number of dispensers, the holder shape, the materials, and the way water drains. Looking at these features is more useful than choosing a set by appearance alone. A good match should fit the sink area and support your daily dishwashing routine.
Some sets use a shared tray, while others have separate parts that can be moved around. A shared base keeps the items together but may be harder to fit in an unusual corner. Separate parts offer more flexibility, though they can spread out and take up more counter space.
Source: m.media-amazon.com
Single Soap Dispenser With Sponge Holder
A single-dispenser set is a simple choice for a household that mainly needs dish soap and one sponge. The layout is often compact, and fewer parts can make cleaning easier. It may also cost less than a set with two bottles, although actual prices vary by brand, size, and material.
This style works well when hand soap is already stored elsewhere. Check that the sponge slot is wide enough for the type of sponge you use. A narrow opening may not fit a thick scrub pad or a long dish brush.
Best fit
Small kitchens, compact counters, and households that need only one soap bottle near the sink.
Dual Soap Dispenser Sets
A dual set has two soap containers. Many people use one for dish soap and one for hand soap, but the exact purpose depends on the labels and materials. Separate containers make it easier to keep the two products apart without placing another bottle on the counter.
Before buying, check the capacity of each bottle and how the pump attaches. A bottle with a wide refill opening may be easier to fill without spills. Clear labels are useful when both pumps and containers look the same.
Best fit
Households that want dish soap and hand soap in one organized area.
Sets With a Removable Tray
A removable tray can make cleanup easier because you can lift it away from the dispenser and wash it separately. This is useful when soap drips or small food bits collect around the sponge. Check whether the tray comes out without tipping the bottles over.
Some trays have grooves or raised areas that guide water away from the sponge. Others are mainly flat catch trays. Neither design is automatically better for every sink. The useful feature is easy access for rinsing, drying, and removing residue.
Best fit
People who want to clean the base often or prefer parts that can be separated.
Wall-Mounted and Sink-Edge Holders
Wall-mounted designs can free up counter space, but they need a suitable mounting surface and a secure attachment method. Adhesive mounts may not work well on every tile, finish, or damp surface. Follow the product instructions and check the weight limit before filling the bottles.
Sink-edge holders sit over or beside the basin. They can keep a sponge near the water, but the fit depends on the sink rim and faucet layout. Measure the available width and make sure the holder does not block the faucet handle or interfere with normal sink use.
Best fit
Small counters where a stable, compatible wall or sink-edge mounting spot is available.
How to Choose the Right Set for Your Kitchen
Start by measuring the space beside your sink. A set may look small in a product photo but feel bulky beside a faucet, dish rack, or window ledge. Measure the width and depth of the open area, then compare those numbers with the listed product dimensions.
Next, consider what you need to store. One soap pump and a sponge holder may be enough for a small household. A larger kitchen may benefit from two pumps and room for a scrub brush. Avoid paying for extra parts that will sit unused or make the counter crowded.
Think about daily use as well. The pump should be easy to press with one hand, the bottle should be easy to refill, and the sponge slot should hold your preferred sponge without forcing it into place. These small details often matter more than decorative trim.
Source: m.media-amazon.com
Compare Capacity and Refill Access
Bottle capacity affects how often you need to refill the dispenser. A larger bottle may reduce refill trips, but it can also take up more room and become heavier when full. A small bottle is easier to handle but may run empty more often in a busy kitchen.
Product listings may show capacity in fluid ounces or milliliters. For reference, 12 US fluid ounces is about 355 milliliters. Use the listed capacity as a guide, but remember that the bottle may not need to be filled to the brim. Leave space if the manufacturer recommends it.
Check the opening
A wide refill opening can reduce spills when pouring soap from a large container.
Check the pump tube
The tube should reach the soap near the bottom of the bottle without being bent or pinched.
Check the bottle design
A removable top can make filling easier, while a narrow neck may need a small funnel.
Pick a Material That Suits Your Routine
Material affects weight, cleaning, appearance, and how a dispenser handles daily use. No material is best in every kitchen. Look at the bottle, pump, base, and tray separately because one set can combine several materials.
Stainless steel can suit a modern kitchen, but the grade and finish matter. Some parts marketed as stainless steel may still show water spots or corrosion if the material or coating is unsuitable. Glass can look neat and makes the liquid level easy to see, but it can break if dropped. Plastic is often light and easy to handle, while ceramic can be heavy and may chip if struck against a hard sink.
Plastic
Lightweight and often easy to move. Check whether the bottle feels stable and whether the plastic is compatible with the soap you plan to use.
Stainless steel
A metal finish can match common kitchen fixtures. Check the care instructions and dry the surface if water spots bother you.
Glass
Useful when you want to see the soap level. Handle with care and avoid placing it where it can fall into the sink.
Ceramic
Offers a solid, decorative look. It may be heavier and can chip or crack after an impact.
Check Stability and Pump Quality
A dispenser should stay in place when you press the pump. A narrow, tall bottle may tip more easily than a wider one, especially when the bottle is nearly empty. A broad base can help, but the shape and weight distribution also matter.
The pump should move smoothly and return to its normal position after use. Check whether the pump head twists off for refilling and whether replacement pumps are available. A product page may not explain how long a pump lasts, so avoid treating claims about durability as proven without supporting information.
Look at the base
Choose a design that sits flat and does not wobble on your counter.
Review the pump
Look for clear refill instructions and a pump that can be removed without tools if the design allows it.
Read care details
Confirm whether the parts are hand-wash only or safe for a dishwasher. Do not assume every component can go in a dishwasher.
How to Set Up a Soap Dispenser and Sponge Holder
Set up the dispenser on a clean, dry, stable surface. Before filling it, read the care and use instructions supplied with the set. Check that all parts are present and that the bottle, pump, and tray fit together as intended.
A simple setup can help prevent spills and make the set easier to maintain. The steps below apply to many countertop designs, but follow the maker’s instructions whenever they differ.
Source: m.media-amazon.com
Step 1: Choose a Safe, Useful Spot
Place the set close enough to reach while washing dishes, but do not block the faucet handle, sink sprayer, or drain area. Keep it away from the edge of the counter, where a bump could knock it onto the floor.
Avoid spots where water regularly pools under the base. If the counter is made from wood or another moisture-sensitive material, use a design with a suitable drip tray and check beneath it often.
Test the reach
Move the faucet handle through its full range and make sure the dispenser does not get in the way.
Check the surface
Wipe the area dry and make sure the set sits flat without rocking.
Step 2: Clean and Fill the Bottles
Wash new bottles if the product instructions allow it, then rinse and dry them fully before filling. Use only a liquid that the dispenser is designed to handle. Thick soap, soap with large particles, or products that separate may clog some pumps.
Fill the bottle to the recommended level and secure the pump. If the pump needs priming, follow the directions and press it over the sink until soap flows. Do not force a stuck pump, since excess pressure may damage the mechanism or cause a spill.
Keep liquids separate
Use one bottle for dish soap and another for hand soap when the set supports two liquids.
Avoid overfilling
Leave any headspace required by the product instructions so the pump can be reattached without pushing soap out.
Wipe the neck
Remove spilled soap from the bottle threads before closing the dispenser.
Step 3: Place the Sponge and Test the Pump
Put a clean, damp sponge in the holder and check whether it sits securely. The sponge should not block a drainage opening or extend into the path of the pump. If you use a long brush, confirm that the holder supports it without making the entire set unstable.
Press the pump several times as directed by the manufacturer. Watch for leaks around the pump, bottle neck, and base. The setup is working as intended when the pump releases soap, the bottle remains upright, and the sponge fits without covering the drainage area.
If soap does not flow
Check the liquid level, pump connection, and priming instructions. If the pump remains blocked, clean it only as the manufacturer directs.
If the base wobbles
Move the set to a flat surface and check whether the parts are assembled correctly.
If water collects
Check the tray and drainage openings. Empty the tray and move the set if runoff reaches a surface that should stay dry.
How to Clean and Maintain the Set
Clean the dispenser set on a regular basis, especially around the pump, sponge tray, and base. These areas can collect soap film, crumbs, and water. A quick wipe helps, but the parts that touch a wet sponge may need a more thorough wash.
The right cleaning method depends on the material. Use mild dish soap and warm water when the maker permits them, then rinse and dry the parts well. Avoid harsh cleaners, abrasive pads, or strong chemicals unless the instructions say they are safe for that finish.
Source: m.media-amazon.com
A Simple Cleaning Routine
Empty the drip tray and remove the sponge before washing the holder. Wipe the outside of the bottle and pump, paying attention to soap that has dried around the nozzle. If the holder has detachable parts, separate them only as the instructions allow.
Rinse away cleaner residue and dry the parts before putting the set back together. A damp base left under a bottle can trap moisture and leave marks on the counter. Let the sponge dry in a place with good airflow rather than sealing it inside a wet compartment.
After heavy use
Remove food scraps and rinse the sponge holder if it has collected visible debris.
During routine cleaning
Wash the tray and wipe the pump, bottle, and base to remove soap buildup.
Before refilling
Check for cracks, loose pump parts, dried soap, or signs of leakage.
How to Care for the Sponge
A sponge can hold food particles and moisture after washing dishes. Rinse it well after use, squeeze out excess water, and place it where air can reach it. Do not leave it pressed against the bottom of a tray filled with water.
Replace a sponge when it breaks down, develops a lasting bad smell, or remains visibly dirty after cleaning. A holder cannot make an old sponge sanitary by itself. Follow any care instructions provided by the sponge maker, and use a separate cleaning tool when needed for raw-meat juices or other contamination concerns.
Let it drain
Keep the sponge raised or positioned so water can escape instead of pooling underneath it.
Do not share every tool
Use suitable separate tools for dishes, counters, and surfaces that may carry raw food juices.
Check for wear
Replace damaged or persistently smelly sponges rather than relying on the holder to solve the problem.
Prevent Soap Buildup and Pump Problems
Soap residue can dry around the pump nozzle and make it harder to press. Wipe the nozzle when buildup appears, and clean the pump only according to the product directions. Some pumps can be rinsed with warm water, while others may need a different method.
If the pump stops working, check the soap level first. Then check whether the tube has come loose or the pump needs priming. If the soap is too thick for the dispenser, use a compatible product instead of adding random amounts of water or another liquid. Dilution can change how a soap works and may affect its stability.
Pump feels stuck
Stop pressing hard. Remove the pump only if it is designed to come off, then follow its cleaning instructions.
Soap leaks around the neck
Check the cap or threaded connection, remove dried residue, and tighten the parts without forcing them.
Pump releases little soap
Check the tube, liquid level, and soap compatibility before deciding that the pump needs replacement.
Common Buying Mistakes to Avoid
A good-looking set may still be awkward to use. Product photos often show a clean, open counter, but a real kitchen has faucet handles, dish racks, window trim, and other items competing for room. Check dimensions and layout before ordering.
Another common mistake is assuming every dispenser works with every soap. Pump designs differ, and a thick liquid may not flow through a narrow mechanism. Read the product details and use the type of liquid recommended by the manufacturer.
Source: m.media-amazon.com
Buying Without Measuring
Measure the width and depth of the counter area, including space needed to use the faucet. Check the height if the set will sit beneath a cabinet or shelf. A tall pump may fit on the counter but hit the cabinet when you press it.
If the sink area is narrow, compare a compact single dispenser with a larger dual set. Do not rely on a photo to judge scale because camera angles can make products appear smaller or larger than they are.
Measure first
Record the usable counter width, depth, and height clearance before choosing a model.
Choosing Looks Over Drainage
A closed sponge cup may look neat, yet it can hold water if there is no drainage path. Standing water can leave residue and keep the sponge damp. Check for drainage slots, a removable tray, or another way to empty the holder.
The sponge should not be squeezed into a tight space. A cramped holder can make it harder to remove the sponge and clean the tray. Choose a design that fits the size and shape of the cleaning tools you already use.
Inspect the holder
Check how the sponge rests, where water goes, and whether the tray can be reached for cleaning.
Ignoring Material and Care Instructions
A set may contain materials that need different care. A metal outer shell does not mean every part is stainless steel, and a decorative coating may be damaged by rough scrubbing. Read the care details for the bottle, pump, tray, and base.
Do not assume that a product is dishwasher-safe because the bottle looks sturdy. Heat can damage some plastics, seals, coatings, and pump parts. Wash only the components the maker identifies as suitable for the dishwasher.
Check each part
Confirm the cleaning method for the bottle, pump, tray, and any removable accessories.
Is a Kitchen Soap Dispenser Set Worth Buying?
A kitchen soap dispenser set with sponge holder can be useful if your sink area often feels crowded or you want a fixed place for daily dishwashing supplies. It combines storage for items that are already used together, and many designs are easy to set up without changing the sink or countertop.
The value depends on whether the set solves a real problem in your kitchen. If you already have a good sponge rack and a soap bottle that works well, replacing both may offer little benefit. If you have to move several items every time you wash dishes, a combined set may be worth considering.
Think about the total cost, too. The purchase price is only one part of ownership. A design with replaceable pump parts may be easier to keep using, while a set with a difficult-to-clean tray may take more effort each week. Product details do not always establish long-term durability, so avoid assuming that a higher price guarantees a longer service life.
Source: m.media-amazon.com
Who May Benefit Most?
People with a clear patch of counter space may find a countertop set simple and practical. Households that use both hand soap and dish soap may prefer a dual dispenser. Renters who do not want to drill holes may favor a freestanding design that can be moved during cleaning.
A small sink, crowded counter, or unusual faucet layout may call for a different approach. A narrow holder, a single pump, or a separate sponge rack could be more useful than a large combined unit. The best option is the one that fits your actual space and routine.
For compact kitchens
Look for a narrow base and only the storage parts you need.
For busy households
Consider a refillable dual set with a sturdy base and an easy-to-clean sponge tray.
For renters
A countertop model avoids permanent mounting changes, provided it fits the available space.
For low-maintenance care
Choose removable parts, clear cleaning instructions, and a sponge holder that drains well.
A Quick Comparison Before You Buy
Use the following table to compare common set styles by their practical trade-offs. These are general design considerations, not claims about every product in a category. The exact dimensions, materials, and care needs still depend on the model.
Single dispenser with sponge holder
Simple layout with fewer parts. Best when one soap bottle is enough.
Dual dispenser with sponge holder
Keeps two liquids together. Needs more room and clear labels.
Set with removable tray
Makes it easier to empty and wash the base. Check that the tray is easy to remove.
Wall-mounted set
Can free counter space. Requires a suitable surface and secure mounting.
Sink-edge holder
Keeps tools near the basin. Fit depends on the sink rim and faucet layout.
Frequently Asked Questions
Q
What should I put in a kitchen soap dispenser set?
Use the dispenser for a compatible liquid soap, such as dish soap or hand soap, based on the bottle’s intended use. A dual set can hold one of each. Keep the liquids separate, label the bottles when needed, and follow the manufacturer’s instructions about suitable soap types.
Q
Can I use thick dish soap in a refillable dispenser?
That depends on the pump. Some dispensers handle common liquid dish soaps well, while others struggle with thicker liquids. Check the product instructions before filling the bottle. If the pump clogs, do not force it or mix the soap with other chemicals. Clean the pump as directed and use a compatible liquid.
Q
How often should I clean a sponge holder?
Remove food scraps and standing water as soon as you notice them. Wash the holder and drip tray during regular kitchen cleaning, and clean them sooner if soap film or a bad smell develops. The exact schedule depends on how often the sink is used and how quickly the holder collects residue.
Q
Are stainless steel soap dispenser sets better than plastic ones?
Neither material is always better. Stainless steel can suit a metal kitchen finish, but water spots and the quality of the metal or coating matter. Plastic is often lighter and easier to move. Compare the full product construction, stability, pump quality, care instructions, and price instead of choosing by material name alone.
Q
How can I stop my sponge holder from smelling bad?
Rinse food debris from the sponge, squeeze out excess water, and place it where air can reach it. Empty and wash the holder’s tray so water and residue do not build up. Replace a sponge that keeps smelling bad or shows signs of wear. If the holder itself smells, wash it with a cleaner suitable for its material and let it dry fully.
Q
Can I put a kitchen soap dispenser set in the dishwasher?
Only if the manufacturer says the specific parts are dishwasher-safe. Heat and detergent can damage some plastics, coatings, seals, and pump mechanisms. When the instructions are unclear, hand-wash the removable parts with mild dish soap and water, then rinse and dry them well.
Q
Will a soap dispenser set fit beside every kitchen sink?
No. Counter depth, faucet placement, cabinet clearance, and nearby accessories can affect the fit. Measure the space before buying and compare it with the listed width, depth, and height. Make sure you can still operate the faucet and move dishes around the basin without hitting the set.
✦ Wrapping Up
Conclusion
A kitchen soap dispenser set with sponge holder can make the sink area easier to use by keeping soap and cleaning tools together. It can also reduce loose bottles and wet sponges on the counter. The most useful design is not always the largest or most decorative one. It is the set that fits your space, works with your soap, and stays easy to clean.
Before choosing a set, measure the counter, decide whether you need one or two dispensers, and check the pump, bottle opening, materials, and drainage design. Look for a removable tray if you want easier cleanup. Read the care instructions before using a dishwasher or a strong cleaner, and let the sponge dry between uses.
💡 Key Takeaway
Measure the open area beside your sink first. Then compare two or three sets by size, soap capacity, pump design, sponge drainage, and cleaning needs before making a purchase.