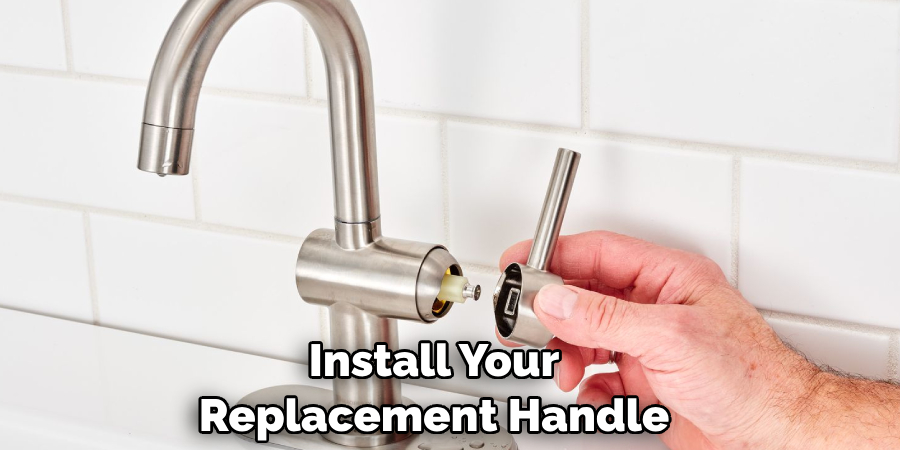
Many Moen kitchen faucet handles use a 3/32-inch Allen wrench for the set screw, while some models use a 7/64-inch wrench. The right screw and tool depend on the faucet model and handle design. Check your model’s instructions before buying a replacement screw or forcing a wrench into the opening.
A loose kitchen faucet handle can make simple tasks harder. You may reach for the handle to fill a pot, rinse a plate, or wash your hands, only to feel it wobble or turn without moving the water control as it should. In many US homes, this problem starts with a small set screw that needs to be tightened or replaced.
Moen makes several kitchen faucet designs, and their handle parts are not all the same. Some handles have a small screw hole at the back or side. Others hide the screw beneath a cap or plug button. The wrench size, screw shape, and removal steps can change with the design.
This guide explains how to find the Moen kitchen faucet handle screw, choose the right Allen wrench, tighten a loose handle, and identify a worn or missing screw. It also covers stripped screw heads, replacement parts, and signs that the problem may involve the handle or cartridge instead.
A Moen kitchen faucet handle screw is a small fastener that holds the handle in place on the faucet’s control stem or related handle assembly. It is often called a set screw or handle set screw. On many lever-style faucets, the screw sits inside a small hole on the side, rear, or underside of the handle.
The screw helps keep the handle aligned with the faucet’s control mechanism. When you move the handle, the handle and stem work together to adjust water flow or temperature. If the screw loosens, the handle may wobble, slip, or come off even though the faucet body remains firmly mounted to the sink.
This fastener is different from the larger screws and nuts used to secure a faucet to the sink or hold other internal parts together. Replacing the wrong part will not solve a loose handle, so identify the fastener before removing anything else.
Source: m.media-amazon.com
Set screw
A small screw that secures a handle to a stem or handle assembly. Many Moen lever handles use a hex-shaped recess for an Allen wrench.
Handle cap or plug button
A small cover that may hide the screw opening. Some designs use a removable cap, while others leave the screw opening exposed.
Cartridge stem
The part connected to the faucet’s water-control cartridge. The handle must fit and engage with the stem correctly.
Why Does the Screw Matter?
A secure screw helps the handle move with the control stem instead of slipping around it. When the fastener loosens, you may notice extra movement before the water turns on or off. In some cases, the handle may also sit at an odd angle.
A loose handle does not always mean the screw has failed. The screw may simply need tightening, or the handle’s threads, inner shape, or the stem may be worn. Check the whole connection before deciding which part to replace.
Loose handle
The handle rocks or shifts even when the faucet body stays still.
Slipping control
The handle moves but does not turn the water control in a steady way.
Missing fastener
The handle lifts off or moves freely because the screw is absent or no longer holds it.
What Size Is a Moen Kitchen Faucet Handle Screw?
There is no single screw size that fits every Moen kitchen faucet. The correct size depends on the faucet model and the type of handle assembly. A wrench size listed for one Moen handle should not be treated as a universal specification for the full product range.
Moen’s repair instructions for several handle designs specify a 3/32-inch hex wrench. Its guidance for certain other kitchen faucet handle assemblies specifies a 7/64-inch hex wrench. These measurements refer to the wrench that fits the screw’s hex recess, not the screw’s outside diameter or thread size.
That distinction matters when buying replacement parts. A 3/32-inch wrench does not tell you the screw’s thread pitch, overall length, material, or tip shape. You need the correct part specification or a verified model-specific replacement to make sure the new fastener fits.
Source: m.media-amazon.com
3/32-inch Allen wrench
Moen specifies this size for a number of hex-screw lever handles and certain other kitchen faucet handle designs.
7/64-inch Allen wrench
Moen specifies this size for some handle assemblies that use a different screw arrangement, including certain adapter-style designs.
Model-specific screw
The screw’s thread, length, shape, and material must match the intended handle assembly. Confirm these details before ordering.
3/32 Inch or 7/64 Inch: Which Wrench Should You Use?
Start with the faucet’s installation sheet or official repair guide. If the model is not known, look for a product number on the original paperwork, packaging, or another location identified in Moen’s model-identification guidance. Moen also offers a Faucet Identifier tool that can help identify a faucet from a photo.
If you already have a suitable set of inch-size Allen wrenches, test the size that matches the model instructions. The wrench should enter the recess fully and sit snugly without excessive play. Do not force a larger wrench into a smaller opening or use a loose-fitting wrench to turn a tight screw.
If neither size fits properly, stop and check the model and screw design. The fastener may use another size, or the recess may be worn or packed with dirt. Guessing can damage the screw head and make removal harder.
Use a snug fit
The wrench should sit firmly in the hex recess before you apply turning force.
Check the screw head
Remove visible dirt carefully so you can see whether the recess is hex-shaped and undamaged.
Verify the model
Use the faucet’s product information and matching repair instructions when the size remains uncertain.
How to Find the Correct Replacement Screw
Find the faucet model first, then open the matching parts breakdown or installation guide. Look for the handle screw or set screw in the handle assembly. If the faucet came with a small parts kit, compare its part information with the model documentation rather than assuming every included screw fits the handle.
If you cannot identify the model, take clear photos of the entire faucet, the handle, and the screw opening. If the old screw is available, keep it in a small container and note any visible damage. Moen Customer Support can help you identify the correct part when the model or component is unclear.
Avoid choosing a screw based only on a product title that says it fits Moen faucets. A listing may cover only certain models or handle types. Confirm the intended faucet series, dimensions, and fastener specification before buying.
Best source
The parts breakdown or instructions for your exact faucet model.
Useful backup
Moen’s official Faucet Identifier and Customer Support services.
Avoid
A replacement chosen only because its photo looks similar to your old screw.
Tools and Preparation Before You Start
Most simple handle screw repairs need only a few tools. Gather them before starting so you do not have to leave a loose handle on the sink while searching for a wrench. The exact list depends on whether you are tightening the screw, replacing it, or removing the handle to inspect the connection.
For a basic adjustment, a correctly sized Allen wrench is the main tool. A flashlight helps you see the screw opening, while a soft cloth protects the faucet finish and catches a small fastener if it falls. Keep a small dish nearby to hold the screw and cap.
If you plan to inspect internal faucet parts, locate the hot and cold shutoff valves beneath the sink. Turn them off before disassembly, then open the faucet to release remaining pressure and confirm the water supply is shut off. If the valves are stuck, corroded, or leaking, do not force them.
Source: m.media-amazon.com
Correct Allen wrench
Use the size listed for your exact handle assembly, commonly 3/32 inch or 7/64 inch for certain Moen designs.
Flashlight
Helps locate a concealed screw and inspect the recess for dirt or damage.
Soft cloth and small dish
Protect the finish and keep the screw, cap, or plug button from falling into the sink.
Replacement fastener, if needed
Buy only after confirming the model-specific part and its compatibility.
Do You Need to Shut Off the Water?
A small adjustment to an exposed handle set screw may not require removing the handle or opening the water-control assembly. Even so, shut off the water before taking the handle apart or working near internal faucet parts. This reduces the risk of an unexpected flow of water during a larger repair.
After closing the shutoff valves, open the faucet to check that the flow stops. If water continues to flow, the valves may not have closed fully. Do not proceed with internal disassembly until the supply can be safely isolated.
For a simple exposed screw
Inspect the screw and follow the model’s instructions for a minor adjustment.
For handle removal
Turn off the supply, open the faucet, and confirm that water flow has stopped.
For damaged shutoff valves
Stop and seek qualified plumbing help if you cannot safely isolate the water.
How to Tighten a Loose Moen Kitchen Faucet Handle
If the handle is loose but the screw head is intact, try a careful adjustment before buying parts. The goal is to secure the handle to its intended connection, not to make the screw as tight as possible. Excessive force can damage the recess or the handle assembly.
Source: thekitchenix.com
Step 1: Find the Handle Screw
Look along the back, side, or underside of the handle for a small round opening. Some Moen handles have a decorative plug button or cap that covers the screw. If you see a cover, remove it gently according to the model instructions. Avoid prying against the finish with a sharp metal tool.
Use a flashlight to inspect the opening. Check whether the screw is present and whether the recess is clean enough for the wrench to engage. If the screw is missing, do not try to hold the handle in place with glue or an unrelated fastener.
Visible screw
Confirm its head type and use the specified wrench.
Covered screw
Remove the cap or plug carefully, keeping it for reassembly.
No screw visible
Check the model’s handle design before assuming a part has fallen out.
Step 2: Fit the Correct Allen Wrench
Insert the selected wrench fully into the screw’s hex recess. The wrench should sit firmly and remain centered. If it rocks from side to side or engages only at the edge, remove it and check the size rather than turning harder.
Some screw openings face a direction that is awkward to reach, particularly when the faucet handle is close to a backsplash or other fixture. Use a suitable short or long Allen wrench if needed, provided it matches the required size and gives you good control.
Full engagement
Make sure the wrench reaches the bottom of the recess before turning.
Steady pressure
Keep the wrench aligned with the screw to reduce the chance of rounding the edges.
Step 3: Tighten the Screw Gently
For a loose screw, turn the wrench clockwise in small increments while keeping it aligned. Stop when the handle feels secure and no longer wobbles during normal movement. Do not apply extra force after the screw has seated firmly.
If the screw spins without becoming snug, stop. The threads may be damaged, the screw may be the wrong type, or the handle may not be seated correctly. Repeated tightening will not repair worn threads.
Tightens normally
Continue only until the handle is secure and the fastener holds.
Keeps spinning
Inspect the threads and fit instead of applying more force.
Will not turn
Check the wrench fit and screw condition before trying again.
Step 4: Test the Handle
Move the handle through its normal range without forcing it against its stops. Check that it engages with the control stem and that its movement feels steady. If you removed a cap or plug button, reinstall it once the handle is secure.
If you shut off the water supply, restore it slowly and check the faucet’s operation. Look beneath the sink for signs of a leak if you worked on internal parts. A secure handle should not wobble excessively, slip off, or prevent normal water control.
Success
The handle feels stable and controls the faucet normally.
Problem remains
Check the handle seating, screw threads, and cartridge stem for damage.
How to Replace a Missing or Damaged Handle Screw
Replace a missing or damaged screw with the correct part for the faucet model. A screw that appears close in size may still have the wrong thread or length. If it does not fit the handle’s threaded opening correctly, it can damage the part that needs to hold the handle in place.
Source: m.media-amazon.com
Step 1: Identify the Faucet Model
Check the original installation paperwork, packaging, receipt, or any product information you kept. If those records are gone, use Moen’s official Faucet Identifier and follow its photo instructions. Include the whole faucet in the picture so its shape and handle design are clear.
A part number printed on a loose component can help with identification, but it may not be the faucet’s model number. Compare the details with official product information before ordering a replacement.
Best option
Match the screw to the parts breakdown for the identified faucet model.
If identification fails
Contact Moen Customer Support with clear photos and any product details you have.
Step 2: Confirm the Screw Specification
Look for the handle set screw in the model’s parts list or repair instructions. Check whether the part is sold separately or supplied with a replacement handle or hardware kit. Read the compatibility details carefully before placing an order.
If the original screw is available, compare its length, thread form, head design, and tip with the documented replacement. Do not rely on the Allen wrench size alone. The wrench opening is only one feature of the fastener.
Thread fit
The replacement must match the receiving threads and screw design.
Length
A screw that is too long may interfere with nearby parts, while one that is too short may not hold securely.
Tip and head
Use the specified design rather than assuming all hex socket screws work the same way.
Step 3: Install the Replacement
Seat the handle on the correct stem or handle connection according to the model instructions. Align it as required, then start the replacement screw by hand if the design permits. The screw should begin threading smoothly rather than binding immediately.
Use the specified Allen wrench to tighten the screw until the handle is secure. Follow any model-specific torque or assembly instructions provided by Moen. If the screw binds, will not engage, or requires unusual force, stop and recheck the part and alignment.
After installation, test the handle’s full intended movement. Restore the water supply if it was shut off, then check that the faucet operates normally. If the screw cannot hold, inspect the handle threads and the mating component before installing another fastener.
Correct fit
The screw enters smoothly and secures the handle without unusual force.
Incorrect fit
Stop if the screw binds, sits at an odd angle, or cannot tighten.
Final check
Confirm stable handle movement and normal faucet operation.
Troubleshooting: Why the Handle Screw Will Not Hold
If tightening the screw does not fix the handle, look for the reason it keeps moving. The screw may be loose, but the handle connection or cartridge stem can also be worn or damaged. A simple symptom check can help you decide whether to adjust the fastener, replace a part, or stop and seek repair help.
Do not keep tightening a screw that slips, spins freely, or has a damaged recess. Repeated force can turn a small repair into a more difficult one. Use the model instructions to identify the handle assembly before removing more parts.
Source: i.ytimg.com
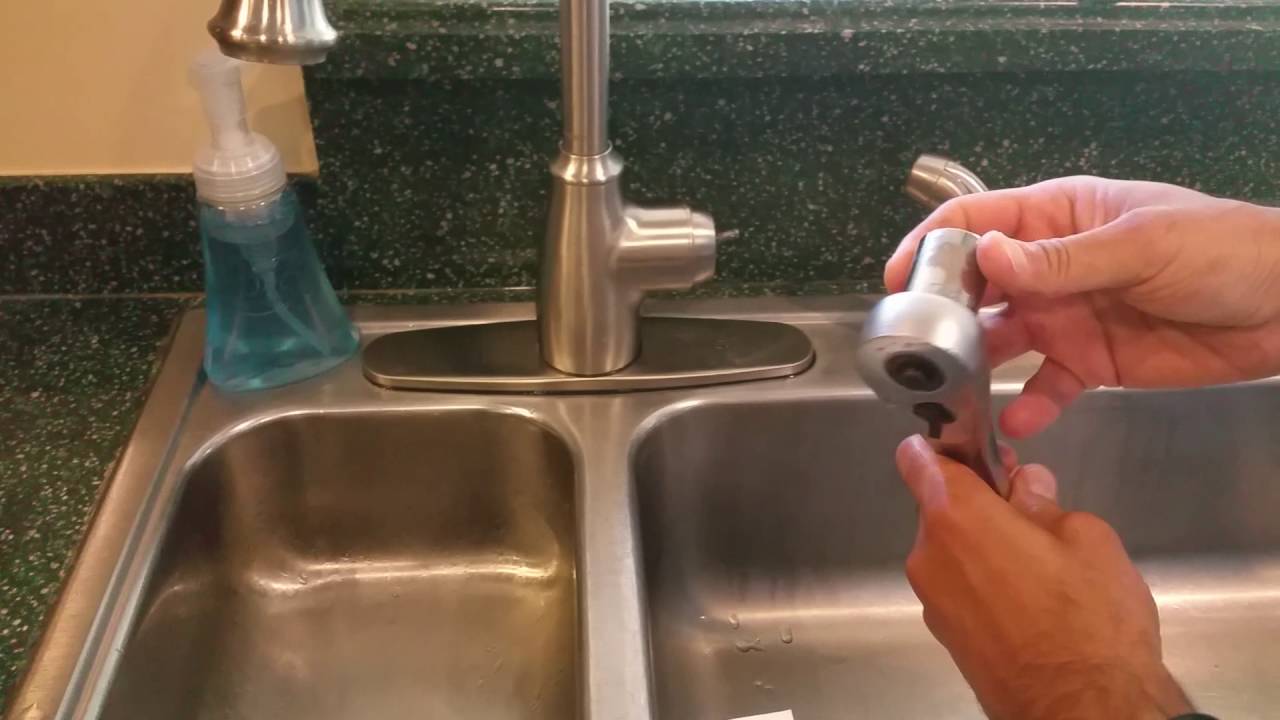
The Handle Keeps Coming Loose
A handle that loosens again soon after adjustment may have worn screw threads, a damaged receiving thread, or a handle that is not seated correctly. Remove the handle only after following the model’s safety and disassembly steps, then inspect the connection for visible wear.
If the fastener and handle appear intact, confirm that the handle is positioned correctly on the stem. A handle that sits at an angle or does not engage fully may fail to stay secure even when the screw is tightened.
Check seating
Make sure the handle is positioned fully and aligned with the correct stem or adapter.
Check threads
Look for visible wear, damaged edges, or a screw that turns without gripping.
Replace damaged parts
Use model-specific parts rather than adding improvised shims or adhesive.
The Allen Wrench Spins Inside the Screw
A wrench that spins without turning the screw may be the wrong size, may not be fully inserted, or may be slipping inside a stripped hex recess. Stop applying force and inspect the opening under good light. Clean away loose dirt carefully, then confirm the wrench size against the model instructions.
If the recess is rounded, a standard Allen wrench may no longer grip it. Avoid drilling, cutting, or using aggressive extraction methods on the faucet handle unless you understand the risks and have the right tools. An extraction attempt can damage a handle that might otherwise be reusable.
First check
Confirm the exact wrench size and full engagement.
If stripped
Consider professional removal or replacement of the affected handle component.
The Screw Is Stuck or Corroded
A screw may resist turning because of corrosion, mineral buildup, or damage to the recess. Make sure the wrench fits correctly before trying to loosen it. Apply controlled pressure and stop if the head begins to deform.
Avoid spraying an unverified chemical into the handle assembly. Some products can affect finishes or nearby components, and excess liquid may reach parts that should remain clean. If the screw will not move without heavy force, a plumber or repair technician may be able to remove it with less risk of damage.
Use care
Keep the wrench aligned and stop if the screw head begins to round.
Avoid force
Do not use a power driver or long lever that could damage the handle.
The Handle Is Tight but Water Control Feels Wrong
A secure handle does not prove that the internal control parts are working properly. If the handle moves normally but the water does not respond as expected, the issue may involve the cartridge, stem, adapter, or another part of the faucet assembly.
Do not replace the set screw repeatedly to solve a water-control problem. Identify the faucet model and follow the matching repair guide. If the faucet leaks, binds, or will not shut off normally, stop using it if necessary and seek qualified help when the cause is unclear.
Handle feels secure
The set screw may not be the source of the control problem.
Water control remains poor
Inspect the correct internal components using the model’s repair instructions.
Common Mistakes to Avoid During Repair
A handle screw is small, but the parts around it can be costly or awkward to replace. Most avoidable damage comes from using the wrong tool, applying too much force, or buying a screw without checking compatibility. A few careful checks can save time and prevent damage to the faucet finish.
Source: m.media-amazon.com
Assuming every Moen faucet uses one wrench size
Some models use a 3/32-inch wrench, while others use a 7/64-inch wrench or a different fastener arrangement. Confirm the model instructions.
Buying a screw based only on appearance
Similar screws can have different thread sizes, lengths, and tips. Match the replacement to the faucet’s parts information.
Overtightening the fastener
Excess force can strip the screw head or damage the handle connection. Stop once the handle is secure.
Forcing the wrong wrench
A loose or oversized wrench can damage the hex recess. Choose a snug fit before turning.
Using glue as a repair
Adhesive can make later service difficult and may not provide a safe or durable connection. Replace the faulty part with a compatible component.
Ignoring other damaged parts
A new screw will not correct stripped handle threads, a worn stem, or a broken adapter.
When Should You Stop and Call a Plumber?
A simple screw adjustment is usually a small repair, but some problems call for professional help. Stop if the handle cannot be removed without force, the screw is badly stripped, the faucet body is damaged, or a shutoff valve will not close safely.
Professional help is also sensible if the faucet continues to leak, the handle binds after reassembly, or internal parts are difficult to identify. If the faucet is covered by a warranty, check Moen’s warranty terms and contact support before attempting a repair that could affect coverage.
Seek help for
Damaged threads, a stuck fastener, a leaking valve assembly, or shutoff valves that cannot isolate the water.
Check support first
Use Moen’s official product help and warranty information to confirm the correct repair path.
How to Choose Between Tightening, Replacing, and Repairing the Handle
The best repair depends on what you find during inspection. A loose but undamaged screw may only need adjustment. A missing or damaged screw needs a compatible replacement, while a handle that cannot hold the screw may require a new handle or another matching component.
Use the following table to choose the next step based on the symptom. These are general troubleshooting paths, not a substitute for the instructions for your exact faucet model.
Source: m.media-amazon.com
Loose handle, intact screw
Check the fit and tighten gently with the model-specified wrench.
Missing screw
Identify the faucet model and order the documented replacement fastener.
Stripped screw head
Stop using the damaged recess and assess safe removal or handle replacement.
Screw will not grip
Inspect the screw threads, handle threads, and handle seating for damage.
Handle secure but hard to move
Check the model-specific handle assembly and internal control parts rather than tightening further.
A Simple Decision Guide
If the screw turns and the handle becomes firm, test the faucet and check that normal control has returned. If the screw is missing, identify the model before purchasing a replacement. If the screw turns freely or will not hold, inspect the mating threads and handle connection.
If the handle remains loose even with a correct, secure screw, the fault may lie elsewhere in the assembly. A new fastener is not always the answer. The model’s parts breakdown is the best way to tell whether you need a handle, adapter, stem-related part, or another component.
Tighten
Use this path when the correct screw is present, undamaged, and simply loose.
Replace
Use this path when the screw is missing or damaged and the correct part can be identified.
Repair or replace the assembly
Use this path when threads, the handle, or the connected parts are damaged.
Research Notes and Useful Next Questions
The repair guidance in this article was checked against Moen’s published support information and model-specific repair instructions available on October 26, 2026. The main finding is that handle screw sizes and removal methods vary by assembly, so a universal screw specification would be misleading.
Moen’s official product help explains that a loose handle may need its set screw tightened and that a damaged handle may need replacement. Its kitchen faucet repair instructions identify 3/32-inch and 7/64-inch hex wrench sizes for different handle designs. Moen’s Faucet Identifier can help users locate model information, installation instructions, and replacement parts.
The article also addresses practical follow-up needs that arise from the repair task, including how to identify the fastener, what to do when the screw is stripped, and when a loose handle may point to damage elsewhere. These follow-up needs are inferred from the repair process rather than presented as verified search-volume trends.
The reviewed official material supports model-specific repair steps, but it does not establish one universal set screw size or a single replacement part that fits every Moen kitchen faucet. A product listing or image alone is not enough to confirm compatibility.
Source: m.media-amazon.com
Question: Which wrench size fits my faucet?
Reader stage: Before repair. Basis: Model-specific Moen instructions document different wrench sizes. Coverage in the reviewed official guidance: Answered for the named handle types, not every model. Benefit: Helps prevent damage from a poor fit. Evidence: Official Moen repair instructions. Priority: High. Placement: Screw size section.
Question: Where can I find the right replacement screw?
Reader stage: Before purchase. Basis: Inferred next need after identifying a missing or damaged fastener. Coverage in the reviewed official guidance: Answered through model identification and parts breakdowns, but the exact part depends on the faucet. Benefit: Reduces the chance of ordering an incompatible screw. Evidence: Moen Faucet Identifier and product support. Priority: High. Placement: Replacement screw section.
Question: What if the screw will not tighten?
Reader stage: During repair. Basis: Inferred next need when a basic adjustment fails. Coverage in the reviewed official guidance: Shallow as a general issue because causes vary by model and damage. Benefit: Helps readers stop before causing further damage. Evidence: General mechanical troubleshooting plus model-specific parts information. Priority: High. Placement: Troubleshooting section.
Question: Does a loose handle always mean the screw is bad?
Reader stage: During diagnosis. Basis: Inferred from the difference between a loose fastener and damaged mating parts. Coverage in the reviewed official guidance: The possibility of a broken handle is addressed, while a full diagnosis depends on inspection. Benefit: Prevents unnecessary screw replacement. Evidence: Component-based troubleshooting and model parts breakdowns. Priority: Medium. Placement: Troubleshooting and decision guide.
Question: When should I stop the repair?
Reader stage: During or after repair. Basis: Inferred from the risks of stripped fasteners, damaged valves, and failed shutoff valves. Coverage in the reviewed official guidance: Safety steps are present, while individual damage requires judgment. Benefit: Helps readers avoid a larger repair or water leak. Evidence: Official preparation guidance and general repair safety. Priority: Medium. Placement: Safety and troubleshooting sections.
Frequently Asked Questions
Q
What size Allen wrench does a Moen kitchen faucet handle use?
Many Moen kitchen faucet handle assemblies use a 3/32-inch Allen wrench, while certain designs use a 7/64-inch wrench. The correct size depends on the model and handle mechanism. Check the matching Moen installation or repair instructions before applying force.
Q
Are Moen kitchen faucet handle screws universal?
No. Do not assume one set screw fits every Moen kitchen faucet. Screw length, thread size, tip design, and handle construction can differ. Identify the faucet model and use its parts breakdown to confirm the correct replacement.
Q
Can I tighten a Moen faucet handle without removing it?
Often, yes. If the set screw is accessible through an exposed opening, you may be able to tighten it without lifting the handle off. Use the correct Allen wrench and stop when the handle is secure. If the screw is hidden by a cap, the cap must usually be removed first.
Q
Why does my Moen faucet handle keep coming loose?
The set screw may be loose, but worn screw threads, a damaged handle connection, poor seating, or a worn mating part can also cause repeated movement. If the screw loosens again after correct adjustment, inspect the connection rather than tightening it harder.
Q
What should I do if the Moen handle screw is stripped?
First, stop turning the screw and confirm that the wrench size is correct. If the hex recess is rounded, a normal Allen wrench may no longer grip it. Avoid aggressive drilling or cutting that could damage the handle. Consider professional removal and replace the fastener or handle component as needed.
Q
Where can I identify my Moen kitchen faucet model?
Start with the original paperwork, packaging, or product records. If these are unavailable, use the official Moen Faucet Identifier at https://www.moen.com/pages/faucet-identifier. The tool can help identify the faucet from a photo and direct you to model information, instructions, and replacement parts.
Q
Should I replace the whole faucet if the handle screw is damaged?
Not necessarily. A damaged screw or handle can often be addressed with the correct replacement part. Replacing the whole faucet may be unnecessary if the body and internal components remain in good condition. Confirm part availability and compatibility before deciding on a larger repair.
✦ Wrapping Up
Conclusion
A loose Moen kitchen faucet handle often starts with a small set screw, but the correct repair depends on the faucet model. Many handle designs use a 3/32-inch Allen wrench, while some require a 7/64-inch wrench. Neither size should be treated as universal, and the wrench measurement does not identify the screw’s thread size.
Start by locating the screw, checking its condition, and confirming the model-specific instructions. If the screw is intact, tighten it gently and test the handle. If it is missing or damaged, identify the correct replacement before buying one. When the screw will not hold, look for damaged threads, a poorly seated handle, or another faulty component.
💡 Key Takeaway
Before ordering a Moen kitchen faucet handle screw, identify your faucet model and check its official parts breakdown. Use the specified wrench size, avoid overtightening, and stop if the screw or handle connection is damaged.