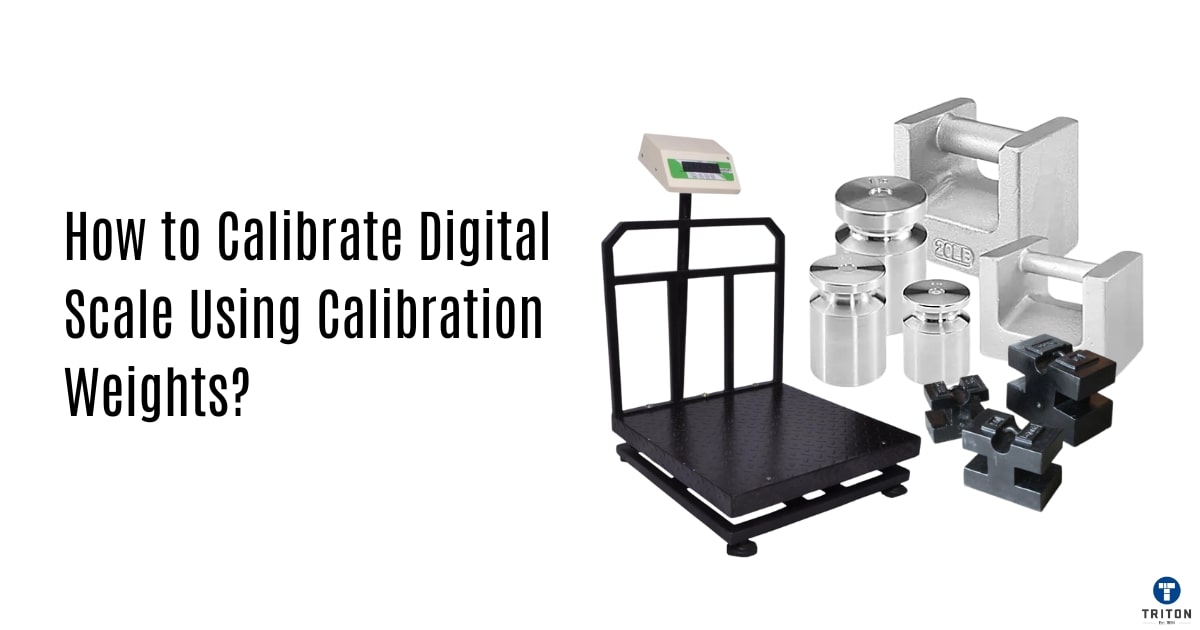
To calibrate a kitchen scale, place it on a firm, level surface, let it settle, and follow the calibration steps in its manual. Use the specified calibration weight, if required. If your scale has no calibration mode, check its accuracy with a known weight instead.
In American kitchens, a digital food scale can help measure flour, meat, coffee beans, and other foods by weight. It can also help with meal prep and portion control. Yet a scale may give poor readings if it sits on an uneven counter, has weak batteries, or needs adjustment. A few simple checks can help you find the cause.
Kitchen scale calibration means setting a scale to match a known reference value. Accuracy checks are a related but different task. They show whether the scale reads a known weight correctly, but they do not always adjust the scale. This guide explains how to calibrate common digital scales, test their readings, spot common errors, and know when a scale needs repair or replacement.
Kitchen scale calibration is the process of setting a scale against a known weight reference. The goal is to make the displayed value agree with that reference under the conditions specified by the manufacturer. Some digital scales let you do this at home. Others have no user calibration function and only allow a basic accuracy check.
A scale uses sensors to detect the force applied by an item on its platform. The electronics convert that signal into a weight reading. Calibration helps match the sensor response to a known value, while the display may round that value to the nearest supported increment.
Calibration does not mean every reading will be perfect under every condition. A scale can read correctly at one weight but show a larger error at another. Its maximum capacity, smallest display increment, surface, temperature, and load position can all affect the result.
Source: storage.googleapis.com
Calibration
Adjusting a scale against a reference according to its calibration procedure.
Accuracy check
Comparing the displayed reading with a known weight to see how closely they agree.
Repeatability
The ability to show similar readings when the same weight is placed on the scale under the same conditions.
Resolution
The smallest change shown on the display, such as 1 gram or 0.1 gram. Resolution alone does not prove accuracy.
Why Does a Kitchen Scale Need Calibration?
A scale may drift over time or give poor readings after rough handling, a move, or a change in temperature. Low batteries, dirt under the platform, and a soft counter can also cause trouble. Some models need calibration after setup, while others are adjusted at the factory and need only routine checks.
Correct weight readings matter when a recipe depends on a precise flour-to-liquid ratio, when you portion food, or when you weigh coffee for a repeatable brew. A small error may have little effect on a casual meal. The same error may matter more in a recipe that uses very small amounts of an ingredient.
For baking
Correct weight readings help keep ingredient ratios consistent from one batch to the next.
For portioning
A reliable scale helps you measure the amount you intend to serve.
For small quantities
A scale with suitable resolution and accuracy is needed when measuring small amounts of coffee, spices, or other ingredients.
What You Need Before Calibrating a Kitchen Scale
Gather the items your scale’s manual calls for before you begin. Many household scales only need fresh batteries and a stable counter for an accuracy check. A model with a calibration function may need a particular weight value or a set of calibration weights.
Do not assume that every digital scale uses the same calibration method. Some models use a button marked CAL. Others enter calibration mode when you hold a button or press a certain key sequence. The required weight can differ by model, so an online guide for a similar-looking scale may not be correct for yours.
Source: tiponthetrail.com
Your scale’s manual
Check the calibration steps, required weight, maximum capacity, and permitted operating conditions.
A firm, level surface
Choose a solid counter or table that does not wobble or flex under pressure.
Fresh batteries or a suitable power source
A stable power supply helps prevent low-power warnings and erratic behavior.
A known reference weight
Use the value and weight type specified by the manufacturer when calibration is supported.
A clean platform
Remove crumbs, grease, and other debris without allowing liquid to enter the scale.
Which Calibration Weight Should You Use?
Use the exact mass required by the scale’s instructions. A model may call for a 100-gram, 500-gram, or 1,000-gram reference, but those values are examples, not universal requirements. The correct weight depends on the scale design and calibration procedure.
A certified calibration weight is made and checked to a stated tolerance. A household object with a printed mass may be useful for a rough check, but its actual mass may differ from its label. Coins, cans, bags of sugar, and water-filled containers should not be treated as certified references unless their mass has been independently verified to the needed level.
Avoid placing a reference weight on the platform if its mass exceeds the scale’s maximum capacity. Do not use a weight that is too light for the required calibration procedure. When a manual calls for a specific reference, follow that instruction rather than choosing a convenient object.
For routine home checks
A verified known weight may be enough to see whether the scale is reading close to its expected value.
For precise work
Use suitable calibration weights with known tolerances and traceability when the measurement requirements demand them.
How to Calibrate a Digital Kitchen Scale Step by Step
The right procedure depends on the make and model of your scale. The steps below cover the common process, but the manufacturer’s instructions take priority whenever they differ. If the scale has no calibration mode, skip the adjustment steps and use the accuracy-check method in the next section.
Source: www.youtube.com > Nancy wu–Digital scale
Step 1: Read the manual
Find out whether your model supports calibration, which button starts the process, and what reference weight it requires.
Step 2: Check the power
Replace weak batteries or connect the approved power supply if the display is dim, unstable, or showing a low-battery warning.
Step 3: Clean the scale
Remove crumbs and dirt from the weighing platform. Keep liquids away from openings, buttons, and the battery compartment.
Step 4: Place it on a level surface
Set the scale on a solid counter or table. Make sure all feet rest evenly and the platform does not touch nearby objects.
Step 5: Turn it on and let it settle
Start the scale without a load and wait for the display to reach its normal zero reading. Follow any warm-up period stated in the manual.
Step 6: Enter calibration mode
Press the required button or key combination exactly as the manual describes. Do not guess a sequence based on another model.
Step 7: Add the required weight
When prompted, place the specified reference weight in the center of the platform. Keep your hands clear and avoid bumping the counter.
Step 8: Wait for confirmation
Allow the scale to read the weight and show its completion message, if provided. Remove the weight only when the instructions say to do so.
Step 9: Check the result
Exit calibration mode as directed. Remove the load, confirm that the scale returns to zero, and test it with a known weight.
What Does a Successful Calibration Look Like?
A successful process usually ends with a confirmation message, a return to normal weighing mode, or another result described in the manual. The scale should return to zero after you remove the reference weight. A follow-up accuracy check should also show a reading within the tolerance needed for your task.
A display that says CAL or flashes numbers does not, by itself, prove that calibration has finished. Some scales use those messages while waiting for a reference weight. Follow the model’s instructions and look for the stated completion signal.
The scale returns to zero
The unloaded display settles at zero or at the normal zero indication for that model.
The reference weight reads correctly
The reading agrees with the known mass within the scale’s stated tolerance or your task’s acceptable limit.
Repeated readings remain stable
The same weight gives similar results when placed and removed under the same conditions.
How to Check Kitchen Scale Accuracy Without Calibration Mode
If your scale does not offer user calibration, you can still test how well it reads a known mass. This is an accuracy check, not an adjustment. If the reading is wrong, the result helps you decide whether to repeat the setup checks, consult the manual, or seek service.
Choose a known weight that falls within the scale’s capacity and is suitable for its display resolution. Place it near the center of the platform. Record the result, remove the weight, let the display return to zero, and repeat the test several times.
Source: www.youtube.com
A Simple Accuracy Test
Start with an unloaded scale. Confirm the correct unit, such as grams, and make sure the display reads zero. Place a known reference weight on the center of the platform without pushing down or touching the counter.
Wait for a stable reading and write it down. Remove the weight and check that the display returns to zero. Repeat the same test to see whether the scale gives consistent results. If you have more than one suitable reference weight, check at different points across the scale’s working range.
Test zero
Check the unloaded reading before and after each measurement.
Test a known mass
Compare the display with a reference weight whose mass is known.
Repeat the test
Look for changes between repeated readings rather than trusting a single result.
Test different loads
When practical, check a light, middle, and heavier load within the scale’s rated capacity.
How to Calculate the Measurement Error
Subtract the known reference mass from the displayed reading to find the signed error. A positive result means the scale reads high. A negative result means it reads low.
For example, suppose a verified 500-gram weight produces a stable reading of 503 grams. The scale has a positive error of 3 grams at that test point. The relative error is 0.6 percent because 3 divided by 500, multiplied by 100, equals 0.6 percent.
This example does not prove that the scale is inaccurate at every load. One test shows only how the scale performed at that reference mass under those conditions. Check the manufacturer’s tolerance and the needs of your task before deciding whether the result is acceptable.
Signed error
Displayed mass minus reference mass. A result of 503 g minus 500 g equals +3 g.
Relative error
Signed error divided by reference mass, multiplied by 100. In the example, +3 g divided by 500 g equals +0.6 percent.
Common Kitchen Scale Calibration Problems and Fixes
A failed calibration does not always mean the scale is broken. Check simple causes first, such as power, placement, zero, units, and the reference weight. Stop if the scale shows damage or if the manual calls for service rather than further adjustment.
Source: www.youtube.com
The Scale Will Not Enter Calibration Mode
The button sequence may be wrong, the scale may not support user calibration, or the device may need a reset. Check the manual for the exact procedure and any conditions required before calibration begins. Do not force buttons or try random key combinations that could change other settings.
Check the model number
Make sure the instructions match the exact model, not just a scale with a similar case or display.
Check the power source
Install the specified batteries or use the approved adapter if the manual permits one.
Check the available functions
Some household scales support unit changes and tare only, with no manual calibration mode.
The Display Shows an Error Message
An error message may mean the scale is overloaded, unstable, unable to detect the required weight, or experiencing a fault. The exact meaning depends on the model. Check the manual’s error list before taking further action.
Overload warning
Remove the load carefully and keep the total weight within the rated capacity. Do not continue if the platform or sensor appears damaged.
Unstable reading
Move the scale away from vibration, drafts, and a surface that bends or shakes.
Calibration weight rejected
Confirm that the reference mass and procedure match the manual and that the weight is within the permitted range.
The Scale Gives Different Readings Each Time
Changing readings often point to an unstable setup, poor contact with the counter, weak power, or a problem with the scale itself. A weight that touches a wall, container, or other object can also affect the result. Repeat the test with the platform clear and the reference weight centered.
Level the setup
Use a stable surface and check that the scale’s feet sit evenly.
Check for contact
Make sure the weight and platform do not touch nearby objects.
Replace weak batteries
Use the battery type listed by the manufacturer.
Repeat with a verified weight
A reference of known mass helps separate a scale problem from uncertainty about the test object.
The Scale Reads High or Low
A reading that stays above or below the reference may result from an incorrect calibration, an unsuitable reference weight, or a fault in the measuring system. First confirm the units and the known mass. Then repeat the test after the scale has been zeroed and placed on a stable surface.
Do not try to correct the error by adding a made-up offset unless the manufacturer explicitly supports that procedure. Some models provide user adjustments, while others require service. An offset may hide one error without fixing the scale’s response at other weights.
Confirm units
Check that the scale displays grams, ounces, or another intended unit before comparing values.
Repeat at another weight
A second reference point can help reveal whether the error changes with load.
Use the approved adjustment
Follow the manufacturer’s process or contact its support team if the reading remains outside the required tolerance.
How Often Should You Calibrate a Kitchen Scale?
There is no single calibration schedule for every kitchen scale. A household model used for ordinary cooking may need only occasional accuracy checks, while a scale used for detailed recipe work may need more frequent checks. Follow the manufacturer’s advice and consider how much the scale is used, how it is stored, and how costly a wrong reading would be.
Calibration and accuracy checks are not the same maintenance task. If your scale has no calibration mode, checking it regularly against a known weight may be the only user-level option. If you depend on tight tolerances, use a suitable reference and follow a documented check routine.
Source: Serious Eats
After moving the scale
Check the reading after moving it to a new counter or work area, especially if the surface differs.
After rough handling
Inspect and test the scale if it has been dropped, knocked, or stored in a way that could affect the platform.
When readings seem wrong
Repeat an accuracy check before changing calibration settings.
Before precision tasks
Check the scale when a small measurement error could change the outcome of a recipe or process.
During routine care
Use the interval in the manual or set a reasonable check schedule based on the scale’s use and your accuracy needs.
Does Temperature Affect Kitchen Scale Readings?
Temperature can affect some scales and their sensors. A scale brought from a cold garage into a warm kitchen may need time to reach stable operating conditions. Rapid changes in temperature can also cause condensation, which may damage equipment that is not designed for moisture exposure.
Use the operating temperature range stated in the manual. Keep the scale away from hot ovens, direct sunlight, and damp areas. If the manufacturer specifies a warm-up or settling period, allow that time before checking the reading.
Let the scale settle
Allow it to reach the normal room conditions described in its instructions.
Avoid sudden heat changes
Keep the scale away from hot cookware and strong heat sources.
Keep it dry
Clean it according to the manufacturer’s directions and prevent water from entering the electronics.
Kitchen Scale Calibration for Baking and Food Prep
A well-checked kitchen scale can make baking and meal prep more consistent. Weight measurements reduce the uncertainty that comes from using cups or spoons, where ingredient volume can change with how tightly a food is packed. Still, the scale must have enough capacity and suitable accuracy for the amount you measure.
For a large batch of dough, a scale that reads in whole grams may be adequate for many home recipes. For a tiny amount of yeast or a small dose of a strong flavoring, the same scale may not have enough resolution or accuracy. Choose the tool based on the amount and tolerance you need, not just the number of digits on the screen.
Source: amazon.com.be
Use the Tare Function Correctly
The tare function resets the displayed weight to zero while a container remains on the platform. Place the empty container on the scale, wait for the reading to settle, and press TARE or ZERO as directed. Add the ingredient only after the display returns to zero.
Tare is useful for weighing several ingredients in one bowl. Add the first ingredient, record its mass if needed, and press tare before adding the next. Remember that tare changes the displayed reference point; it does not calibrate the scale or repair an inaccurate sensor.
Center the bowl
Keep the container stable and within the platform area.
Wait for zero
Do not add an ingredient until the display has settled.
Watch the total load
The container and all ingredients must remain within the scale’s capacity, even when the display shows zero after tare.
Choose the Right Unit and Resolution
Check whether your recipe uses grams, ounces, pounds, or milliliters. Grams and ounces measure mass, while milliliters measure volume. A scale that displays milliliters may use a built-in assumption about the substance’s density, so that setting is not a universal replacement for measuring liquid volume.
A display that changes in 1-gram steps has a different resolution from one that changes in 0.1-gram steps. Yet more decimal places do not guarantee a more accurate result. Read the manufacturer’s specifications and test the scale against a suitable reference if measurement quality matters.
For flour and dough
Use a scale with enough capacity for the bowl and ingredients, and follow the recipe’s stated unit.
For coffee
Choose a scale with a resolution suited to the small quantities you weigh.
For liquids
Use a measuring jug or a suitable weight-based recipe unless the scale’s liquid mode is appropriate for the substance.
Common Calibration Mistakes to Avoid
Small setup errors can spoil a calibration or make an accuracy check misleading. A few careful habits help keep the process safe and repeatable. Use the manual as the main guide, especially when your model has a special calibration sequence.
Source: www.youtube.com
Using the wrong reference weight
A weight that does not match the required value may prevent calibration or lead to an incorrect result.
Calibrating on a soft surface
A towel, mat, or flexible counter can affect stability. Use a firm surface unless the manufacturer specifies otherwise.
Skipping the zero check
A scale that starts from a nonzero reading may give confusing results. Confirm zero before testing.
Assuming tare fixes accuracy
Tare removes the displayed container weight from the measurement. It does not correct sensor error.
Overloading the platform
A load above the rated capacity may damage the scale or make it unsafe to use.
Trusting a single test
One reading cannot establish repeatability or prove accuracy across the full weighing range.
Using unverified household items as exact standards
A label or expected mass does not prove the item’s actual weight.
Opening the scale without guidance
Internal parts may be delicate, and unauthorized repairs can cause damage or affect warranty coverage.
When Should You Replace or Repair a Kitchen Scale?
Consider repair or replacement if the scale remains outside the required tolerance after the approved checks, will not return to zero, or gives unstable readings with a suitable reference weight. Visible cracks, a bent platform, liquid damage, or a failed display are also reasons to stop relying on it until the problem is assessed.
For ordinary home cooking, replacing a low-cost scale may be more practical than paying for service. For work that requires traceable measurements, contact a qualified calibration provider or the manufacturer. Do not use a scale for a task that depends on precise weight when its performance is known to be unreliable.
Try basic checks first
Confirm the power source, surface, units, zero reading, and reference weight.
Contact the manufacturer
Ask about supported calibration, repair, and any warranty limits.
Stop using damaged equipment
Do not continue if the platform, housing, or electronics appear damaged or unsafe.
A Simple Kitchen Scale Check Record
Keeping a short record helps you spot changes over time. This can be useful if you bake often, weigh coffee each morning, or rely on a scale for repeatable food portions. Record the date, the reference mass, the displayed reading, the scale’s location, and whether the reading repeated consistently.
For a home scale, a simple note on paper may be enough. For work that needs traceable results, use a formal record that includes the reference weight’s identification, its stated tolerance, the test conditions, and the acceptance limits. A record does not make an inaccurate scale accurate, but it helps show when performance begins to change.
Source: nakedgrapefruit.com
Date and scale model
Write down when you checked the scale and which model you used.
Reference mass
Record the known weight and how its value was verified.
Displayed reading
Record the result and the unit shown on the screen.
Record a battery change, approved calibration, service request, or decision to replace the scale.
Frequently Asked Questions
Q
Can I calibrate a kitchen scale without calibration weights?
You may be able to check a scale with a household item whose mass is independently known, but you should not assume that an ordinary coin, can, or food package is an exact reference. If the scale requires a specific calibration weight, use the stated value and procedure. If no calibration mode is available, a known mass can help you check the reading without changing the scale’s settings.
Q
How do I reset my digital kitchen scale to zero?
Remove everything from the platform and wait for the display to settle. Press ZERO or TARE if the manual calls for it. If the scale will not return to zero, check for debris, an uneven surface, weak batteries, or a load that is touching nearby objects. A zero reset is not the same as calibration.
Q
Can I use coins to calibrate a digital kitchen scale?
Coins are not a dependable calibration standard unless their actual mass has been verified to the accuracy you need. Wear, dirt, damage, and differences between coin types can affect their mass. Use the reference weight specified by your scale’s manufacturer for calibration, and treat an unverified coin only as a rough check.
Q
Why is my kitchen scale off by a few grams?
Possible causes include low batteries, an uneven surface, a dirty or obstructed platform, temperature changes, an incorrect unit, or sensor drift. Check these conditions and repeat the test with a known weight. Whether a few grams is acceptable depends on the total load, the scale’s stated tolerance, and the task you are doing.
Q
Does every digital kitchen scale need calibration?
No. Some digital scales have a user calibration function, while others are factory-adjusted and do not allow manual calibration. Follow the model’s instructions. Even if manual calibration is not supported, you can often check the reading with a suitable known weight.
Q
How can I tell whether my kitchen scale is accurate?
Place a suitable known weight on the center of the platform and compare the displayed mass with the reference value. Repeat the test after removing the weight and letting the scale return to zero. If practical, test more than one weight. Compare the results with the manufacturer’s stated tolerance or the limit needed for your task.
Q
Can I calibrate a kitchen scale with water?
Water can provide a rough reference only when its mass is measured or calculated under known conditions and the container’s mass is accounted for. Volume marks on a measuring cup do not provide an exact mass standard. Water can also damage a scale that is not water-resistant, so do not use this method unless the setup is suitable and safe.
✦ Wrapping Up
Conclusion
Kitchen scale calibration starts with the right setup and the correct method for your model. Place the scale on a firm, level surface, check the power source, confirm zero, and use the exact reference weight required by the manual. If your scale does not support calibration, an accuracy check can still help you see how well it reads a known mass.
Repeat the test, check more than one weight when practical, and keep a short record if you rely on consistent results. Do not assume that tare, extra decimal places, or a single successful reading proves accuracy. When a scale stays outside the needed tolerance or shows signs of damage, seek manufacturer support or replace it.
💡 Key Takeaway
Start by finding your scale’s exact model number and manual. Then check zero, test it with a suitable known weight, and use the manufacturer’s calibration procedure only if the model supports it.