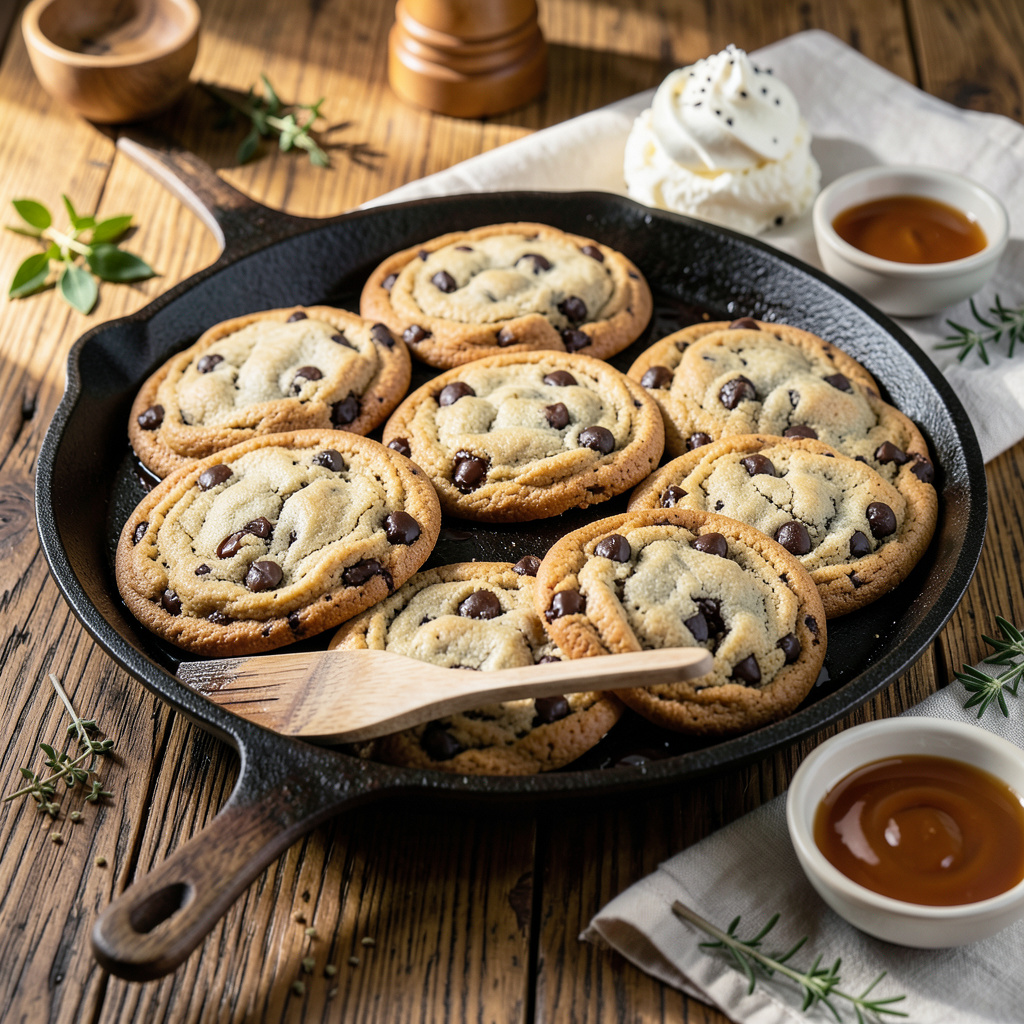
Kitchenaid chocolate chip cookies are easy to make with a KitchenAid stand mixer, butter, brown sugar, white sugar, eggs, flour, and chocolate chips. Cream the butter and sugars, mix in the wet and dry ingredients, chill the dough if needed, and bake at 350°F until the edges turn golden and the centers look just set.
Chocolate chip cookies are a favorite in homes across the United States. They show up at bake sales, school events, holiday parties, and quiet nights at home. A KitchenAid stand mixer can make the mixing process easier, especially when you prepare a full batch of dough.
The mixer does not do all the work for you. The way you measure flour, soften butter, mix the dough, and time the bake still matters. Small changes can turn a soft cookie into a thin, crisp one, so it helps to know what each step does.
This guide uses a practical, small-batch home recipe designed for a stand mixer. It explains the ingredients, mixing method, baking time, and common fixes. The recipe is not presented as an official KitchenAid formula or as a recipe tested in a lab. Oven type, mixer model, ingredient temperature, and cookie size can all affect the final result.
Source: dessertrecipester.com
What Makes KitchenAid Chocolate Chip Cookies Work?
A good chocolate chip cookie has a balance of fat, sugar, flour, eggs, and chocolate. Butter adds flavor and helps the dough spread. Brown sugar adds moisture and a mild caramel taste, while white sugar helps the edges brown and turn crisp.
A stand mixer helps blend these parts with less effort. Its flat beater is useful for creaming butter and sugar, mixing eggs into the batter, and combining the flour with the wet ingredients. You can make the same recipe by hand, but a mixer can be helpful when your butter is firm or you are making several batches.
The main goal is to mix each stage enough to blend the ingredients without working the dough too much. Once flour enters the bowl, extra mixing can make the cookies tougher than you want.
Source: www.kitchenaid.com
Soft centers
Brown sugar, suitable dough thickness, and careful baking help keep the middle tender.
Crisp edges
White sugar and enough baking time help the edges brown and firm up.
Even mixing
The stand mixer can blend the dough well when you use the right attachment and speed.
Which KitchenAid attachment should you use?
Use the flat beater for a standard chocolate chip cookie recipe. It is made for mixing thicker batters and cookie dough. A wire whisk is better suited to whipping air into lighter mixtures and is not the best tool for a thick cookie dough.
A dough hook is meant for kneading yeast dough. It is not needed for ordinary chocolate chip cookies. If your mixer has several speed settings, start low and raise the speed only when the recipe calls for it.
Flat beater
Best for creaming butter and sugar and mixing cookie dough.
Wire whisk
Not needed for the main mixing steps in this recipe.
Dough hook
Designed for yeast dough rather than standard cookie dough.
Ingredients for Kitchenaid Chocolate Chip Cookies
This recipe makes about 24 medium cookies, depending on how much dough you use for each one. It uses common US baking ingredients and standard measuring cups, spoons, and an oven set to Fahrenheit.
For the most consistent result, weigh flour if you have a kitchen scale. Cup measurements can vary based on how flour is scooped and packed. If you use cups, spoon the flour into the cup and level the top without pressing it down.
Source: storage.googleapis.com
All-purpose flour: 2 1/4 cups
Provides the structure that holds the cookies together. Measure it carefully to avoid dry dough.
Unsalted butter: 1 cup
Use two standard sticks of softened butter. Unsalted butter gives you more control over the salt level.
Brown sugar: 3/4 cup
Pack the brown sugar into the measuring cup. It adds moisture and a rich, warm flavor.
Granulated sugar: 1/2 cup
Adds sweetness and helps the edges brown during baking.
Large eggs: 2
Eggs bind the dough and add moisture. Room-temperature eggs blend more easily with softened butter.
Vanilla extract: 2 teaspoons
Adds a familiar cookie aroma and rounds out the chocolate flavor.
Baking soda: 1 teaspoon
Helps the cookies spread and brown. Measure it accurately.
Salt: 1/2 teaspoon
Balances the sweetness. Reduce the amount slightly if your butter is salted.
Semisweet chocolate chips: 2 cups
Provide chocolate in each bite. Milk chocolate or dark chocolate chips can be used instead.
Can you change the chocolate or sugar?
Yes, but each change can affect the taste and texture. Semisweet chocolate chips give a balanced mix of sweetness and cocoa flavor. Dark chocolate chips make the cookies taste less sweet, while milk chocolate chips add more sweetness.
You can use a mix of chips and chopped chocolate if you want different sizes of chocolate pieces. Keep the total amount close to two cups so the dough still holds together well.
Brown sugar comes in light and dark varieties. Light brown sugar gives a mild caramel note, while dark brown sugar has a deeper molasses flavor. Either can work in this recipe.
For a richer taste
Use semisweet or dark chocolate, or combine both.
For sweeter cookies
Try milk chocolate chips while keeping the rest of the recipe unchanged.
For extra texture
Use chopped chocolate along with chips, but keep the total amount similar.
How to Make Chocolate Chip Cookies in a KitchenAid Mixer
The best way to use a stand mixer is to work in stages. Prepare the ingredients first, cream the butter and sugars, add the eggs, mix the dry ingredients separately, and then bring everything together at low speed.
Before you start, heat the oven to 350°F. Line two baking sheets with parchment paper if you have it. Set out a cooling rack and make sure the flat beater and mixer bowl are clean and dry.
Source: storage.googleapis.com
Prep time
Allow about 15 minutes for measuring and mixing, not including optional chilling.
Bake time
Plan on about 9 to 12 minutes per batch, then adjust based on cookie size and your oven.
Yield
About 24 medium cookies. The exact number depends on the size of each portion.
Step 1: Cream the butter and sugars
Fit the flat beater to your KitchenAid mixer. Add the softened butter, brown sugar, and granulated sugar to the bowl. Mix on a low setting until the ingredients start to combine, then use a medium-low setting until the mixture looks smooth and slightly fluffy.
Stop the mixer and scrape the sides and bottom of the bowl with a spatula. This helps remove pockets of butter or sugar that the beater may have missed. The butter should not be melted or oily.
What to look for
The mixture should look blended and creamy, with no large chunks of butter.
What to avoid
Do not start at high speed. Sugar and butter can scatter, and the mixture may not blend evenly.
Step 2: Add the eggs and vanilla
Add the eggs one at a time, mixing on low after each addition. Add the vanilla extract and mix just until blended. If the mixture looks slightly uneven for a short time, scrape the bowl and continue at low speed.
Avoid adding cold eggs straight from the refrigerator when the butter is very soft. A large temperature difference can make the mixture look curdled, although the dough may still come together when the flour is added.
Mix gently
Use low speed to keep the mixture in the bowl and reduce splashes.
Check the bowl
Scrape the sides so the eggs and vanilla blend evenly.
Step 3: Combine the dry ingredients
In a separate bowl, stir together the flour, baking soda, and salt. Breaking up small lumps now makes it easier to spread the leavening and salt through the dough.
Add the dry mixture to the mixer bowl in two or three portions. Use the lowest speed and stop as soon as most of the flour disappears. This keeps loose flour from flying out of the bowl and helps prevent overmixing.
Use low speed
A slow setting gives the flour time to blend into the wet ingredients.
Stop early
Finish combining by hand if a few small streaks of flour remain.
Step 4: Fold in the chocolate chips
Add the chocolate chips to the bowl. Mix briefly on the lowest setting, or fold them in by hand with a sturdy spatula. Stop when the chips are spread through the dough.
Do not run the mixer for a long time at this stage. The flour has already been added, so extra mixing can develop more gluten and make the cookies firm or tough.
Even distribution
Check the bottom of the bowl for chips that may have gathered in one spot.
Keep the dough thick
The finished dough should be scoopable, not runny like cake batter.
Step 5: Chill the dough if needed
Chilling is optional when the dough is firm and your kitchen is cool. If the butter feels very soft, the dough seems greasy, or your cookies often spread too much, cover the bowl and refrigerate the dough for 30 to 60 minutes.
Cold dough is firmer and may spread less quickly in the oven. Chilling also gives the flour more time to absorb moisture. It does not guarantee a particular texture, but it can make sticky dough easier to portion and handle.
When chilling helps
Use it when the dough is warm, soft, or difficult to scoop neatly.
When you can skip it
Bake right away if the dough is firm enough to hold its shape and the recipe behaves as expected.
Step 6: Portion the dough
Scoop the dough into portions of about 1 1/2 tablespoons each. Place them on the prepared baking sheets with about two inches of space between portions. This gives the cookies room to spread without running into each other.
Keep the portions close in size so they bake at a similar rate. If one cookie is much larger than the rest, it may need more time in the oven while the smaller ones are already done.
For even cookies
Use the same scoop or spoon for every portion.
For thick cookies
Keep the dough cool and avoid flattening each portion too much.
Step 7: Bake until the edges are set
Place one baking sheet on the center rack of the preheated oven. Bake for about 9 to 12 minutes, checking early because ovens and cookie sizes vary. The edges should look lightly golden, while the centers may still appear a little soft.
Do not wait for the centers to become dark brown. Cookies continue to cook for a short time after they leave the oven. Taking them out when the edges are set can help keep the middle tender.
If you bake two sheets at once, follow your oven’s guidance for rack placement and rotate the sheets only if needed. Opening the oven too often lets heat escape and can change the bake.
For soft centers
Remove the cookies when the edges are set and the centers no longer look wet.
For crispier cookies
Leave them in a little longer, checking often to prevent overbrowning.
For safe handling
Use oven mitts and place the hot baking sheet on a heat-safe surface.
Step 8: Cool before serving
Leave the cookies on the baking sheet for about five minutes after baking. They are fragile while hot, and this short rest lets the structure firm up. Move them to a cooling rack once they can be lifted without breaking.
The centers should become more stable as the cookies cool. Serve them slightly warm for soft chocolate, or wait until they reach room temperature if you want a firmer bite.
Do not rush
Moving the cookies too soon can cause them to bend or break.
Cool between batches
Let the baking sheet cool before placing fresh dough on it, or the next batch may spread faster.
How to Get the Texture You Want
The texture of chocolate chip cookies depends on ingredient ratios, dough temperature, portion size, and baking time. You can use the same basic recipe to make soft, chewy cookies or cookies with firmer, crisp edges, but changes should be small.
Start with the recipe as written. Change one variable at a time so you can see what caused the difference. Adjusting flour, sugar, butter, and oven time all at once makes it harder to work out what went wrong.
Source: www.pinterest.com
For a soft middle
Use the suggested brown sugar amount and remove the cookies when the edges are set but the centers are still slightly soft.
For crisp edges
Allow a little more baking time and watch the color closely.
For less spread
Check the flour measurement, make sure the butter is not melted, and chill the dough if it is warm.
For a richer flavor
Try dark brown sugar or a mix of semisweet and dark chocolate chips without changing the basic method.
Should you use melted or softened butter?
Use softened butter for this recipe because the creaming step relies on butter that can hold air as it mixes with sugar. Softened butter should give slightly when pressed but should not look shiny, greasy, or liquid.
Melted butter changes the dough’s structure and can cause the cookies to spread more. Some cookie recipes are built around melted butter, but that method uses a different balance and mixing process. Do not swap melted butter into this recipe and expect the same result.
Butter is too cold
Let it soften at room temperature before mixing. Do not force the mixer to work through hard chunks.
Butter is too warm
Chill it until it feels soft but still holds its shape.
Does resting the dough improve cookies?
Resting dough in the refrigerator can help with handling and may improve flavor as the ingredients sit together. It also firms the butter, which can slow spreading during the first part of baking.
A short chill is enough for many home baking needs. Longer chilling may change the texture and spread, so check the dough before baking. If it becomes very firm, let it sit briefly until you can scoop it without forcing the spoon through hard dough.
Short rest
Useful when the dough is sticky or the kitchen is warm.
Longer rest
Can change flavor and texture, but may require the dough to soften slightly before portioning.
Common Cookie Problems and How to Fix Them
When cookies do not turn out as planned, start with the simplest checks. Look at the butter, flour measurement, dough temperature, portion size, and oven temperature before changing the full recipe.
A single batch can also reveal a problem with the baking sheet or oven. Dark metal pans may brown the bottoms faster than light pans, and ovens can run hotter or cooler than the display suggests.
Source: storage.googleapis.com
Cookies spread too much
Check whether the butter was melted or too soft, whether the flour was measured correctly, and whether the baking sheet was still hot from the previous batch. Chill the dough if needed.
Cookies are dry or crumbly
Too much flour or too much baking time may be the cause. Measure flour carefully and check the cookies a little earlier.
Cookies are too hard
Overbaking or excessive mixing after adding flour may lead to a firm result. Stop mixing once the dough comes together and let the cookies cool without leaving them in the oven.
Cookies look pale
They may need more baking time, or the oven may not have reached the set temperature. Check that the oven is fully preheated.
Cookies brown too fast underneath
Try a light-colored baking sheet and check the rack position. Parchment can help with release, but it does not correct every oven or pan issue.
Dough will not mix well
Stop the mixer, scrape the bowl, and check whether the butter is too cold. Add ingredients in stages instead of running the mixer at high speed.
Why are the cookies raw in the middle?
Cookies can look done around the edges before the center has set. Large dough portions, a hot oven, or a baking sheet placed too high may contribute to this problem. Try making the portions smaller and checking the oven temperature with an oven thermometer.
If the edges are already dark while the centers remain wet, lower the oven temperature slightly and allow more time for the middle to bake. Make small adjustments because oven behavior and cookie size vary.
Check the portion size
Make each cookie close to the same size so the centers bake at a predictable rate.
Check the oven
Use a separate oven thermometer if you suspect the displayed temperature is inaccurate.
Why is the dough greasy?
Greasy dough often means the butter is too warm, especially if the bowl has been sitting in a warm kitchen. Stop mixing and refrigerate the dough for 20 to 30 minutes before portioning it.
If the dough still looks oily after chilling, review the ingredient amounts. Too little flour or an incorrect butter measurement can change the balance. Avoid adding large amounts of flour without checking the original measurements first.
Cool the dough
Chill it until it feels firm enough to scoop.
Review the amounts
Check the flour and butter measurements before changing the recipe.
KitchenAid Mixer Tips for Better Results
A stand mixer can make cookie prep easier, but the right speed and bowl technique matter more than using a high setting. Let the flat beater do the work, and pause when you need to scrape the sides or check the dough.
Mixer models differ in bowl size, motor power, and control settings. Follow the instructions for your specific model, especially when mixing a large batch or using a bowl-lift machine. Do not force the mixer to handle more dough than the model is designed for.
Source: droolrecipes.com
Start slowly
Begin at low speed when adding sugar, flour, or chocolate chips to prevent ingredients from scattering.
Scrape the bowl
Stop the mixer before using a spatula to scrape the sides and bottom.
Watch the dough
Stop once the ingredients are blended rather than mixing for a fixed time without checking.
Avoid overfilling
Make separate batches if the dough exceeds the recommended capacity for your mixer.
Can you double the recipe?
You can double the ingredients if your mixer bowl has enough room and the model can handle the amount of dough. Do not assume every KitchenAid mixer has the same capacity. Check the user guide before preparing a large batch.
For a double batch, add the dry ingredients in stages and use low speed. You may need to scrape the bowl more often. If the dough presses against the beater or the mixer struggles, stop and divide the batch rather than forcing it to continue.
Check capacity first
Use the model’s guidance rather than relying only on the size of the bowl.
Bake in batches
Keep unused dough chilled while the first sheets bake if the kitchen is warm.
Do you need to adjust the beater height?
Some KitchenAid stand mixers have a beater-height adjustment, while others use a different bowl or attachment setup. If the flat beater does not mix well or scrapes the bowl, check the instructions for your model.
Do not adjust the beater while the mixer is running. Turn the mixer off and unplug it before carrying out any adjustment described in the manual.
Follow the model guide
Use the approved adjustment method for your exact mixer.
Keep hands clear
Switch off and unplug the mixer before checking or changing the attachment setup.
How to Store and Freeze Chocolate Chip Cookies
Store baked cookies in an airtight container once they have cooled. Warm cookies can create steam inside the container, which may make the surface damp. Let them cool first, then keep the container in a cool, dry spot.
For the best texture, use the cookies within several days. The exact shelf life depends on room conditions, ingredients, and how well the container seals. Discard cookies that show mold, smell unusual, or have been exposed to contamination.
Source: storage.googleapis.com
At room temperature
Keep cooled cookies in an airtight container away from heat and moisture.
In the freezer
Place cooled cookies in a freezer-safe container or bag, with layers separated by parchment if needed.
For serving
Let frozen cookies thaw at room temperature or warm them briefly in an oven set to a low temperature.
Can you freeze the cookie dough?
Yes. Portion the dough into individual balls and place them on a lined tray. Freeze until firm, then transfer the portions to a labeled freezer-safe bag or container. This makes it easier to bake a few cookies at a time.
Frozen dough may need a little extra baking time, depending on its size and your oven. Start checking around the usual baking time, then continue in short intervals until the edges are set and the centers are no longer wet.
Write the date and baking temperature on the container. For the best quality, use frozen dough within a few months rather than leaving it in the freezer indefinitely.
Freeze in portions
Separate the dough before freezing so you do not need to thaw the whole batch.
Label the container
Include the recipe name and date to make future baking easier.
How do you refresh cookies that have gone firm?
A cookie that has become firm may soften slightly when warmed for a short time. Place it in a low oven for a few minutes and check it often. Let it cool briefly before eating because the chocolate can become very hot.
Warming does not reverse every change caused by age or poor storage. If the cookies have an unusual smell, visible mold, or signs of spoilage, discard them instead of trying to refresh them.
Warm gently
Use a low oven and short intervals rather than high heat.
Check before eating
Allow the chocolate and cookie center to cool enough to avoid burns.
Easy Variations for Your Cookie Batch
Once the basic recipe works for you, a few small changes can give the cookies a different taste. Keep the core ingredient balance steady when you first experiment, and change one thing at a time.
These options use familiar ingredients found in many US grocery stores. They are variations rather than separate tested formulas, so check the dough texture and bake as you go.
Source: aylarecipes.com
Chocolate chunk cookies
Replace some or all of the chips with chopped semisweet chocolate. The uneven pieces create a mix of small bits and larger melted pockets.
Nutty chocolate chip cookies
Add about 1/2 cup of chopped walnuts or pecans. Make sure anyone eating the cookies knows they contain nuts.
Sea salt topping
Add a small pinch of flaky salt to each portion before baking if you enjoy a sweet and salty taste.
Smaller snack cookies
Use smaller dough portions and check them earlier because they bake faster than medium cookies.
Extra chocolate flavor
Use a mix of semisweet chips and dark chocolate chunks without greatly increasing the total amount.
Can you make the recipe without a stand mixer?
Yes. A large mixing bowl, a sturdy spoon or hand mixer, a spatula, and a little patience are enough. Cream the softened butter and sugars until well blended, then add the eggs and vanilla before mixing in the dry ingredients.
A hand mixer can make the creaming step easier, but stop if the beaters struggle with thick dough. Fold in the chocolate chips with a spoon or spatula. The oven temperature, portion size, and baking cues remain the same.
By hand
Use soft butter and a sturdy spoon, and allow extra time for the creaming step.
With a hand mixer
Use a suitable speed and finish thick dough by hand if needed.
A Practical Baking Checklist
A short checklist can help you avoid the most common mistakes before the cookies go into the oven. Most problems begin with an ingredient measurement, a temperature issue, or dough that has been mixed for too long.
Use the checklist for each batch, especially when you change pans, ovens, or ingredient brands. Once you learn how your own oven behaves, you can make small changes with more confidence.
Source: www.pinterest.com
Before mixing
Measure all ingredients, soften the butter, and fit the flat beater to the mixer.
Before adding flour
Cream the butter and sugars well, then blend in the eggs and vanilla.
After adding flour
Mix at low speed and stop as soon as the dough comes together.
Before baking
Check the oven temperature, use a cool baking sheet, and leave space between dough portions.
After baking
Look for set edges, let the cookies rest on the pan, and move them carefully to a rack.
How can you tell when a batch is ready?
Look for light golden edges and centers that are soft but no longer wet. A cookie may look slightly underdone in the middle when it first leaves the oven, yet firm up during the cooling period.
Use the first batch to learn your oven’s timing. If the cookies are too pale, add a little time to the next batch. If the edges are dark and the centers are dry, check them earlier or verify the oven temperature.
Good sign
The edges hold their shape while the center remains a little soft.
Needs more time
The center still looks wet and the cookie has not begun to set.
Likely overbaked
The edges are very dark and the whole cookie feels dry after cooling.
Frequently Asked Questions
Q
What speed should I use on a KitchenAid mixer for chocolate chip cookies?
Start at a low speed when combining ingredients, especially when adding flour or chocolate chips. Use a moderate speed for creaming the softened butter and sugars, then return to low speed for the flour. The exact setting depends on your model, so follow its user guide.
Q
Why are my KitchenAid chocolate chip cookies flat?
Flat cookies may result from butter that is too warm, too little flour, a hot baking sheet, or dough that needs chilling. Check your ingredient measurements first. If the dough is soft or greasy, chill it before baking the next batch.
Q
Can I use salted butter instead of unsalted butter?
Yes. Salted butter can work in this recipe. Reduce or omit the added salt based on the butter’s salt level and your taste. Since salt levels vary by brand, make one batch and adjust the next if needed.
Q
Do I need to chill chocolate chip cookie dough?
No, chilling is not always required. You can bake the dough right away if it is firm and easy to portion. Chilling for 30 to 60 minutes can help when the dough is sticky, the butter is very soft, or the cookies spread too much.
Q
How long should I bake KitchenAid chocolate chip cookies?
At 350°F, medium cookies often take about 9 to 12 minutes. Start checking early and look for lightly golden edges with centers that are just set. Larger cookies may need more time, while smaller ones may finish sooner.
Q
Can I freeze KitchenAid chocolate chip cookie dough?
Yes. Portion the dough into balls, freeze them on a lined tray until firm, then move them to a freezer-safe container or bag. Label the container with the date and bake the portions from frozen, checking for doneness and adding time if needed.
Q
Can I make this recipe in a KitchenAid hand mixer?
A hand mixer can cream the butter and sugars and blend the wet ingredients. Thick dough may become hard to mix near the end, so use a suitable speed and fold in the chocolate chips by hand if needed. Do not force the motor to work through dough it cannot handle.
✦ Wrapping Up
Conclusion
Kitchenaid chocolate chip cookies are simple to make when you use the right ingredients and mix each stage with care. A KitchenAid stand mixer can save effort, but good results still depend on softened butter, accurate flour measurements, gentle mixing, and close attention to the oven.
Start with the recipe as written and let the first batch guide your next steps. If the cookies spread too much, check the butter and chill the dough. If they turn dry or hard, review the flour amount and baking time. Small changes can help you find the texture you like without making the recipe harder than it needs to be.
💡 Key Takeaway
Gather the ingredients, soften the butter, set the oven to 350°F, and use the flat beater to mix the dough at the right speeds. Bake a test batch of medium cookies for about 9 to 12 minutes, then adjust the next batch based on the color of the edges and the softness of the centers.