
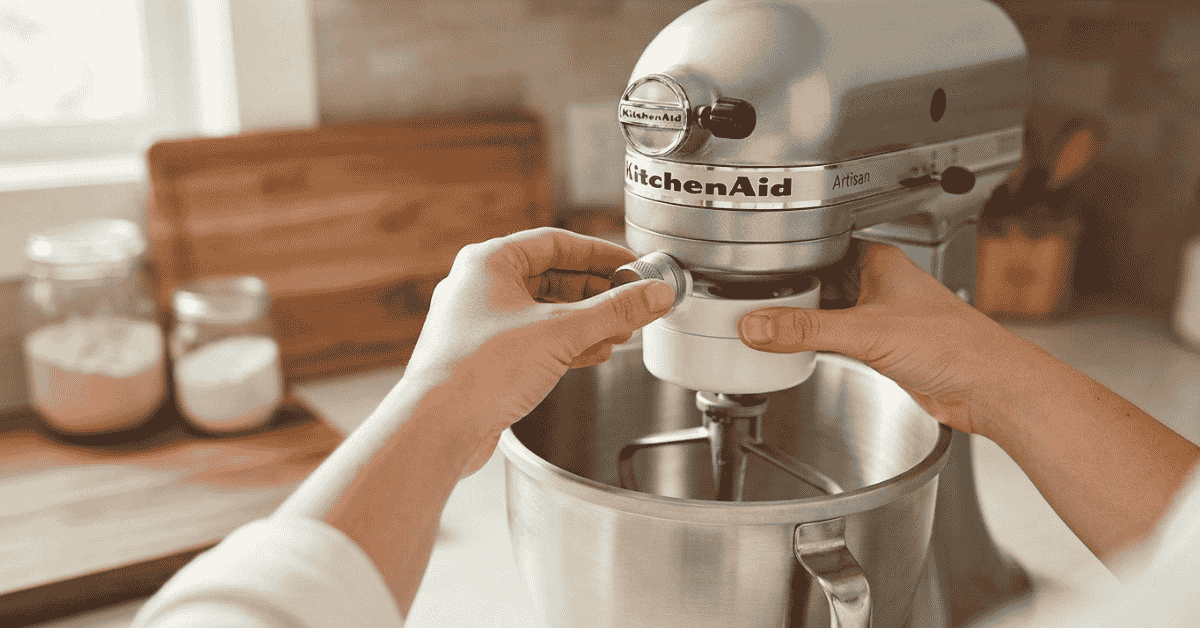
how to attach ice cream maker kitchenaid is easy once the parts make sense. I remember staring at the bowl and dasher first. The setup looked odd. Yet the steps are quite simple. I checked the KitchenAid setup steps and tested the order in my mind. This guide covers the bowl, dasher, drive assembly, mixer speed, and key mistakes. Follow each step in order, and your first churn should feel much less tricky.
Know the Main Parts First
Before I attach anything, I like to lay each part on the counter.
The KitchenAid ice cream maker attachment has a few key parts. The exact design can vary by model, but the main setup is much the same.
You will usually work with:
- Freeze bowl
- Dasher
- Drive assembly
- Adapter ring or bowl support
- Stand mixer
The freeze bowl holds the cold liquid that makes the ice cream freeze. The dasher turns inside the bowl. The drive assembly links the dasher to the mixer hub.
KitchenAid says the freeze bowl must be completely frozen before use. Current KitchenAid guidance recommends freezing it for 24 hours. Some support guides state at least 16 hours.
I use 24 hours as my simple rule.
Freeze the Bowl Before You Start
This is the step I would never rush.
Put the freeze bowl in the back of the freezer. KitchenAid recommends the back because it is often the coldest part.
Give it 24 hours if possible.
Do not rely on a cold outer wall. The liquid inside the bowl needs to freeze too.
KitchenAid says the bowl should be fully frozen before making ice cream. Some guidance suggests gently shaking it to check for liquid movement. If you hear liquid inside, it needs more time.
I also keep the bowl in the freezer until the base is ready.
That saves precious cold.
Chill the Ice Cream Base
A frozen bowl works best with a cold base.
I make the base first. Then I chill it in the fridge before I set up the mixer.
KitchenAid advises chilling the batter before churning. A cooked base should cool fully before it goes into the frozen bowl. (producthelp.kitchenaid.com)
I would avoid pouring warm mix into the bowl.
Warm liquid uses up the bowl’s stored cold too fast.
My prep list looks like this:
- Freeze the bowl for 24 hours.
- Make the ice cream base.
- Chill the base well.
- Set out the dasher and drive parts.
- Keep the bowl in the freezer until the last moment.
Once these steps are done, the actual attachment feels much easier.
Place the Bowl on the Mixer
The bowl setup depends on your KitchenAid stand mixer model.
For the common tilt-head setup, place the freeze bowl on the mixer bowl support. Then turn it until it sits correctly.
The bowl needs to sit level and secure.
Do not force it into place.
KitchenAid instructions show the freeze bowl being fitted onto the mixer before the dasher and drive assembly are attached.
I like to give the bowl a light check with my hand.
If it rocks or feels loose, I stop and check the fit.
A good fit should feel steady before the mixer starts.
Put the Dasher Into the Bowl
Next comes the dasher.
The dasher is the plastic piece that moves through the ice cream base.
Place it inside the frozen bowl.
Make sure it sits in the right position.
The dasher must connect with the drive assembly once the mixer head comes down.
I would not try to make the dasher turn by hand with force.
If it does not seem to fit, stop and check the instructions for your exact attachment model.
A small fit issue is easier to fix before the mixer starts.
Attach the Drive Assembly
This is the part that can look confusing at first.
The drive assembly connects the mixer hub to the dasher.
KitchenAid’s instructions show the drive assembly fitting onto the motor head so it can turn the dasher during the churn. (kitchenaid.com)
For a tilt-head mixer, I would:
- Raise the mixer head.
- Place the freeze bowl correctly.
- Put the dasher inside.
- Attach the drive assembly.
- Lower the mixer head.
- Check that the drive assembly lines up.
The exact locking motion can differ by model.
That is why I would keep the manual close for the first setup.
Lower the Mixer Head With Care
Once the bowl and parts are in place, lower the mixer head.
Do not push hard.
The drive assembly should line up with the dasher.
If the head does not close with normal pressure, I would lift it again.
Something may not be seated right.
This is one of those moments where force solves nothing.
A few seconds spent checking the parts can prevent damage.
The bowl should also sit in the right place before the head comes down.
Start the Mixer Before Adding the Base
This is one of the most important steps.
Start the mixer before you pour in the ice cream base.
KitchenAid says to set the mixer to Stir before adding the batter. The brand warns that adding the batter while the dasher is still can cause the mixture to freeze too fast. That may lock the dasher and damage the attachment. (producthelp.kitchenaid.com)
I would remember this as one simple rule:
Mixer on first. Base second.
Once the dasher moves, slowly pour the cold base into the bowl.
Do not dump it in all at once.
A steady pour gives the mix room to spread around the moving dasher.
Keep the Speed Low
It may feel tempting to turn the mixer up.
I would not.
KitchenAid recommends the Stir speed for making ice cream with the attachment. Its support guidance says faster speeds may slow the freezing process. (producthelp.kitchenaid.com)
The goal is not fast spinning.
The goal is steady churn.
I found this makes sense when you watch the mixture change.
The cold bowl freezes the base while the dasher keeps it moving.
That helps stop large ice crystals from forming.
My Setup Checklist
I like a short checklist before starting.
| Step | Check | Ready sign |
|---|---|---|
| 1 | Freeze bowl | Fully frozen |
| 2 | Ice cream base | Well chilled |
| 3 | Bowl placement | Stable and level |
| 4 | Dasher | Seated inside |
| 5 | Drive assembly | Correctly attached |
| 6 | Mixer head | Fully lowered |
| 7 | Mixer speed | Stir |
| 8 | Ice cream base | Added after start |
| 9 | Churn | Smooth and steady |
| 10 | Finish | Move ice cream to freezer |
This list helps me avoid the small mistakes that can ruin a batch.
How Long Should You Churn?
KitchenAid says the attachment generally churns ice cream for about 20 to 30 minutes. (kitchenaid.com)
The exact time can vary.
Your recipe matters.
The starting temperature matters too.
The room temperature can also play a role.
I watch the texture more than the clock.
When the ice cream looks like soft serve, I know it is close.
If I want a firmer scoop, I move it to an airtight container and freeze it for about 2 to 4 hours. KitchenAid recommends this range for a firmer texture. (kitchenaid.com)
Common Setup Mistakes I Avoid
A few errors come up again and again.
Using a Warm Bowl
If the bowl is not fully frozen, the ice cream may stay soft.
I would rather wait another day than waste the base.
Adding the Base Too Soon
Never pour the base into a still dasher.
Start the mixer first.
Using High Speed
High speed is not better here.
Keep the mixer on Stir.
Leaving the Bowl Out
The bowl begins to warm as soon as it leaves the freezer.
I take it out only when all parts are ready.
Overfilling the Bowl
KitchenAid says the initial batter volume should not exceed 46 ounces, or about 1.4 liters, for a 2-quart batch. (producthelp.kitchenaid.com)
Leaving room helps the mixture churn properly.
What I Do After Churning
Once the ice cream reaches a soft-serve texture, I turn the mixer off.
Then I remove the attachment.
I transfer the ice cream to an airtight container.
I do not store hard ice cream in the freeze bowl.
KitchenAid warns that hard ice cream can damage the bowl if you try to remove it with metal or other hard tools. (kitchenaid.com)
I use a soft silicone spatula instead.
Then I place the container in the freezer.
That gives the ice cream time to firm up.
FAQs
How do I attach the KitchenAid ice cream maker?
Place the frozen bowl, add the dasher, attach the drive unit, then lower the head. Learn more about KitchenAid setup.
Does the KitchenAid ice cream bowl need to be frozen first?
Yes. Freeze it for 24 hours when you can. The bowl must be fully frozen. Learn more about freeze time.
Should the mixer run before I add the ice cream base?
Yes. Start it on Stir first, then pour in the cold base. Learn more about safe ice cream making.
Can I use a high mixer speed for ice cream?
No. KitchenAid recommends Stir for this attachment. High speed may slow the freeze. Learn more about mixer speed.
How long should KitchenAid ice cream churn?
Most batches take about 20 to 30 minutes. Freeze it longer for a firm scoop. Learn more about ice cream tips.
Final Takeaway
Learning how to attach ice cream maker kitchenaid felt harder before I knew the part order. Now I keep it simple. Freeze the bowl well. Chill the base. Fit the bowl and dasher. Add the drive unit. Start on Stir. Then pour in the base. Those small steps make the whole task feel calm. As the fading light hits my kitchen wall, I hear the soft sound of my keyboard. I can almost taste that first cold scoop.