
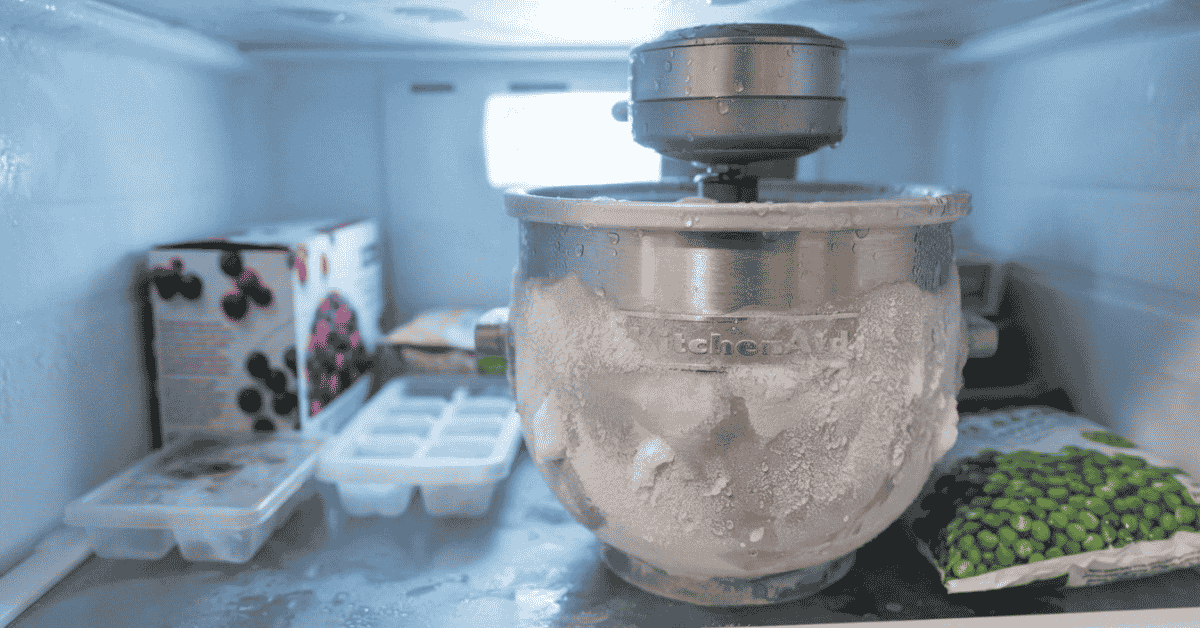
how long to freeze kitchenaid ice cream maker depends on the bowl model. Learn the right chill time, freezer tips, and easy steps today.
How long to freeze kitchenaid ice cream maker is the key to smooth homemade ice cream. I learned this after one soft batch. The bowl looked cold, but it was not ready. KitchenAid says the freeze bowl must be fully frozen before use. Its guidance lists at least 16 hours, while newer product pages advise 24 hours. I will explain both, plus freezer tips and simple checks. Read on before your next scoop.
How Long Should a KitchenAid Ice Cream Bowl Freeze?
For the safest bet, freeze the bowl for 24 hours before use.
KitchenAid’s current product pages for its ice cream maker attachment say to allow the bowl to freeze for 24 hours. Its newer how-to guide also tells users to keep the bowl in the freezer for 24 hours before starting.
Yet there is another number you may see.
KitchenAid support pages and manuals often state at least 16 hours. The brand says the bowl should be completely frozen, with the back of the freezer being the best spot.
So, if you are unsure, I would use the simple rule below:
16 hours is the minimum in many KitchenAid instructions.
24 hours is the better target for more reliable results.
That extra time gives the bowl a better chance to freeze all the way through.
Why Does the Bowl Need So Much Time?
The KitchenAid ice cream maker uses a special double-walled freeze bowl. Liquid inside the bowl walls gets very cold. That stored cold helps freeze the ice cream base as the dasher turns.
The bowl is not like a thin metal mixing bowl.
It needs enough time for the cold to reach the liquid inside its walls. If that liquid is not fully frozen, the bowl cannot pull enough heat from the ice cream base.
I found this easy to understand after thinking about the bowl itself.
The outside may feel cold quite soon. That does not prove the inside is frozen.
A fully frozen bowl has much more cold stored up. That cold is what your ice cream needs.
16 Hours or 24 Hours?
This can seem confusing because KitchenAid uses both times in its guidance.
The difference is worth knowing.
| Freeze time | My view | Best use |
|---|---|---|
| 8 hours | Too short to trust | Avoid |
| 12 hours | Still risky | Avoid if possible |
| 16 hours | KitchenAid minimum in some guides | Can work if fully frozen |
| 24 hours | Best simple target | Recommended |
| 36+ hours | Fine if stored well | Great for planned use |
| Always frozen | Most handy | Best for repeat batches |
KitchenAid’s product page for the KICA0WH attachment says to freeze the bowl for 24 hours.
Its current KSMICM product page also gives the same 24-hour advice.
At the same time, KitchenAid’s product help says the bowl should be stored in the coldest part of the freezer for at least 16 hours.
That is why I would not plan around the 16-hour mark if I have a choice.
Twenty-four hours is easy to remember.
My Favorite Trick Is Keeping the Bowl Frozen
This changed my whole approach.
I used to think I needed to plan ice cream the day before. Now, if I have freezer space, I would keep the freeze bowl there.
KitchenAid itself says keeping the bowl in the freezer gives you the flexibility to make frozen desserts whenever you want.
That means the bowl is always ready.
I like this plan for weekends. I can make a base in the morning, chill it, and churn it later.
There is no last-minute race to freeze the bowl.
The only downside is freezer space. The bowl is fairly large, so small freezers may make this harder.
Put the Bowl in the Coldest Part
Freezer placement matters.
KitchenAid recommends storing the freeze bowl toward the back of the freezer, where temperatures tend to be coldest.
I would avoid the freezer door.
The door warms each time it opens. That makes it a poor spot for a bowl that needs deep, steady cold.
Instead, I would use:
- The back of the freezer
- A flat shelf
- A spot away from the door
- The coldest safe setting
KitchenAid also says setting the freezer to its coldest setting can help the bowl make firmer ice cream faster.
The bowl should sit flat if your freezer allows it.
How Can I Tell If the Bowl Is Fully Frozen?
This is where I would be careful.
Do not rely only on how cold the outside feels.
KitchenAid says the bowl must be completely frozen to make ice cream or other frozen desserts.
Some older guidance suggests checking the bowl by gently shaking it. If you hear liquid moving inside, it is not frozen enough.
I would treat that as a useful check.
If you hear a slosh, give it more time.
If you do not hear movement, that is a better sign. Still, freezer temperature and bowl time matter too.
For a planned batch, I would simply freeze it for 24 hours.
That removes most of the guesswork.
What Happens If You Freeze It for Only 8 Hours?
I would not count on it.
Eight hours may sound long. But the bowl needs to freeze all the way through.
A freezer can also vary in temperature. A busy freezer may warm more often. A nearly full freezer may behave differently from a small one.
The result can be soft ice cream.
You may also notice that the mixture takes longer to thicken.
That is not always a recipe problem.
The bowl may simply not have enough stored cold.
If I had only eight hours, I would rather wait than waste the cream, milk, and other ingredients.
What Happens If the Bowl Is Not Cold Enough?
The biggest issue is texture.
The ice cream may stay too soft during the churn.
It may also take longer to reach the right point.
KitchenAid says its attachment usually churns ice cream for around 20 to 30 minutes.
But that time assumes the bowl is properly frozen and the base is ready.
If the bowl is too warm, the churn time cannot fix the missing cold.
I learned to think of the freeze bowl as part of the recipe.
The ingredients matter.
The base temperature matters.
The bowl temperature matters too.
Chill the Ice Cream Base as Well
A cold bowl works best with a cold base.
KitchenAid advises preparing the ice cream batter ahead of time and chilling it. For cooked bases, the mixture should cool fully before it goes into the freeze bowl.
This makes sense.
A warm base adds more heat to the frozen bowl.
A cold base starts with less heat to remove.
I would make the base first. Then I would put it in the fridge while the bowl stays in the freezer.
That way, both parts are ready at the same time.
Assemble the Mixer Before the Base Goes In
There is one small step I would not skip.
Start the mixer before adding the ice cream base.
KitchenAid warns that pouring the batter into a stationary freeze bowl can make the base freeze too fast. That can lock the dasher and may cause damage.
The brand says to set the mixer to Stir before adding the base.
My order would be:
- Take out the frozen bowl.
- Place the dasher inside.
- Attach the bowl and drive unit.
- Start the mixer on Stir.
- Pour in the cold base.
- Churn for about 20 to 30 minutes.
The freeze bowl starts to thaw once removed from the freezer, so KitchenAid says to use it right away.
That small detail can make a real difference.
How Long Does the Ice Cream Need After Churning?
The bowl freeze time and the final freeze time are two different things.
The bowl needs deep freezing before churning.
After churning, the ice cream may have a soft-serve texture. KitchenAid says you can serve it at once or freeze it for 2 to 4 hours for a firmer, scoopable texture.
I like the two-step idea.
The bowl does the first freeze.
The freezer does the final firm-up.
Do not leave the finished ice cream in the freeze bowl for long-term storage. KitchenAid warns that hard ice cream can damage the bowl when you try to remove it with hard or metal tools.
Move it to an airtight freezer container instead.
A Simple Timeline I Would Use
If I wanted ice cream on Saturday night, I would start on Friday.
Friday night: Put the clean freeze bowl in the back of the freezer.
Saturday morning: Make the ice cream base.
Saturday afternoon: Chill the base fully.
Saturday evening: Assemble the attachment.
Then: Set the mixer to Stir and add the cold base.
After 20 to 30 minutes: Check the texture.
For firmer ice cream: Move it to an airtight container and freeze for 2 to 4 hours.
This plan leaves little room for rushed steps.
Common Mistakes I Would Avoid
A few errors can ruin an otherwise good batch.
- Freezing the bowl for too little time
- Keeping it near the freezer door
- Using a warm ice cream base
- Letting the bowl sit out too long
- Adding the base before the mixer runs
- Using a faster mixer speed
- Overfilling the bowl
- Storing hard ice cream in the freeze bowl
KitchenAid says faster mixer speeds can actually slow the freezing process.
It also says the initial batter volume should not exceed 46 ounces, or about 1.4 liters, for a 2-quart batch.
Those details are easy to miss.
FAQs
How long should I freeze my KitchenAid ice cream maker bowl?
Freeze it for 24 hours when you can. Some KitchenAid guides list 16 hours as the minimum. Learn more about bowl care.
Can I use the KitchenAid ice cream bowl after 16 hours?
Yes, if it is fully frozen. For a safer plan, give it 24 hours. Learn more about freeze time.
Can I leave my KitchenAid ice cream bowl in the freezer?
Yes. KitchenAid says keeping it frozen gives you more freedom to make ice cream. Learn more about storage tips.
Should I put the freeze bowl at the back of my freezer?
Yes. KitchenAid recommends the back, where the freezer is often coldest. Learn more about bowl setup.
How long does KitchenAid ice cream take to churn?
Most batches take about 20 to 30 minutes. A firm texture may need 2 to 4 more hours in the freezer. Learn more about ice cream making.
Final Takeaway
For me, the best answer to how long to freeze kitchenaid ice cream maker is simple. Give the bowl 24 hours when you can. Some KitchenAid guides say 16 hours is enough if the bowl is fully frozen. Yet 24 hours gives me more peace of mind. I keep the bowl at the back of the freezer. As the fading light hits the counter, I hear the soft sound of my keyboard. Now I know the cold bowl is half the recipe.