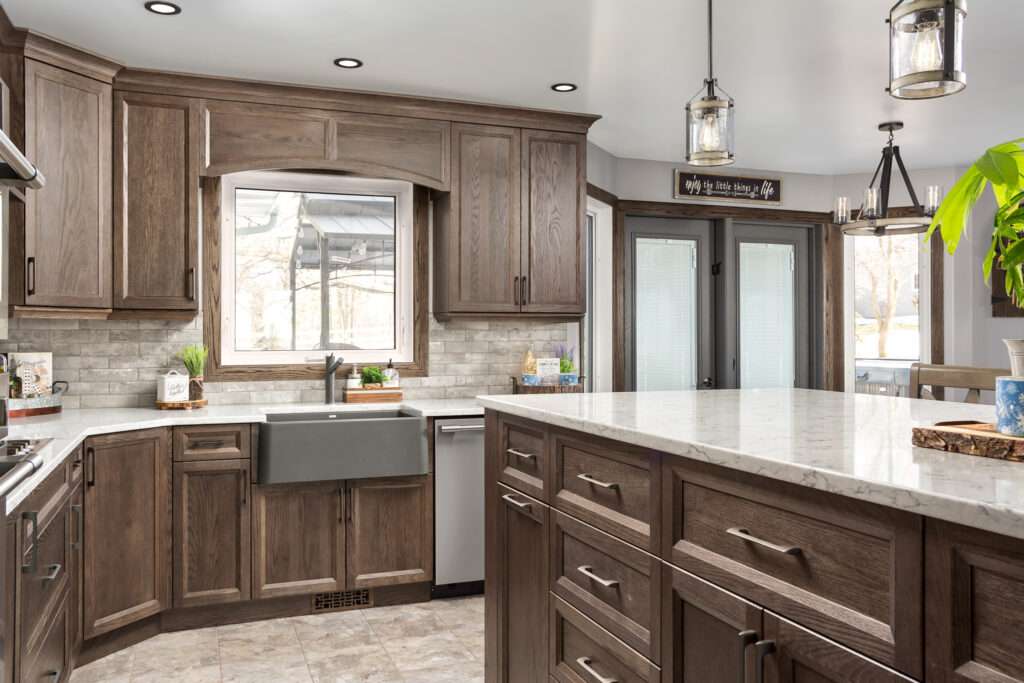
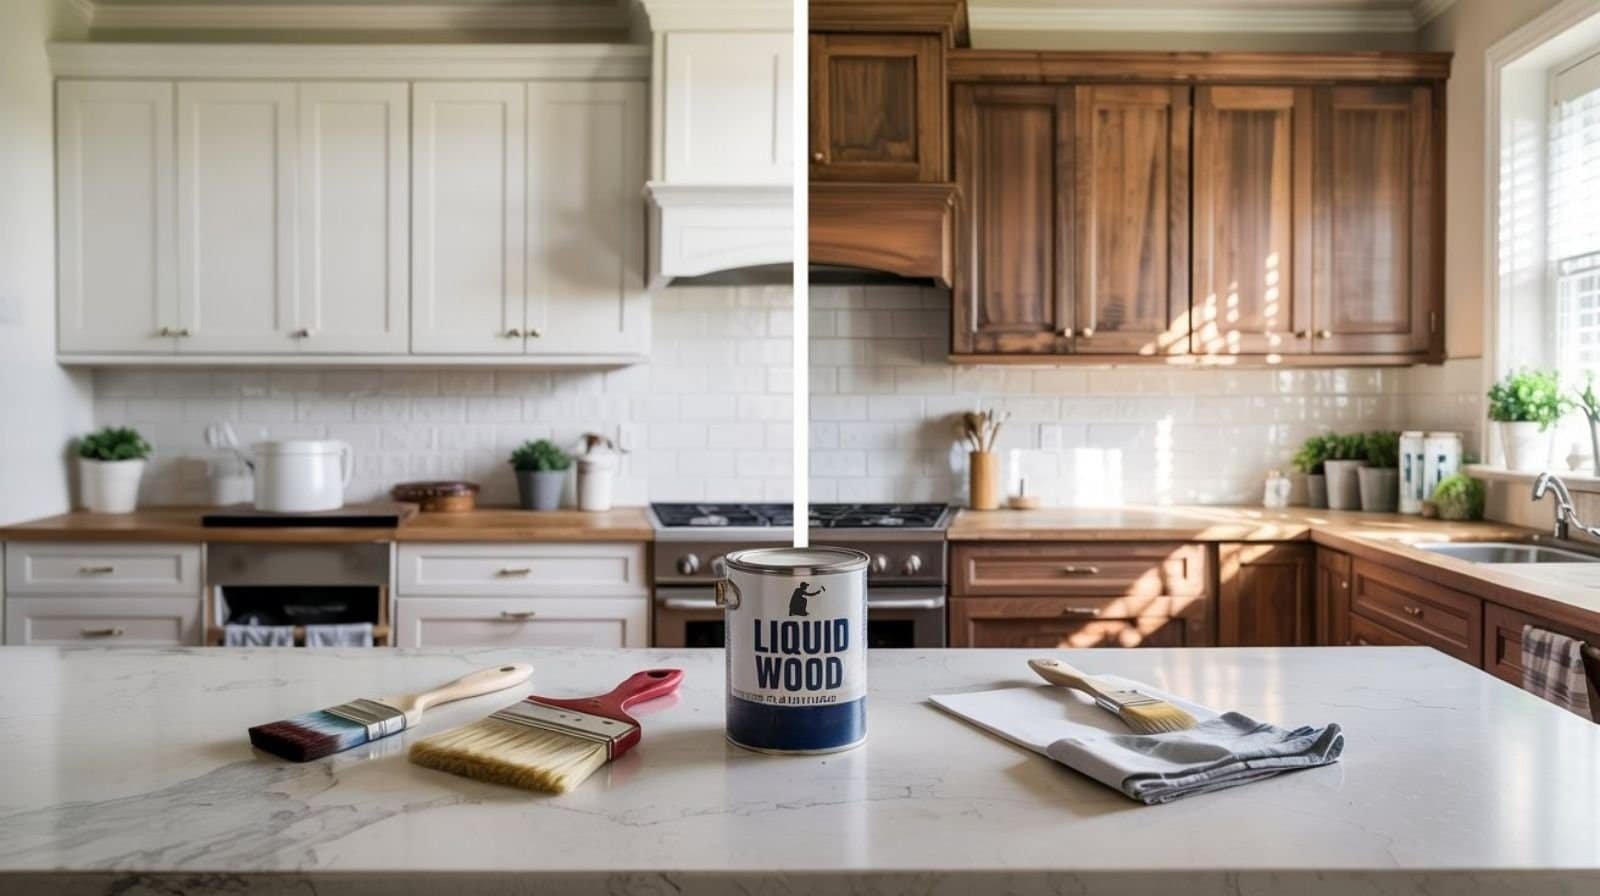
Liquid wood kitchen cabinets are cabinets treated with a coating or refinishing product designed to create the look of real wood. The term can also describe a particular wood-effect coating system, so check the product label before you start. It may offer a way to update dated cabinet doors without replacing the entire kitchen, but the result depends on the cabinet surface, prep work, product, and application method.
In many American homes, kitchen cabinets take up a large share of the room’s visible space. Honey oak doors, worn laminate fronts, and dark brown cabinets can make a kitchen feel dated even when the layout still works. Replacing every cabinet can mean a large bill, extra waste, and days of work. Refinishing the existing doors may be a more practical option when the boxes remain sound.
Liquid wood is a term worth checking closely before buying anything. It does not always mean the same thing as liquid wood filler, wood-look paint, a wood veneer, or a standard cabinet stain. Some products are designed to create a wood-like finish over a prepared surface, while other products sold under similar terms may have different uses. Read the manufacturer’s instructions to confirm that the coating suits your cabinet material.
This guide explains what liquid wood kitchen cabinets are, how the finish differs from other cabinet treatments, and what to consider before applying it. It also covers preparation, application, common mistakes, cleaning, and the limits of a wood-effect finish. The goal is to help you decide whether this method makes sense for your kitchen before you spend money on supplies.
Liquid wood kitchen cabinets are existing cabinets finished with a product or coating system intended to create a wood-like appearance. Rather than installing new solid wood doors, a homeowner may use a suitable coating to change the visible surface of the doors and drawer fronts. The exact process depends on the product being sold as liquid wood.
The phrase can be confusing because it is not a universal technical name for one standardized cabinet treatment. A product may be a wood-effect coating, a decorative refinishing system, a filler, or another material with a similar name. These products are not interchangeable. The label, technical data sheet, and application guide are the best places to confirm what a particular product can do.
The main appeal is visual. A plain painted door may be changed to a surface with a wood-grain pattern, or an old finish may be replaced with a warmer, more natural-looking tone. However, the result should be viewed as a decorative finish rather than proof that the cabinet is made from solid wood.
Source: artofit.org
Existing cabinets remain in place
When the cabinet boxes and doors are sound, refinishing may allow you to keep the existing layout and avoid the cost of a full replacement.
The surface may look like wood
Color, grain marks, and texture can imitate timber, but the realism depends on the coating system and application technique.
The underlying material does not change
A wood-effect coating does not turn MDF, laminate, or particleboard into solid wood.
What Liquid Wood Does Not Mean
Liquid wood should not be confused with ordinary wood filler. Wood filler is generally used to fill holes, cracks, or other small defects before a surface is painted or finished. It is not necessarily designed to cover an entire cabinet door or create a decorative grain pattern.
It is also different from wood stain. Traditional stain changes the color of a compatible wood surface and usually relies on the material’s existing grain. A wood-effect coating can create a grain appearance on a suitable prepared surface, including some surfaces that do not have natural wood grain.
Finally, liquid wood is not the same as a thin wood veneer. Veneer is a layer of real wood attached to a substrate. A decorative coating can imitate wood visually, but it does not provide the same surface as a real wood layer.
Wood filler
Used mainly to fill defects. Check whether the specific filler is suitable for the size and type of repair.
Wood stain
Used to change the color of compatible wood, with results influenced by the species, grain, and previous finish.
Wood veneer
A thin layer of real wood that can provide natural grain, although it requires suitable bonding and edge care.
Why Homeowners Consider This Finish
A cabinet makeover can be useful when the kitchen functions well but its color no longer suits the room. For example, a homeowner may want a light oak appearance instead of an orange-toned finish, or a warmer wood effect instead of flat white doors.
Keeping serviceable cabinets can also reduce demolition and material waste. Yet a coating is not always the cheapest option once you include cleaners, primers, specialty products, tools, replacement hinges, and the time needed to prepare every surface. Compare the complete cost with painting, veneer, replacement doors, and new cabinets before choosing.
A change in style
A wood-like finish may suit kitchens that need a warmer or more natural appearance.
Less demolition
Sound cabinet boxes may stay in place while the doors and drawer fronts receive a new finish.
A smaller project scope
Refinishing only visible doors and drawer fronts may be an option when the cabinet interiors are in good condition.
Which Cabinet Materials Can Accept a Liquid Wood Finish?
The cabinet material is one of the first things to identify. A finish that bonds well to sanded wood may not bond to a slick laminate door. Before buying a product, check whether the manufacturer lists your exact substrate and whether it requires a special primer.
Open a door and inspect its edge, back, and any exposed area near a hinge. Solid wood often shows grain along the edges. MDF usually has a uniform, fine-textured core. Particleboard may show visible wood chips, while laminate often has a thin decorative layer over an engineered wood core. Veneer is real wood, but its surface layer can be very thin.
The condition of the material matters as much as its type. A sound MDF door may be a good candidate for a compatible coating system, while a swollen MDF door near a sink may need replacement. A peeling laminate surface also requires attention before any decorative finish is considered.
Source: hunker.com
Solid wood
Often accepts a range of compatible refinishing systems after suitable cleaning and preparation. Existing varnish, paint, wax, or oil can affect adhesion.
MDF
Can accept suitable coatings when properly prepared. Exposed edges may absorb products differently from the smooth faces, and swollen MDF is difficult to restore.
Laminate
Needs a system specifically approved for the surface. A slick factory finish may require a specified bonding primer or other preparation.
Wood veneer
Can be refinished when firmly attached and in sound condition. Aggressive sanding can cut through the thin wood layer.
Thermofoil
A thin plastic film bonded to a cabinet substrate. Heat damage, peeling, and product compatibility can make refinishing difficult.
How to Check Your Cabinets Before Starting
Look closely at corners, door edges, and the area around the sink. Check for bubbles, peeling film, cracks, soft spots, swollen edges, and loose veneer. Press gently on damaged areas without forcing the material, and inspect whether the surface is firm.
Clean a small test area using a method approved for the cabinet finish. If the surface remains greasy, chalky, or unstable, address that issue before moving forward. A decorative coating cannot repair a weak substrate or make loose laminate stay attached.
If you cannot identify the surface, take clear photos of the door face, edge, and back. A cabinet supplier or refinishing professional may be able to identify the material and recommend a compatible system.
Proceed with a test
The doors are firm, the finish is stable, and the chosen product explicitly supports the surface.
Repair before coating
Small defects or loose hardware need attention, but the underlying material remains sound.
Consider replacement
The door is swollen, crumbling, badly delaminated, or damaged by repeated moisture exposure.
Liquid Wood vs. Paint, Stain, Veneer, and Replacement
The best cabinet update depends on the look you want, the existing material, your budget, and how much work the doors need. Liquid wood is worth considering when you want a wood-like appearance, but it is not automatically better than paint or veneer.
Cabinet paint is often the more direct route to a smooth, single-color finish. Stain makes more sense when the existing wood can support the desired color change. Veneer offers real wood grain but involves careful surface preparation, cutting, bonding, and edge finishing. Replacement may be the more practical answer when doors are badly damaged or the layout no longer works.
Use the following comparison as a starting point, not as a promise of performance. Actual results depend on the selected product, cabinet construction, preparation, and conditions in the kitchen.
Source: www.pinterest.com
Liquid wood or wood-effect coating
Consider it when a decorative wood appearance is the main goal and the product is approved for the cabinet surface.
Cabinet paint
Consider it when you want a consistent solid color and can use a suitable cabinet primer and finish.
Traditional stain
Consider it when the existing wood is suitable for staining and its natural grain is worth keeping.
Wood veneer
Consider it when a real wood surface matters and the substrate can support the veneer system.
New doors or cabinets
Consider replacement when the doors are damaged, the boxes are failing, or you want a different cabinet layout.
Which Option Usually Makes the Most Sense?
For a homeowner with sound, flat cabinet doors who wants a wood-like look, a compatible liquid wood system may be worth testing. For someone who wants navy blue, warm white, or another solid color, cabinet paint is often easier to match across doors and trim.
For real wood doors with an attractive grain, stain or a clear finish may preserve more of the original character. For damaged doors or cabinets that have absorbed water, replacement may prevent repeated repairs and coating failure.
A sample is more useful than a color picture alone. Finish samples may look different under warm kitchen bulbs, cool daylight, and nearby countertop lighting. Test the sample in the actual room before committing to every cabinet.
Choose by appearance
Decide whether you want visible artificial grain, natural grain, or a uniform painted surface.
Choose by condition
Do not spend time refinishing doors with serious moisture damage or failing structural parts.
Choose by full cost
Include preparation, primer, finish, protective coating, hardware, tools, and possible professional labor.
How to Apply Liquid Wood to Kitchen Cabinets
A good cabinet finish starts before the first coat goes on. The correct procedure depends on the exact liquid wood product, so use its label and technical instructions as the primary guide. The steps below describe a general refinishing workflow, not a universal formula for every product sold under this name.
Plan to work on a small test panel or spare door first. That trial helps you check adhesion, color, grain appearance, drying behavior, and compatibility with the final protective finish. It also gives you a chance to find problems before the whole kitchen is covered.
Set aside enough time for cleaning, drying, preparation, coating, and curing. Dry to the touch does not always mean ready for hardware or normal kitchen use. Follow the stated recoat and full-cure times rather than rushing the project.
Source: roomrevivalstudio.com
Basic supplies
Depending on the system, you may need a suitable cleaner, clean cloths, sanding materials, a compatible primer, applicators, the decorative product, a protective topcoat, masking supplies, and personal protective equipment listed by the manufacturer.
A clear work area
Choose a stable work surface away from food, children, pets, open flames, and sources of ignition when the product requires those precautions.
A complete product system
Check that the cleaner, primer, decorative coating, and topcoat can be used together. Do not assume that unrelated products will bond correctly.
Step 1: Remove Doors, Drawers, and Hardware
Remove the cabinet doors and drawer fronts when practical. Take off handles, knobs, and hinges so the coating does not bridge moving parts or leave thick edges around the hardware. Label each door and its hardware to make reassembly easier.
Keep screws and small parts in labeled bags. If you plan to reuse the hinges, check for rust, bent parts, and worn mounting holes while the doors are off. A fresh finish will not correct a loose hinge or a misaligned door.
Label each piece
Use a simple numbering system to match each door to its original cabinet opening.
Protect the kitchen
Cover countertops, floors, appliances, and nearby surfaces before cleaning or sanding.
Step 2: Clean Away Grease and Dirt
Kitchen cabinets collect cooking oil, hand marks, dust, and residue from cleaners. A new coating may fail to bond if those contaminants remain on the surface. Pay special attention to the areas around handles, above the stove, and near the trash bin.
Use a cleaner approved for the existing finish and follow its dilution and rinsing directions. Avoid soaking MDF, particleboard, veneer edges, or damaged laminate. Allow the doors to dry fully before moving to the next step.
If the surface still feels oily or shows residue after cleaning, repeat the approved cleaning process. Do not use a stronger solvent simply because it seems faster; it may damage the old finish or the cabinet substrate.
Use clean cloths
Change cloths as they pick up grease so you do not spread residue over the door.
Let the surface dry
Trapped moisture can interfere with adhesion, especially around exposed engineered-wood edges.
Step 3: Repair Defects and Prepare the Surface
Inspect the clean doors for dents, chipped edges, loose veneer, and peeling coatings. Repair minor defects with materials compatible with the cabinet substrate and finish system. Larger areas of swelling or delamination may call for replacement rather than patching.
Sand only as directed by the product manufacturer. Some surfaces need light abrasion to improve adhesion, while others may require a specific bonding primer or a different preparation method. Avoid aggressive sanding on thin veneer or plastic film that could be damaged by abrasion.
Remove sanding dust with a method approved for the coating system. A clean, dry surface gives the primer and decorative layer a better chance of forming an even film.
Do not sand through veneer
Thin real-wood layers can be damaged quickly, exposing the substrate beneath.
Do not coat loose laminate
Repair or replace unstable material first. A new coating will not restore the original bond.
Step 4: Apply Primer When Required
Primer helps a compatible coating system bond to the prepared cabinet surface and can help control uneven absorption. Whether primer is needed, and which kind to use, depends on the liquid wood product and the substrate.
Apply the specified primer in the recommended film thickness. Thick coats can take longer to dry and may leave marks or uneven texture. Allow the primer to dry or cure for the stated period before adding the decorative finish.
Do not substitute an ordinary wall primer unless the manufacturer confirms that it is suitable for the cabinet material and the coating system. Cabinet doors are handled often and may face more abrasion and cleaning than a typical wall.
Check compatibility
Confirm the primer works with the old finish, substrate, decorative product, and intended topcoat.
Follow recoat times
Applying the next layer too soon can affect adhesion, leveling, or curing.
Step 5: Build the Wood-Like Appearance
Apply the liquid wood or wood-effect layer using the method stated in the product instructions. Depending on the system, the process may involve a brush, roller, special applicator, or a tool used to form a grain pattern. There is no single grain technique that works for every coating.
If the system calls for a grain pattern, practice on a sample first. Work at a steady pace and use consistent pressure to avoid abrupt changes in the marks. Study how the pattern looks from normal viewing distance rather than judging it only from a few inches away.
Color and grain should suit the kitchen as a whole. A warm oak-like finish may work well with cream walls and neutral counters, while a deeper brown may pair with light walls and simple hardware. These are design choices, not fixed rules, so test samples under the room’s actual lighting.
Work in manageable areas
Follow the product’s working time and coverage guidance to avoid visible joins or uneven grain.
Check edges and corners
Thin or heavy areas can be more visible at the edges of raised panels and around routed details.
Keep the sample
Save a finished test piece as a reference for color, texture, and future touch-ups.
Step 6: Add a Protective Finish if Specified
Some decorative systems require a compatible protective topcoat, while others use a different finishing method. Check the product instructions before adding a clear coat. An unapproved topcoat can change the color, soften the underlying finish, or interfere with adhesion.
Choose a finish intended for the expected use of kitchen cabinets. Door fronts and drawer pulls experience frequent contact, while surfaces near a sink may face repeated splashes and cleaning. The product documentation should state the intended applications and any limitations.
Apply the protective layer at the specified thickness and allow the full curing period before normal use. A surface that feels dry may still be too soft for heavy handling, stacked doors, or regular cleaning.
Do not mix systems at random
Use only topcoats that the manufacturer identifies as compatible with the decorative finish.
Respect the cure time
Keep doors protected from impact, moisture, and cleaning until the coating reaches the stage specified for use.
Step 7: Reinstall and Inspect the Cabinets
After the finish has cured enough for handling, reinstall the doors and drawer fronts according to the product directions. Use the labels you made during removal, and avoid dragging hardware across the fresh surface.
Open and close each door to check alignment, clearance, and hinge movement. Look for tacky areas, missed edges, rough patches, and places where the coating has built up around screw holes. Correct problems only after confirming that the finish is ready for touch-up.
A successful result should look consistent from normal viewing distance, with no obvious peeling, sticky areas, or uncoated spots. If the coating lifts during a gentle check or remains soft beyond the stated curing period, pause and contact the manufacturer before applying more product.
Check door movement
Make sure doors do not rub against one another or the cabinet frame.
Keep early use gentle
Avoid harsh cleaners, steam, heavy contact, and repeated moisture until the coating is fully ready for use.
How Much Do Liquid Wood Kitchen Cabinets Cost?
The cost of a liquid wood cabinet project depends on the product system, cabinet count, door size, condition of the existing finish, and amount of preparation required. There is no reliable single price for every kitchen, and the term liquid wood covers products that may differ in coverage and use.
To compare options, calculate the total cost of materials rather than looking only at the price of one container. A small product package may appear affordable but cover too little area for the job. The manufacturer’s stated coverage rate and the number of coats will help you estimate how much to buy.
Labor can also change the total. Removing doors, cleaning years of grease, repairing damage, creating a grain pattern, and waiting through several drying stages can take much longer than painting a simple, flat surface. A professional quote should state what preparation and finishing work it includes.
Source: www.pinterest.com
Decorative coating
Check package size, stated coverage, number of coats, and whether the product is sold alone or as part of a complete system.
Primer and topcoat
Include compatible primers and protective finishes if the instructions require them.
Preparation supplies
Budget for cleaning products, sanding materials, repair supplies, masking, and suitable applicators.
Hardware
Allow for replacement knobs, pulls, hinges, or screws if the existing parts are worn or do not suit the new look.
Labor and repairs
Include the cost of professional preparation or door replacement when the existing surface is damaged.
A Simple Way to Estimate Materials
Start by measuring the faces of all doors and drawer fronts. For a flat rectangular panel, multiply its width by its height to find the face area. Add the areas together and convert the result to the units used on the product label.
For a hypothetical example, suppose the combined face area is 40 square feet and the product states a coverage rate of 100 square feet per gallon for one coat. One coat would require about 0.4 gallon for those faces alone. If the system needs two coats, the basic estimate becomes 0.8 gallon before allowing for waste, edges, texture, and other surfaces.
This calculation is only an illustration. Actual coverage can vary with substrate porosity, applicator, film thickness, and the specific product. Use the manufacturer’s coverage guidance and leave a reasonable allowance rather than relying on the example as a purchase quantity.
Measure all visible surfaces
Include the cabinet sides or frames if they will also receive the finish.
Multiply by the coat count
Use the number of coats stated in the instructions for each layer of the system.
Compare full project costs
Price the complete refinishing system against cabinet paint, replacement doors, veneer, or new cabinets.
Common Problems and How to Fix Them
Most cabinet refinishing problems begin with poor surface preparation, incompatible products, incorrect application, or insufficient curing time. A defect should be diagnosed before another coat is added. Covering a failing layer can make the repair harder and waste more material.
Check the affected area, compare it with the product instructions, and note when the problem appeared. For example, peeling soon after application may point to contamination or poor adhesion, while a soft finish may need more time or may indicate a product or application issue. These signs are clues, not definitive diagnoses.
If the coating continues to fail despite following the instructions, stop work and contact the manufacturer or a qualified refinisher. Do not keep adding primer, solvent, or topcoat without knowing whether the products are compatible.
Source: www.pinterest.com
Peeling or lifting
Possible causes include grease, a glossy surface that was not prepared as required, loose old coatings, or incompatible materials. Find the cause before repairing the affected area.
Uneven color
Differences may result from inconsistent application, varied absorption, lighting, or a surface that was not prepared uniformly. Check the sample and product instructions before applying another coat.
Visible grain that looks artificial
The pattern may be too dark, too regular, or out of scale with the door. Practice on a sample and adjust the technique only as the product allows.
Sticky or soft finish
Possible causes include insufficient cure time, excessive film thickness, unsuitable conditions, or incompatibility. Follow the technical guidance and seek product-specific advice.
Bubbles or rough texture
These may occur when the surface contains contamination, the coating is applied incorrectly, or the substrate releases trapped air. Do not sand or recoat until the product is ready for that step.
When a Cabinet Door Should Not Be Refinished
Some cabinet damage is more than a surface problem. MDF or particleboard that has swollen after repeated leaks may have lost its shape and strength. A coating will not restore the original structure, even if it briefly hides the damaged area.
Replace or professionally assess doors with crumbling edges, badly detached veneer, extensive peeling film, or signs of ongoing moisture damage. Find and fix any leak before installing new doors or refinishing the surrounding cabinets.
If the existing finish is old and its composition is unknown, avoid dry sanding until you have considered whether hazardous material testing is needed. Older coatings may contain lead, and the age and history of the home can affect the risk. In the United States, follow applicable lead-safe work requirements and consult qualified professionals when the risk is uncertain.
Stop if moisture damage is active
Fix the source of water before deciding whether a damaged panel can be repaired or must be replaced.
Do not disturb unknown hazardous coatings
Seek appropriate testing or professional guidance before sanding or scraping a suspect old finish.
Use the correct safety equipment
Follow the product safety data sheet for ventilation, gloves, eye protection, respiratory protection, storage, and disposal.
How to Clean and Maintain the New Finish
Gentle cleaning and prompt attention to spills can help keep refinished cabinet doors looking neat. The right care method depends on the decorative product and topcoat, so follow the maintenance instructions for the complete system rather than assuming every finish tolerates the same cleaner.
Start with a soft cloth and a mild cleaning method approved by the manufacturer. Avoid abrasive pads, harsh scouring powders, strong solvents, and steam unless the product documentation expressly permits them. Aggressive cleaning can dull the surface, scratch the finish, or weaken its protective layer.
Wipe splashes near the sink and dishwasher rather than allowing water to sit on door edges. Check the cabinet finish from time to time for chips, lifting, or worn areas near handles. Small defects may be easier to address before moisture or dirt reaches the substrate.
Source: hunker.com
Use a gentle cleaning method
Follow the coating maker’s advice on cleaners, dilution, wiping, and rinsing.
Keep water away from vulnerable edges
Wipe up spills and investigate repeated moisture around sinks, dishwashers, and plumbing.
Avoid harsh abrasion
Scrubbing pads and abrasive cleaners can alter the sheen or damage the protective layer.
Repair chips early
Use a compatible repair product after confirming that the coating is ready for maintenance.
How Long Will Liquid Wood Cabinets Last?
There is no single lifespan that applies to every liquid wood cabinet finish. Service life depends on the specific product, the condition of the original doors, the quality of preparation, the thickness and compatibility of the coating layers, and how the kitchen is used.
Cabinets that receive frequent handling, cleaning, steam, or water exposure may show wear sooner than lightly used doors. A finish near a sink may also face different conditions from one on a pantry cabinet across the room.
Ask the manufacturer for documented durability information, intended uses, care instructions, and any warranty terms. Treat broad claims about lasting for a fixed number of years with caution unless they apply to the exact system and conditions in question.
Preparation matters
A durable product can still fail if the original surface is dirty, unstable, or incompatible.
Kitchen conditions matter
Heat, humidity, water, cleaning, and repeated contact affect how a finish performs.
Maintenance matters
Following care instructions and repairing damage early may help preserve the surface.
Is Liquid Wood a Good Choice for Your Kitchen?
Liquid wood may be a reasonable choice when the cabinets are structurally sound, the existing surface is compatible with the product, and a wood-like appearance is the goal. It is less appealing when the doors are swollen, the laminate is peeling, or the finish system cannot be confirmed as suitable for the substrate.
The decision also depends on the expected result. A decorative coating can imitate a wood tone or grain pattern, but it should not be chosen on the assumption that it will behave exactly like solid timber. If you want genuine wood grain and the feel of real wood, veneer or suitable solid wood doors may better meet that goal.
Before committing, compare the full project cost and the work involved. A careful sample test can show whether the color, texture, and adhesion meet your expectations. If the test fails, choosing another finish before treating the entire kitchen is usually the more sensible move.
Source: roomrevivalstudio.com
It may suit you if
Your doors are sound, you want a wood-effect look, and the selected product is approved for the existing surface.
Paint may suit you better if
You prefer a uniform color and want a simpler visual result without an artificial grain pattern.
Veneer may suit you better if
You want a surface made from real wood and are prepared for the work and care it requires.
Replacement may be wiser if
Doors have severe moisture damage, loose layers, broken edges, or defects that make a new finish unreliable.
Questions to Ask Before Buying a Product
Ask the seller or manufacturer for the exact product name, the surfaces it supports, and the full application guide. Confirm whether the coating can go over your existing finish and whether a particular primer, grain tool, or protective coat is required.
Check the stated coverage, number of coats, working time, recoat window, cure time, and cleaning guidance. Review the safety data sheet as well, especially if you will work indoors. A low product price is less useful if the system needs extra materials or requires conditions you cannot provide.
If you plan to hire a contractor, request a written description of the preparation steps, coating layers, repair work, and warranty terms. Ask to see a sample made on a similar cabinet surface, not only a photograph of a finished kitchen.
Surface compatibility
Does the manufacturer explicitly approve the product for your cabinet material and existing coating?
Complete application system
Are primer, decorative layers, and protective coatings identified, with clear instructions for each?
Safety and ventilation
Can the work be done safely in your home under the stated ventilation and protective equipment requirements?
Repair and warranty
What happens if the finish peels, changes color, or fails to cure as directed?
What the Available Evidence Can and Cannot Tell You
The term liquid wood is used inconsistently in product and home-improvement content, which makes the exact formulation important. A photograph showing a wood-like cabinet finish can illustrate a design idea, but it cannot establish the product used, the underlying cabinet material, the preparation method, or the finish’s long-term durability.
This guide provides a general explanation of cabinet refinishing decisions and a practical workflow. It does not claim that a specific liquid wood product was tested, that every cabinet material accepts the same coating, or that a particular finish will last for a set number of years. Those claims require product-specific documentation or suitable performance evidence.
The most useful next step is to verify the actual product you intend to use. Read its technical data sheet and safety data sheet, check the substrate requirements, and make a sample on the same material as your cabinet doors. If those details are unavailable, avoid relying on a product name or promotional photograph alone.
Source: www.pinterest.com
Documented product facts
Coverage, application steps, approved substrates, drying instructions, and stated limitations should come from the exact manufacturer’s documentation.
Visual examples
Photos can help with color and style ideas but do not independently prove adhesion, moisture resistance, or wear performance.
Claims that remain unestablished
Universal durability, guaranteed savings, suitability for every laminate, and a fixed service life cannot be established without specific supporting evidence.
A Practical Research Gap Map for This Topic
The most useful unresolved questions for a reader are whether a particular product works on the cabinet material at hand, how much material the job will need, and what care the finished surface requires. These questions follow directly from the decisions involved in refinishing. They are inferred next needs, not verified claims about search demand.
The supplied image list contains visual references for wood-effect cabinet makeovers, but images alone do not establish product specifications or performance. Without a verified product label, technical data sheet, and safety data sheet, exact compatibility, application conditions, and warranty terms remain unchecked.
The practical priority is to obtain product-specific evidence before starting. This prevents an attractive visual example from being mistaken for proof that the same process will work on a different cabinet surface.
Question: Will the product work on my cabinet material?
Reader stage: before buying. Basis: inferred next need from the need to identify the substrate. Competitor coverage: not checked here against three to five opened pages. Reader benefit: helps prevent adhesion failure. Evidence needed: the exact product’s approved-substrate list. Priority: high. Placement: material compatibility section.
Question: How much product will I need?
Reader stage: budgeting. Basis: inferred next need from estimating a refinishing project. Competitor coverage: not checked here against three to five opened pages. Reader benefit: improves purchasing estimates. Evidence needed: measured cabinet area, stated coverage, and coat count. Priority: high. Placement: cost section.
Question: How should the finished cabinets be cleaned?
Reader stage: after application. Basis: inferred next need from routine cabinet use. Competitor coverage: not checked here against three to five opened pages. Reader benefit: reduces the risk of damaging the finish. Evidence needed: the coating manufacturer’s care instructions. Priority: medium. Placement: maintenance section.
Question: How long will the finish last?
Reader stage: choosing a finish. Basis: inferred next need from comparing refinishing with replacement. Competitor coverage: not checked here against three to five opened pages. Reader benefit: sets realistic expectations. Evidence needed: performance data for the exact coating system and conditions. Priority: high. Placement: durability section.
Frequently Asked Questions
Q
Can you use liquid wood on laminate kitchen cabinets?
Possibly, but the answer depends on the exact product and laminate surface. Laminate often has a smooth, nonporous outer layer that can make adhesion difficult. Choose a coating system whose manufacturer explicitly approves that surface, and follow the stated cleaning, preparation, and primer requirements. Test the full system on a spare door or hidden area before treating the kitchen.
Q
Can liquid wood make MDF cabinets look like real wood?
A suitable wood-effect coating may give MDF cabinets the appearance of wood grain, but the result is decorative rather than solid timber. MDF has no natural wood grain on its smooth face, so the pattern must come from the finish or another applied layer. Check the product’s compatibility with MDF, especially the edges, and avoid refinishing panels that have swollen or crumbled from moisture.
Q
Do you need to sand kitchen cabinets before applying liquid wood?
Some coating systems require light sanding or abrasion, while others specify a different preparation method. The correct approach depends on the existing finish and the product instructions. Clean the surface first, then follow the stated preparation steps. Avoid aggressive sanding on thin veneer, plastic film, or old coatings that may contain hazardous materials.
Q
Can liquid wood kitchen cabinets resist water and heat?
Water and heat resistance vary by product and by the complete coating system. Do not assume that a wood-like appearance means the finish can withstand standing water, steam, hot cookware, or strong cleaners. Review the manufacturer’s stated limits and care instructions. Keep water away from vulnerable edges, wipe up spills, and use suitable protection near heat sources.
Q
Is liquid wood cheaper than replacing kitchen cabinets?
It may cost less when the existing cabinets are sound and only need a surface update, but savings are not guaranteed. Include the cost of the decorative product, cleaner, primer, topcoat, tools, repairs, hardware, and labor. If the doors are swollen, the cabinet boxes are failing, or the layout needs to change, replacement may provide better value over time.
Q
Can you apply a clear coat over a liquid wood finish?
Only if the product instructions permit it and identify a compatible clear coat. An unsuitable finish can change the color, cause poor adhesion, or interfere with curing. Follow the recommended recoat window and application thickness, and let the full system cure before normal use. If compatibility is unclear, ask the manufacturer before adding another layer.
Q
How do you maintain liquid wood cabinet finishes?
Use the gentle cleaning method approved by the manufacturer, wipe spills promptly, and avoid abrasive pads or harsh solvents unless the instructions permit them. Check door edges and areas around handles for chips or lifting. Repair damage with compatible materials, and investigate repeated moisture before it reaches the cabinet substrate.
✦ Wrapping Up
Conclusion
Liquid wood kitchen cabinets can offer a way to refresh a dated kitchen without replacing every door and cabinet box. The key is to understand what the product actually is, what surfaces it supports, and what kind of finish it can create. A decorative wood effect can change the look of a room, but it does not turn engineered wood or laminate into solid timber.
Start by checking the condition and material of your cabinet doors. Compare the complete refinishing cost with cabinet paint, veneer, replacement doors, and new cabinets. Then review the product instructions, follow the required safety measures, and test the entire coating system on a small sample before moving ahead.
Good preparation and realistic expectations matter more than a promising product photo. If the doors are sound and the coating is compatible, refinishing may be a practical option. If moisture damage or loose surface layers are present, repair or replacement should come first.
💡 Key Takeaway
Before buying liquid wood for your kitchen, identify the cabinet material, confirm that the exact product is approved for that surface, calculate the total materials needed, and complete a sample test that includes any required primer and protective finish.