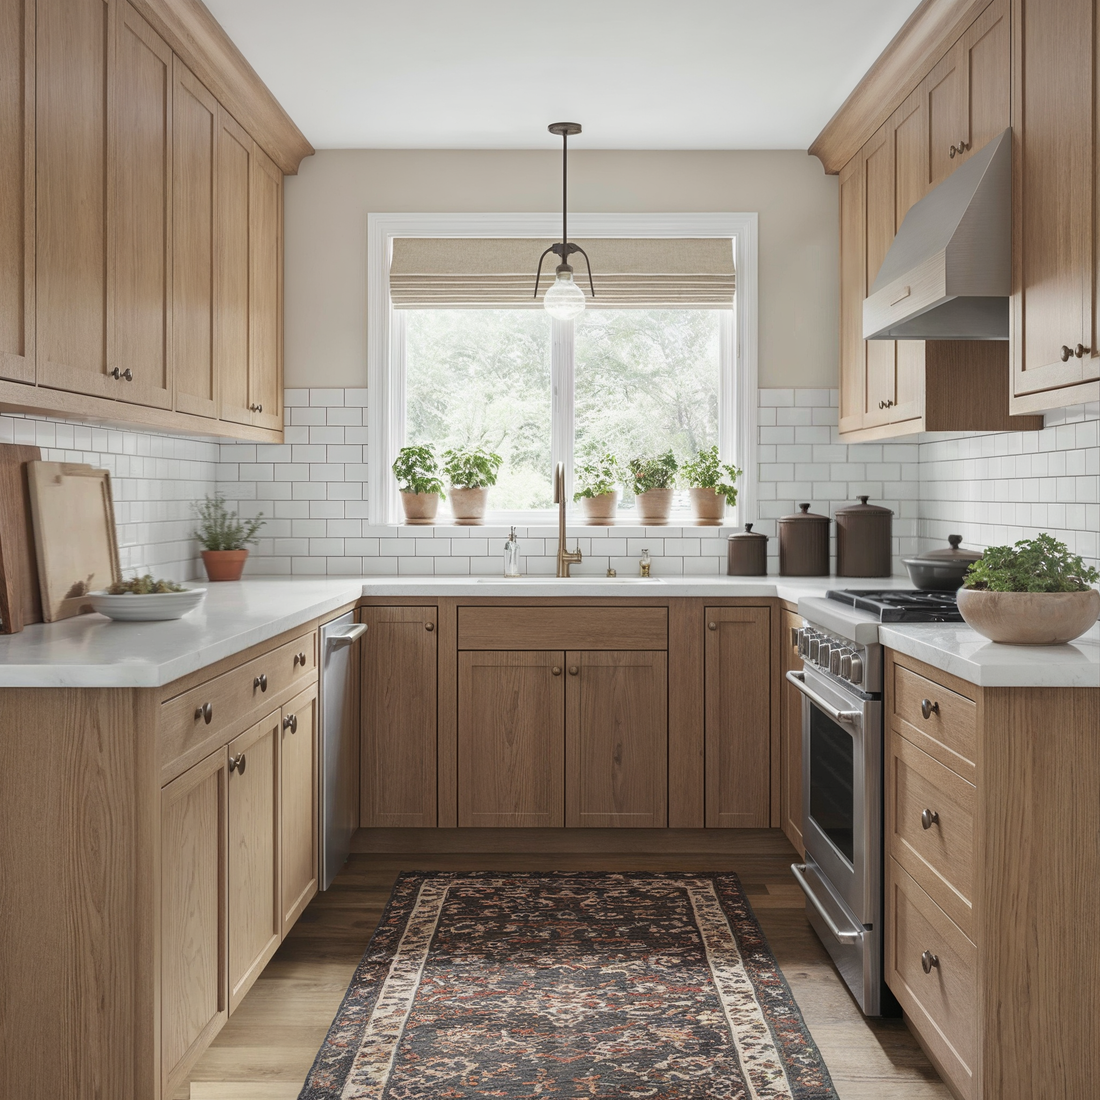
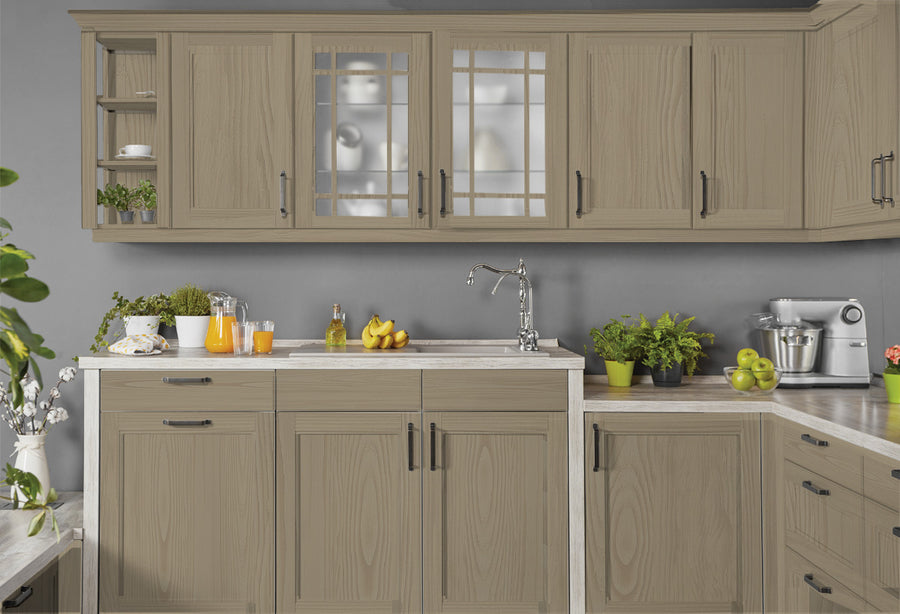
Retique It kitchen cabinets are existing cabinets refinished with a wood-based coating that creates a real wood-grain surface. The system can change the look of painted, finished, or other suitable hard cabinet surfaces without replacing the doors. Good cleaning, surface prep, careful application, and the right protective finish are key to a lasting result.
Across the United States, kitchen updates often start with a simple question: can old cabinets look better without the cost and mess of a full replacement? Retique It offers one option. Its Liquid Wood and Wood’n Finish products are made to give suitable surfaces a wood-like finish, including cabinets that no longer match the rest of the room. The result depends on the cabinet material, the existing finish, the color you choose, and the care taken during each step.
The main appeal is that you can change the look of your kitchen while keeping the cabinet boxes and doors you already own. A dated white, gray, or dark painted finish may be turned into a warmer oak-style or walnut-style look. Some kits create visible grain, while smooth-finish versions aim for a more even appearance. This is a surface makeover, not the same thing as installing solid wood doors.
Retique It publishes product instructions and cabinet kit options, so those directions should guide the project. The coating is not a substitute for sound cabinet construction. Loose veneer, swollen particleboard, water damage, grease, and failing old paint still need attention before you begin. No coating can make a damaged cabinet structurally sound.
This guide explains how the finish works, which cabinet surfaces may suit it, how to plan the work, and how to avoid common mistakes. It also covers grain styles, sealing, cleaning, and the limits of the available durability claims. The aim is to help you decide whether this DIY route fits your kitchen and your skill level.
Retique It is a finishing product line designed to add a wood-like surface to suitable hard materials. Its Liquid Wood and Wood’n Finish systems use wood-based coatings to create a finish that can look and feel more like wood than ordinary solid-color paint. The company offers products for cabinets and other home surfaces.
The Wood’n Finish cabinet kits combine a primer and a wood-grain coating system. Grained versions let you create a visible pattern with a graining tool. Smooth versions skip that step and aim for a more even finish. The exact contents vary by kit, so check the product listing before buying.
The term liquid wood can sound as if a cabinet becomes a solid wood door. That is not what happens. The coating adds a thin finished layer to the existing surface. The door underneath remains its original material, such as wood, medium-density fiberboard, or a suitable finished panel.
Source: retique.com
Wood-grain appearance
The finish can add a visible grain pattern and wood-inspired color to cabinets that do not have the look you want.
Existing cabinet reuse
Suitable doors and cabinet boxes can stay in place as the base for the new finish, which may avoid the need for replacement.
DIY application
The coating can be applied with suitable brushes, rollers, or sprayers as allowed by the specific product instructions.
A surface finish, not a repair
The coating will not fix loose joints, swollen panels, water damage, or broken hinges.
Liquid Wood Versus Ordinary Cabinet Paint
Ordinary cabinet paint gives a surface a solid color. A wood-grain coating is intended to add the look of wood instead. That difference matters when you want oak-style cabinets but do not want to replace painted doors with new wood doors.
The finish also needs more than color alone. Grain direction, contrast, and the amount of visible pattern affect the final look. A well-planned grain pattern can suit a rustic kitchen, while a softer pattern may work better in a clean, modern room.
Choose paint when
You want a solid white, black, green, or other single-color finish without a wood pattern.
Choose a wood-grain system when
You want a wood-inspired appearance on suitable existing cabinet surfaces.
Compare replacement when
The doors are badly damaged, the panels are swollen, or you need a different door shape or cabinet layout.
What Retique It Does Not Prove
A product description can explain the intended use, but it cannot establish how long every kitchen finish will last. Cabinet wear varies with cleaning habits, moisture, sunlight, door use, surface preparation, and the protective coating. Treat broad claims about scratch resistance or waterproofing as product claims, not a promise that a finished kitchen cannot be damaged.
Not a solid wood conversion
The original cabinet material remains under the coating.
Not a guarantee against peeling
Poor adhesion, contamination, or an unsuitable substrate can still cause coating failure.
Can You Use Retique It on Your Existing Cabinets?
Retique It may work on many existing cabinet surfaces, but the condition of the surface matters more than its color. A clean, firm, sound panel is a better starting point than a door with peeling paint, loose laminate, or water damage. Check the exact kit instructions for your material before you begin.
The manufacturer describes its coatings as suitable for many hard surfaces, including painted or finished wood, metal, MDF, and some other materials. That broad intended use does not mean every cabinet finish will bond in the same way. A hidden-area test is a sensible step, especially on slick factory finishes or older cabinets with unknown coatings.
Kitchen cabinets face a mix of grease, hand oils, steam, spills, and repeated contact. The area near the range may need more cleaning than a rarely used upper cabinet. Sink-base doors may also have damage from past leaks. Inspect these areas closely instead of assuming a new coating will hide every flaw.
Source: retique.com
Solid wood
Sound wood doors can be suitable candidates when the old finish is firmly attached and the surface is clean.
MDF and composite panels
These may be suitable when intact, dry, and compatible with the selected system. Avoid soaking exposed edges.
Painted cabinets
Firm old paint may be a workable base after proper cleaning and preparation. Loose or flaking paint must be addressed first.
Laminate or slick factory finishes
Adhesion can be more challenging. Check the manufacturer’s guidance and test the entire system on a hidden area.
Water-damaged cabinets
Swollen panels, crumbling edges, or delaminated surfaces should be repaired or replaced before refinishing.
Check the Cabinet Surface Before Buying
Look at the doors from the front, back, edges, and around the hinges. Press gently near areas that look swollen or loose. If the panel feels soft, the veneer lifts, or the surface sheds old paint, pause and deal with that issue first.
Check for silicone polish, wax, and oily residue. These can interfere with adhesion. If you do not know what was used on the cabinets, test the planned cleaning method and coating on an inconspicuous spot. A successful test should remain firmly attached after the product has fully cured and after you follow its care instructions.
Proceed
The surface is firm, dry, cleanable, and compatible with the kit according to its instructions.
Prepare or repair first
Small chips, loose old paint, and minor surface flaws need suitable repair before the coating process.
Stop and reassess
The panel is swollen, the veneer is separating, or the surface remains oily after cleaning.
How to Apply Retique It to Kitchen Cabinets
A good cabinet makeover starts before the first coat. Plan enough space to remove doors, label hardware, let the coating dry, and keep dust away from the work. Read the instructions for your exact kit, because the number of coats, drying time, and optional finish can differ by product.
For many Wood’n Finish projects, the basic sequence is to degrease, lightly scuff the surface where appropriate, wash and rinse, apply the specified primer, create the wood grain if using a grained kit, and finish with any required or chosen protective coat. Do not skip a step just because the cabinets look clean.
Work on a small test panel first. It lets you check the color, the grain pattern, and the way the coating behaves on your cabinet material. It is much easier to adjust a test piece than to redo a full kitchen.
Source: retique.com
Prepare the work area
Protect floors and counters, set up a clean drying space, and keep children and pets away from wet coatings.
Label doors and hardware
Mark each door and its hardware so everything returns to its original place.
Use the full system
Follow the instructions for the selected primer, stain or grain coating, and topcoat rather than mixing products without checking compatibility.
Step 1: Remove Doors, Drawers, and Hardware
Take off cabinet doors, drawer fronts, knobs, pulls, and hinges when practical. Store screws in labeled bags. Use a pencil mark on a hidden area or a piece of removable tape to match each door to its cabinet opening.
Lay the doors on a stable, level work surface. Raising them on suitable supports can make it easier to coat the edges, but the supports must not touch wet areas. Keep drawer fronts separate so you can reach their sides without smearing the finish.
Protect fixed cabinets
Mask nearby walls, counters, appliances, and hinges that will remain in place.
Keep hardware organized
Place each set of screws and fittings in a labeled container to avoid mix-ups during reassembly.
Step 2: Degrease and Clean
Remove grease and hand oils with a cleaner permitted by the product instructions. Retique It’s published guidance identifies suitable cleaning methods and warns against TSP products for its wood-based coatings. Follow the current instructions rather than substituting a familiar cleaner.
After degreasing, wash the surface as directed and rinse thoroughly. Cleaning residue can affect the way a coating bonds. Let the doors dry fully, including corners, joints, and panel edges, before moving to the next step.
Pay extra attention to cooking areas
The doors near the range and the handles often collect a thin film that is easy to miss.
Avoid soaking exposed edges
Use a controlled amount of cleaning solution on MDF and composite panels to reduce the risk of swelling.
Step 3: Scuff Sand When Appropriate
Light scuff sanding can help prepare a slick or glossy surface for better adhesion. The aim is to dull the shine, not to grind through the old finish or reshape the door. Use a suitable sanding pad or fine abrasive and remove the resulting dust before coating.
Do not assume that every surface needs aggressive sanding or that sanding can fix a loose finish. If the old coating is peeling or the material underneath is damaged, resolve that problem first. Use appropriate dust protection and follow the safety instructions for the material you are sanding.
Use a light touch
Focus on a uniform surface rather than removing all the existing color.
Check edges and profiles
Raised panel details and corners can be damaged by heavy sanding.
Step 4: Apply the Primer
Apply the primer specified for your kit. The manufacturer’s Wood’n Finish guidance describes two primer coats and recommends smoothing the wet primer with long brush strokes in the direction planned for the grain when using a roller. Check your own kit instructions before following this sequence.
Keep each coat even and avoid heavy buildup around corners, joints, and decorative profiles. Let the primer dry for the stated time before applying the next layer. A coat that feels dry on top may not be ready for another product if the stated drying period has not passed.
Watch for drips
Inspect the edges and recessed panels while the primer is still workable, and correct runs according to the product instructions.
Keep strokes consistent
Long, controlled strokes can help reduce a patchy appearance and prepare for the intended grain direction.
Step 5: Create the Grain or Keep the Finish Smooth
For a grained finish, apply the wood-grain coating in manageable sections. While the coating is wet, pull the graining tool through it using a steady motion. Practice on a spare panel first because pressure, speed, and tool movement change the pattern.
If a section does not look right, follow the kit directions for reworking it while the coating is still suitable for correction. Avoid repeatedly dragging the tool through material that has started to set. That can leave torn lines or rough patches.
A smooth-finish kit follows a different path. Skip the graining-tool step and use the specified application method. Smooth finishes may suit contemporary kitchens or cabinets where a strong rustic grain would look out of place.
Work in manageable sections
Complete each section before the coating begins to dry so the grain remains easier to control.
Keep the direction logical
Vertical strokes often suit door stiles, while horizontal strokes may suit rails, but the design is your choice.
Practice before the real doors
A test panel helps you settle on a grain pattern before committing to the full kitchen.
Step 6: Add Color and a Protective Finish
Some kits let you add optional stain layers to adjust the final color and the strength of the grain. Follow the product directions for the chosen stain and the number of coats. Adding more color can change the appearance, so test the full sequence rather than judging one wet layer.
A protective topcoat is worth considering for kitchen cabinets because doors and drawer fronts receive frequent contact. Retique It lists topcoat use as optional for cabinets in its general system guidance, while other surfaces have different requirements. Choose a compatible finish intended for the actual use, and follow the current label for coat thickness, drying time, and cure time.
Do not reinstall the hardware or return the doors to heavy use just because the final coat feels dry. Allow the finish to cure as directed. During that time, avoid scrubbing, stacking coated faces together, or pressing items against the surface.
Check sheen
Matte, satin, and gloss finishes reflect light differently and can change how the wood color looks.
Follow product compatibility guidance
Do not assume every clear coat will bond to every wood-based coating.
Respect cure time
A fully cured finish generally handles normal use better than a coating that has only dried to the touch.
Choosing the Best Retique It Cabinet Color and Grain
The best color depends on your room’s light, counters, flooring, backsplash, and the amount of contrast you want. A sample that looks warm in a bright showroom or product photo may look darker or cooler in a kitchen with limited daylight. Test the finish in the actual room before treating every door.
Retique It offers a range of wood-inspired looks, including oak-style and weathered finishes. Available colors and kit sizes can change, so confirm the current selection before planning your project. Choose the pattern as carefully as the color because strong grain can become the main feature of the room.
A useful way to narrow the choice is to start with the fixed surfaces you are keeping. If the floor has a strong pattern, a quieter cabinet grain may help the room feel balanced. If the counters and backsplash are plain, a more visible grain may add warmth without changing the layout.
Source: storage.googleapis.com
Light oak or white oak looks
These can suit bright kitchens, pale counters, and rooms where you want a lighter wood effect. Check for unwanted yellow or gray tones in your lighting.
Dark oak or walnut-inspired looks
These can add depth and contrast but may make a small or dim kitchen feel heavier.
Weathered or pickled finishes
These may suit farmhouse or relaxed interiors, especially when the floor and counters already have compatible colors.
Black or very dark finishes
These can create a strong modern look. Dust, fingerprints, and surface marks may be more visible depending on the sheen and lighting.
Grained Versus Smooth Cabinet Kits
A grained kit is the better match when you want visible wood lines and a more rustic or natural look. It also gives you more control over the pattern, which means the result depends on your technique. Different doors may look less consistent if the grain direction or tool movement changes from one panel to the next.
A smooth kit is a more direct option when you want a clean, even surface rather than pronounced grain. It can still have a wood-inspired color, but it does not aim to create the same visible pattern. Check the kit contents because graining tools may not be included with smooth versions.
Choose grained for
Visible wood patterns, rustic character, or a more distinct wood-grain effect.
Choose smooth for
A more uniform finish, simpler application, or a contemporary cabinet style.
Test Color Under Your Kitchen Lighting
Apply a sample to a spare door or a hidden section and view it in morning daylight, afternoon light, and the light you use at night. Warm bulbs can make some browns look more golden, while cooler lighting can make a finish appear grayer.
Place the sample near the countertop and backsplash. This gives you a better sense of whether the finish clashes with nearby undertones. Do not rely on a phone screen alone because screens can shift colors and brightness.
Compare in the room
Look at the sample near the fixed surfaces that will remain after the makeover.
Check the whole finish
Use the planned stain and topcoat on the test sample because each layer can affect the final color.
How Much Retique It Do You Need for a Kitchen?
The amount you need depends on the total surface area, the number of coats, the cabinet style, and the product’s stated coverage. A kitchen with many deep drawers, raised panels, and exposed side panels needs more attention than a row of flat doors. Do not buy a kit based only on the number of cabinet doors.
Retique It’s cabinet guidance has described a gallon of coating as covering about 600 square feet, but coverage is a planning estimate, not a promise for every project. Confirm the current coverage for the exact product and whether the stated figure applies to one coat or a particular application. Porous surfaces, textured details, and application losses can change actual use.
Measure the doors, drawer fronts, and cabinet sides you intend to coat. For a flat rectangular face, multiply its height by its width. Add the area of all faces and any additional surfaces that will receive the same finish. Then use the product’s coverage instructions and the number of required coats to estimate the quantity.
Source: detroitchinatown.org
Count every surface
Include door fronts, door backs if they will be coated, drawer fronts, exposed cabinet sides, and other planned areas.
Account for coat count
Primer and finish coatings may have different coverage figures and application requirements.
Check the kit contents
Some kits include certain finishing products or tools, while others may require separate purchases.
Allow for mistakes and touch-ups
A small reserve can help when you need to correct a test area or finish an unexpected surface.
A Simple Cabinet Area Calculation
Here is a hypothetical example. Suppose you have 20 flat cabinet fronts, and each measures 2 feet tall by 1.5 feet wide. Each front has an area of 3 square feet, so the total front area is 60 square feet. This estimate does not include the backs, cabinet boxes, exposed sides, or extra area created by detailed profiles.
If the product label states coverage per coat, divide the measured area by that figure to estimate the amount for one coat. Repeat the calculation for each required layer and each product. Follow the label’s method of calculating coverage rather than assuming the primer and grain coating use the same amount.
Measure
Record the height and width of each type of door or drawer front.
Calculate
Multiply height by width, then add the areas of all surfaces receiving the product.
Compare
Use the coverage listed for the specific product and required number of coats.
What Affects the Total Project Cost?
The kit is only one part of the budget. You may also need cleaning supplies, abrasives, masking materials, brushes, rollers, repair filler, and a compatible protective finish. If you do not own basic tools, include those costs before comparing refinishing with replacement.
Current prices vary by kit size, color, included tools, and topcoat option. Check the retailer’s current listing rather than relying on an old price or an estimate from a different kit. Also consider the time needed to remove doors, prep surfaces, apply coats, and wait for the finish to cure.
Material cost
Add the price of all coating products, repair supplies, and protective materials.
Time cost
Allow for preparation, drying between coats, corrections, and reassembly.
Repair cost
Damaged doors or swollen panels may need repair or replacement before coating.
How Durable Is a Retique It Kitchen Cabinet Finish?
The durability of a refinished cabinet depends on the whole system, not just the wood-grain coating. Surface condition, cleaning, primer adhesion, coat thickness, drying time, topcoat choice, and daily use all matter. A good-looking sample is useful, but it does not prove how the finish will perform after years of use.
Cabinet doors near the dishwasher, sink, and range often face more moisture, heat, or grease than other doors. Edges and corners can also receive repeated knocks. A protective finish that suits the product and intended use may help, but the correct choice depends on compatibility and the manufacturer’s directions.
Treat claims such as waterproof or scratch-resistant with care. They do not mean that you can leave standing water on a door, scrape it with a sharp object, or clean it with any chemical. Use the finish as directed and protect it from the kinds of wear that damage most cabinet coatings.
Source: retique.com
Use a compatible topcoat
Select a finish intended for cabinet use and compatible with the underlying products.
Allow full curing
Do not judge the final strength by touch alone or rush the return to daily use.
Manage moisture
Wipe up spills and condensation, especially around the sink and dishwasher.
Avoid harsh cleaning
Use gentle methods permitted by the product instructions and test any new cleaner in an inconspicuous place.
Signs the Finish May Be Failing
Peeling, bubbling, flaking, or edges that lift can point to an adhesion problem or a damaged surface underneath. Sticky areas may indicate that the coating has not cured as expected, or that the surface has been exposed to a product it does not tolerate. A dull spot alone does not prove that the coating has failed.
Do not keep adding layers over a loose or peeling finish. First identify the likely cause, check the product guidance, and test a repair method on a small area. If the original panel has swollen or separated, a surface touch-up may not be enough.
Peeling near edges
Check for missed cleaning, weak old paint, poor adhesion, or repeated impact.
Bubbles or raised areas
Check for moisture, contamination, trapped material, or an unsuitable surface.
Persistent tackiness
Review drying conditions, coat thickness, and the product’s stated cure time before applying anything else.
Simple Care for Finished Cabinets
Use a soft cloth and a mild cleaning method that the coating instructions permit. Avoid soaking the doors or letting cleaner sit in joints and along exposed edges. Dry the surface after cleaning, especially near water sources.
Do not use abrasive pads, strong solvents, or aggressive cleaners unless the finish maker confirms they are suitable. For a small chip, clean the area and identify the products used in the original finish before attempting a repair. An incompatible touch-up product may make the damaged area more obvious.
Clean spills promptly
Remove water, food, grease, and cleaning residue rather than allowing them to sit on the finish.
Use soft cloths
Avoid rough scrubbers that can scratch or dull the surface.
Check hinges and handles
Tight hardware helps reduce movement and impact that can damage the finish around screw holes.
Common Retique It Cabinet Problems and How to Avoid Them
Most preventable problems begin before the final coat. Grease, cleaner residue, dust, uneven primer, and rushed drying can all affect the result. A careful test and a consistent work method give you a better chance of finding issues before they spread across the kitchen.
The second common problem is expecting the product to hide every flaw. Wood-grain coatings change the surface appearance, but dents, uneven repairs, and damaged panel edges may still show. Fix defects before priming, and use a suitable repair material that will work with the planned coating system.
The third problem is inconsistent grain. A graining tool responds to movement, pressure, and the amount of wet coating. If you rush one door and work slowly on the next, the doors may look like they belong to different kitchens. Practice first and keep your method as consistent as you can.
Source: www.pinterest.com
Problem: The coating does not stick
Possible causes include grease, silicone residue, an incompatible surface, or a weak old finish. Stop and review preparation and compatibility before recoating.
Problem: The grain looks uneven
Tool movement, inconsistent coating thickness, or working after the coating begins to dry may cause irregular lines. Practice on a test panel.
Problem: The finish looks patchy
Uneven application, missed areas, or differences in surface absorption may be involved. Check the product instructions and inspect a fully dried test area.
Problem: The color looks too dark
The chosen stain, number of coats, lighting, and topcoat can affect the final appearance. Test the full finish sequence before continuing.
Problem: Doors stick after reassembly
The coating may need more cure time, or the edges may have excess buildup. Avoid forcing the doors and check the finish instructions before making adjustments.
When Should You Stop and Start Again?
If the coating lifts when you handle the test area, do not cover the problem with more product. Check whether the surface was clean, dry, and suitable for the system. A small test failure can save time and materials by showing that the preparation or product choice needs to change.
If you see swelling, loose veneer, or soft material around the sink base, address the damage before refinishing. Replacing one badly damaged door may be more sensible than spending time coating a surface that cannot hold the finish. Seek qualified help if the source of ongoing water damage is unclear.
Stop when adhesion fails
Find the cause before applying additional coats.
Repair structural damage
Do not use the coating as a substitute for sound panels, joints, and mounting points.
Follow the current instructions
Use the exact product guidance for recoating, drying, compatibility, and repair.
Frequently Asked Questions
Q
Does Retique It work on painted kitchen cabinets?
It may work on painted cabinets when the old paint is firmly attached and the surface is compatible with the chosen kit. Clean and prepare the surface as directed, and test the complete system in a hidden spot. Peeling paint, grease, or a weak old finish can lead to poor adhesion.
Q
Do I need to remove all the old cabinet paint?
Not always. Retique It’s system is designed for use over many suitable painted or finished hard surfaces, so stripping every old layer may not be necessary. However, loose or failing paint must be dealt with, and the product instructions determine whether the existing surface needs extra preparation.
Q
Can Retique It make laminate cabinets look like wood?
Some laminate or other slick surfaces may be suitable, but compatibility should be confirmed for the exact material and kit. A light scuff and proper cleaning may be part of preparation, but do not assume the coating will bond to every laminate. Test the entire process on an inconspicuous area first.
Q
Does Retique It need a topcoat on kitchen cabinets?
Retique It’s general guidance lists a topcoat as optional for cabinets, but the right choice depends on the specific kit and the amount of wear the cabinets receive. A compatible protective finish may help with routine kitchen use. Follow the product instructions and do not assume that every clear coat is suitable.
Q
How long does Retique It take to dry?
Drying time varies by product, coat thickness, room conditions, and the stage of the process. Retique It’s published Wood’n Finish instructions describe a two-hour drying period for certain steps, but you should check the exact kit directions. Drying to the touch is not the same as full curing.
Q
Can I clean Retique It cabinets with regular kitchen cleaner?
Use only cleaning methods that are suitable for the completed coating. Mild cleaning with a soft cloth is a sensible starting point, but strong degreasers, solvents, and abrasive pads can damage some finishes. Test an unfamiliar cleaner in a hidden spot and follow the topcoat maker’s care instructions.
Q
Is Retique It cheaper than replacing kitchen cabinets?
Refinishing may cost less when the existing cabinet boxes and doors are sound and you are comfortable doing the work yourself. The full cost includes the kit, preparation supplies, protective finish, repair materials, and your time. If doors are badly damaged or the layout needs to change, replacement may be the more practical option.
✦ Wrapping Up
Conclusion
Retique It kitchen cabinets offer a way to change the look of an existing kitchen without automatically replacing every door. The wood-based coating system can create a wood-grain appearance on suitable surfaces, with options for visible grain or a smoother finish. The final result depends on the cabinet condition, preparation, application technique, and protective finish.
The most useful first step is to inspect your cabinets. Look for peeling paint, oily residue, swollen panels, loose veneer, and damage around the sink or dishwasher. Choose a compatible kit, read its current instructions, and test the full finish on a hidden area or spare door before committing to the whole room.
If the test looks good and remains firmly attached after the recommended cure time, plan the work in stages. Label each door, keep the grain direction consistent, and give every coat the time it needs. A careful, measured process is more useful than rushing to finish the kitchen in a weekend.
💡 Key Takeaway
Before buying a cabinet kit, measure the surfaces you plan to coat, check the current product coverage and instructions, and create one complete test sample with primer, chosen color, grain treatment, and protective finish. Use that sample to judge adhesion, color, grain, and sheen in your own kitchen.