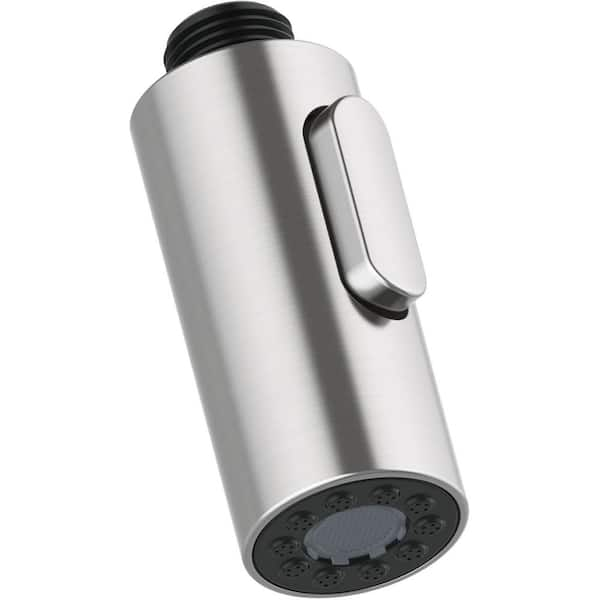
You can often replace a Glacier Bay kitchen faucet head without replacing the whole faucet. First, identify your exact faucet model, match the replacement spray head, and check how the old head connects to the pull-down hose. Shut off the water before taking parts apart.
In American homes, a kitchen faucet gets used all day. It fills pots, rinses produce, washes dishes, and cleans the sink after dinner. When the spray head starts to leak or the spray button stops working, even a small fault can make daily chores harder. A replacement head may solve the problem, but only if it fits the faucet.
Glacier Bay faucets are sold through The Home Depot, and different models can use different spray heads, hose connections, finishes, and internal parts. A head that looks right in a product photo may still have the wrong thread or connector. The safest first step is to identify the faucet model and compare the replacement part details before you buy anything.
This guide explains how to inspect the old head, choose a compatible replacement, remove the damaged part, install the new one, and test for leaks. It also covers common problems, such as low water flow, a stuck connector, and a hose that will not retract. The instructions apply to common pull-down designs, but your model’s manual takes priority whenever its connection or removal method differs.
Source: images.thdstatic.com
When Should You Replace a Glacier Bay Kitchen Faucet Head?
Replace the spray head when it has a damaged body, a failed spray selector, a cracked connection, or a persistent leak that remains after basic cleaning and inspection. A replacement may also make sense when the spray pattern no longer changes properly between modes. The fault should be in the head itself, not another part of the faucet.
Start with a quick inspection. Turn on the faucet and watch where the water escapes. Water coming from the spray face may point to a blocked outlet or a damaged internal part. Water escaping where the head meets the hose may indicate a worn seal, a loose connection, or a mismatched head. Water leaking under the sink usually calls for a different repair.
A weak stream does not automatically mean the spray head has failed. Mineral deposits, debris in the inlet screen, a partly closed shutoff valve, or a kinked hose can also reduce flow. Check these simple causes before buying parts.
Source: images.thdstatic.com
Replace the head
Consider replacement if the head is cracked, the spray control is broken, or the model-specific instructions identify the head as a replaceable part.
Clean the head first
Try cleaning removable mineral deposits and rinsing an accessible screen when the head is intact but the spray pattern is uneven.
Inspect the hose and faucet
Look for a damaged hose, leaking connection, or retraction problem. A new head will not repair a failed hose or valve.
Head Leak Versus Hose Leak
Dry the outside of the head and hose with a towel, then run the faucet briefly. Watch the first place that becomes wet. If water emerges around the joint between the head and hose, turn off the water and inspect the seal and connector. If the leak starts farther down the hose, the hose may need repair or replacement instead.
Water that appears only when the faucet is running can be easier to trace than a slow drip after use. Do not put your fingers near a damaged connection while the faucet is pressurized. Turn off the supply before touching or loosening any part.
Leak at the head joint
Check the O-ring, washer, connector, and fit of the replacement part.
Leak under the sink
Inspect the hose connections and supply lines. Stop using the faucet if a leak cannot be controlled.
How to Find the Correct Replacement Spray Head
The correct replacement depends on the faucet model and connection design. Glacier Bay sells several kitchen faucet styles, and parts that share a similar shape may not use the same connector. Do not order a head based only on the Glacier Bay name or a matching finish.
Look for the model number on the original packaging, installation paperwork, product receipt, or the manufacturer’s product information. If those are missing, inspect the faucet and take clear photos of the full faucet, the spray head, the hose connection, and any visible labels. The Home Depot or its parts support channel may be able to help identify the model from those details.
Compare the replacement listing with the faucet’s documented parts list. Check the part number, connection type, included seals, finish, and any stated model restrictions. A replacement sold for one Glacier Bay series should not be assumed to fit another series unless the listing or manufacturer confirms compatibility.
Source: images.thdstatic.com
Model number
Use the exact model number whenever possible. It is more useful than the faucet’s general appearance.
Part number
Compare the listed replacement number with the parts diagram or official product documentation for your faucet.
Connection type
Check whether the head attaches with a threaded fitting, quick connector, retaining clip, or another model-specific design.
Finish and spray modes
Match the finish and confirm that the replacement provides the functions you need, such as stream and spray.
Can You Use a Universal Kitchen Faucet Head?
Sometimes, but the word universal is not enough to prove a fit. Some replacement heads are designed for specific thread sizes or connector styles, while others include adapters for a limited range of faucets. Pull-down faucet hoses can also use proprietary connections.
Before buying a generic head, verify the actual connection dimensions and the seller’s compatibility list. Do not force a threaded part onto a different thread or rely on tape to make an incompatible fitting seal. If you cannot confirm the connection, an exact model-compatible part is the safer option.
A generic head may work
Use one only when its connection and operating requirements match the faucet.
Avoid guessed adapters
An improvised connection can leak, restrict flow, or come apart during use.
What If You Cannot Find the Model Number?
Keep the old head attached until you have documented its shape and connection. Take photos from several angles and measure any accessible threaded connection only after the water is off and the part has been safely removed. Record whether the fitting uses a separate clip, seal, or quick-connect collar.
Ask The Home Depot or a qualified plumbing parts supplier to identify the faucet from the photos and details. If the original model is discontinued, ask whether a documented substitute is available. Similar appearance is not proof that a substitute will work.
Save the old part
Keep it until the replacement is installed and tested successfully.
Bring clear photos
Show the faucet, head, connector, and any model label rather than sending only a front view.
Tools and Supplies You May Need
Most straightforward spray-head replacements need only a few basic items. Gather them before you begin so the hose does not remain disconnected while you search for a tool. Your faucet’s instructions determine whether you need a wrench or a special release method.
Protect the sink finish and the faucet’s coating. A cloth can help grip a smooth part and reduce scratches, while a small bowl keeps a loose seal or clip from falling into the cabinet. Use tools gently because plastic connectors can crack under excessive force.
Source: terrylove.com
Compatible replacement head
Confirm the part number or model fit before starting.
Soft cloth
Use it to protect the finish and wipe away water.
Adjustable wrench, if required
Use only if the model’s instructions call for it. Protect finished surfaces and avoid crushing plastic fittings.
Small bowl or tray
Keep clips, washers, and O-rings together during removal.
Flashlight
Help inspect the hose connection and the cabinet below the sink.
Towel
Catch residual water and dry the joint before leak testing.
Do You Need Plumber’s Tape?
Not usually for a faucet head that seals with an O-ring, washer, or purpose-built quick connector. Those connections rely on the correct seal and proper seating, not extra thread tape. Adding tape where it does not belong can interfere with the fit.
Use sealing materials only if the manufacturer specifies them for that exact joint. If a connector leaks after correct installation, inspect the seal and part compatibility before trying to cover the problem with tape.
O-ring or washer joint
Check that the seal is present, clean, undamaged, and seated correctly.
Threaded joint
Follow the faucet instructions for the specific thread and sealing method.
Step-by-Step: Replace a Glacier Bay Kitchen Faucet Head
The general process is to shut off the water, remove the old head using the correct connector release method, inspect the hose end, install the compatible replacement, and test the joint. The exact removal steps vary by model, so check the installation manual before disconnecting any clip or collar.
Keep the old spray head until the new one works as expected. Do not cut the hose, pry at the faucet body, or twist a plastic fitting with heavy force. If the connector does not release with the method shown in the manual, stop and confirm the design rather than forcing it.
Source: images.thdstatic.com
Before starting
Read the model-specific instructions, confirm the replacement part, and clear the cabinet under the sink.
Step 1: Turn Off the Water
Close the hot and cold shutoff valves beneath the sink. Turn the faucet handle on briefly to relieve the pressure and confirm that the flow has stopped. Return the handle to the off position before taking the spray head apart.
If the shutoff valves are stuck, corroded, or begin to leak when turned, do not force them. A damaged valve can create a larger plumbing problem. Contact a plumber if you cannot safely isolate the water.
Check both supplies
Make sure the hot and cold feeds are off before disconnecting a water-carrying part.
Step 2: Pull Out the Spray Hose
Gently draw the pull-down head out over the sink. Support the hose so it does not snap back into the faucet spout or pull hard against the connection below the sink. A towel in the basin can protect the sink and catch drips.
If the hose has a counterweight beneath the sink, note its position and make sure the hose moves freely. Do not remove the weight unless the repair instructions require it.
Keep the hose supported
Prevent the hose from retracting while you work on the head.
Step 3: Disconnect the Old Head
Examine the joint where the spray head meets the hose. Some models use a threaded connection; others use a quick connector with a release collar or retaining clip. Follow the exact instructions for your design.
For a threaded head, turn the head in the direction specified by the manual while holding the hose fitting steady. For a quick connector, release the designated clip or collar as instructed before pulling the parts apart. Do not assume every Glacier Bay head unscrews in the same way.
Keep any small clip, seal, or adapter. Inspect the old head for cracks and check whether a washer or O-ring remains on the hose. A missing or damaged seal may explain a leak, even if the head itself looks fine.
Avoid excess force
If the connection will not move, confirm the release method and look for a hidden retaining clip.
Protect the hose
Do not grip, crush, or twist the flexible hose body with pliers.
Step 4: Inspect the Hose End and Seal
Check the exposed hose connector for dirt, cracks, damaged threads, and a worn or missing O-ring. An O-ring is a small rubber seal that helps prevent water from escaping at the joint. Replace a seal only with a compatible part specified for the faucet.
Wipe the connection clean with a soft cloth. Do not scrape the sealing surface with a knife or other sharp tool. If the hose fitting is cracked or its locking parts are damaged, replacing the head alone is unlikely to produce a dependable repair.
Clean and intact
Proceed if the connector and seal are in good condition.
Damaged connector
Identify the correct hose or connection part before continuing.
Step 5: Fit the New Spray Head
Compare the new head with the old one before attaching it. Check the connector shape, seal placement, finish, and spray controls. If the fittings differ, stop and verify compatibility rather than trying to make them fit.
Attach the head using the method specified in the faucet manual. For a threaded fitting, start the threads carefully and tighten by hand before using a tool if the instructions permit one. For a quick connector, push the parts together until the specified locking feature engages. Never guess that a connection is secure based only on a click or a tight feel.
Do not overtighten the joint. Excess force can damage threads, seals, or plastic fittings. If the manual specifies a tightening method or torque, follow it rather than applying more force.
Match the connector
The new head should attach without improvised adapters or forced threads.
Confirm the lock
Check the retaining clip or connector lock as directed by the manufacturer.
Step 6: Restore Water and Check for Leaks
Keep the head over the sink and slowly reopen the shutoff valves. Turn on the faucet at a low flow first. Watch the joint between the head and hose, then increase the flow if there are no signs of a leak.
Test each spray setting while watching the connection. Turn the water off and dry the joint with a towel. Check again for fresh moisture. A leak that appears only when a certain spray mode is active may point to a head fault or an incompatible connection.
If water escapes from the joint, shut the water off before adjusting anything. Recheck the connector, seal, and part compatibility. Do not keep tightening the joint if the parts are misaligned or the seal is damaged.
Successful installation
The head stays attached, the spray modes work, and the connection remains dry during and after use.
Failed leak test
Turn off the supply and inspect the seal and connector before trying again.
Step 7: Check Hose Retraction
Guide the spray head back toward the spout without letting it slam into place. Pull the hose out and let it return gently a few times. It should move without snagging, and the head should sit correctly in its holder.
If the head will not retract, look beneath the sink for a hose that catches on stored items, a tangled line, or a misplaced counterweight. A heavier or differently shaped replacement head can also affect how the assembly returns. Check the model’s parts and installation instructions before changing the weight or hose routing.
Smooth return
The head returns to its holder without a hard pull or repeated manual adjustment.
Snagging hose
Clear obstructions and inspect the hose route before assuming the new head is faulty.
Common Problems After Replacing the Head
A new spray head should fit securely and deliver the functions documented for that faucet. If the result is poor, check the simplest and safest causes first. A loose seal, debris, an incorrect part, or a restricted hose can cause trouble even when the new head appears to fit.
Source: images.thdstatic.com
Water leaks at the connection
Shut off the water, then inspect the O-ring, washer, connector alignment, and compatibility. Replace damaged seals with the correct parts.
Water flow is weak
Check whether the shutoff valves are fully open, the hose is kinked, and the head or inlet screen is blocked. Clean only parts the manual permits you to remove.
Spray mode does not change
Check the selector for debris or damage and confirm that the replacement supports the faucet’s intended functions.
Head falls off the hose
Stop using the faucet. Recheck the connector type and retaining clip. A head that will not lock securely must not be used under pressure.
Head will not retract
Inspect the hose path, counterweight, and holder. Make sure the replacement is suitable for the original faucet.
What to Do When the New Head Still Leaks
First, identify the exact leak point. A drip from the spray face, a leak around the head-to-hose joint, and water from beneath the sink can have different causes. Drying the assembly before a short test helps show where the water begins.
If the joint leaks, remove pressure and inspect the seal. Make sure the correct O-ring or washer is present and seated in its intended position. Reinstall the connection according to the manual and test it again. If the fitting is cracked, the threads are damaged, or the connection still leaks with the correct parts, stop using it until the fault is repaired.
Do not try to stop a leak by applying more force to a plastic connector. A cracked fitting can fail further, and a slow leak inside the sink cabinet can damage stored items or the cabinet floor.
Leak from the spray face
Check for a head fault, blocked outlet, or selector problem.
Leak from the hose joint
Check the seal, connector seating, and replacement compatibility.
Leak below the sink
Inspect the hose and supply connections, and get professional help if the source is unclear.
What to Do About Low Water Pressure
A restricted spray head can reduce the stream, but the problem may also come from the faucet hose, supply valves, or water supply itself. Compare the flow with the original head only if it is safe and practical to reinstall it. Do not dismantle the faucet cartridge without confirming that the symptom points to that part.
If cleaning is allowed, remove accessible debris and rinse the part as directed. Avoid sharp objects that could damage the spray outlets. If low flow remains after checking the head and hose, the next step is to diagnose the faucet or supply system rather than buying another spray head.
Uneven spray holes
Mineral buildup or debris may be blocking some outlets.
Low flow across all modes
Check the supply valves, hose, and other faucet components before blaming the head alone.
Can You Clean the Existing Head Instead of Replacing It?
Yes, cleaning may solve an uneven spray pattern or mild flow restriction when the head is still in good condition. Mineral deposits can build up around the spray outlets, especially where household water contains a high level of dissolved minerals. Loose debris can also collect in an accessible inlet screen.
Start by checking the faucet manual for cleaning instructions. Wipe the spray face with a soft cloth and use only a cleaning method approved for the head’s finish and materials. If the manual allows removal of the head or screen, shut off the water and follow the stated procedure. Avoid harsh cleaners, abrasive pads, and tools that can scratch the surface or damage rubber outlets.
Do not soak the entire head in vinegar or another acidic cleaner unless the manufacturer says that method is suitable. Some finishes, seals, and internal components may be harmed by the wrong cleaner or exposure time. A gentle clean is preferable to damaging a part that might otherwise be reusable.
Source: images.thdstatic.com
Cleaning is worth trying
The head is intact, the spray pattern is uneven, and the manual permits cleaning.
Replacement is more likely needed
The body is cracked, the control is broken, or a leak remains after correct cleaning and seal inspection.
How to Tell Whether Cleaning Worked
After cleaning, restore the water and test the spray over the sink. Look for an even stream or spray pattern consistent with the faucet’s design. Check that the selector changes modes as expected and that the connection stays dry.
If the same outlets remain blocked or the head continues to leak, check the manual for further service options. Replace the head only when the fault and the correct replacement have been identified.
Improved flow
The spray looks more even and water reaches the sink without unexpected side jets.
No change
Check for deeper blockage, a damaged head, or a problem elsewhere in the faucet.
Replacement Head or Entire Faucet: Which Makes Sense?
Replacing only the head is usually the more limited repair when the faucet body, handle, hose, and valve still work properly. Replacing the whole faucet may make more sense when several parts have failed, compatible replacement parts cannot be confirmed, or the faucet body and hose connections are badly damaged.
Compare the scope of the fault before spending money. A single cracked head and a leaking hose assembly are different repair jobs. The right choice depends on the documented compatibility of available parts, the condition of the remaining faucet, and the labor needed to complete the repair.
Source: noelsplumbingsupply.com
Choose a replacement head when
The fault is isolated to the spray head, the hose connector is sound, and a compatible part is available.
Consider a hose replacement when
The hose itself leaks, is split, or cannot move through its normal path.
Consider a full faucet replacement when
The body or valve is damaged, multiple parts have failed, or suitable replacement components cannot be confirmed.
Check Warranty and Parts Support First
Before buying a replacement, review any warranty paperwork and the terms that apply to your faucet model. Coverage, exclusions, and required proof of purchase can vary. Do not assume that every part or every type of damage is covered.
Keep the model number, purchase record if available, and photos of the fault. Contact the retailer or the support channel identified in the product documentation to ask about the correct part and any warranty options. Confirm current terms directly rather than relying on an old listing or an unrelated model’s policy.
Keep proof of purchase
A receipt or order record can help support a parts or warranty request.
Ask about the exact model
Request confirmation for your faucet’s model and replacement part number.
Safety Tips and Mistakes to Avoid
A spray-head repair is often manageable for a homeowner, but water pressure and tight fittings can still cause damage when handled carelessly. Shut off the supply before disconnection, protect the finish, and stop if the fitting design is unclear. A short pause to check the manual is better than breaking a connector.
Do not work on a pressurized connection or ignore a leak because it looks small. Water can spread inside the cabinet before the damage becomes visible. If the shutoff valve fails, a connector breaks, or water cannot be controlled, stop and contact a qualified plumber.
Source: craftcornerkitchen.com
Do not force the connector
Different models use different release systems. Forcing a clip or collar can break the connection.
Do not overtighten
Excess force can damage threads, plastic fittings, or rubber seals.
Do not guess at compatibility
A head that attaches loosely or requires an improvised adapter may not be safe to use.
Do not ignore a damaged hose
A new spray head cannot repair a split hose or a failing supply connection.
Do not use harsh cleaners without approval
Check the care instructions before using acidic cleaners, abrasives, or chemical products.
When to Call a Plumber
Call a qualified plumber if you cannot shut off the water, a valve starts leaking, the hose connector is broken, or the source of a leak remains unclear. Professional help is also sensible when the repair requires dismantling the faucet valve or working on damaged plumbing beneath the sink.
Stop using the faucet if the spray head will not lock securely or the hose fitting separates during operation. Do not test a loose connection at full pressure. Restore service only after the damaged part has been correctly repaired or replaced.
Uncontrolled water
Shut off the nearest safe supply and seek professional help if water continues to flow.
Broken or uncertain fitting
Do not improvise a repair on a connector that carries pressurized water.
A Quick Compatibility and Troubleshooting Checklist
Use this checklist before you order a part or put the faucet back into service. It separates the most useful checks from problems that need more than a new head. If any key connection remains uncertain, pause the repair until the correct part or procedure is confirmed.
Source: images.thdstatic.com
Before buying
Identify the faucet model, verify the replacement part number, and compare the connector and seal design.
Before removal
Read the model instructions, shut off both supplies, relieve pressure, and support the hose.
Before installation
Inspect the connector and O-ring, clean the sealing surface, and confirm that the new head matches.
After installation
Open the supply slowly, test all available modes, inspect for leaks, and check hose retraction.
How Long Does Replacement Take?
There is no single reliable time for every Glacier Bay faucet. A straightforward head swap can be a short task when the model is known, the connector is accessible, and the replacement fits. Identification, a stuck connector, a damaged seal, or a hard-to-reach hose can add time.
Plan enough time to inspect the connection and test for leaks rather than rushing to finish. If the head cannot be removed with the documented method, stop and confirm the design instead of treating extra force as the next step.
Simple replacement
The model is known, the fitting releases as directed, and the compatible head is ready.
More involved repair
The model is unknown, parts are damaged, or the fault may involve the hose or faucet body.
Frequently Asked Questions
Q
Are Glacier Bay kitchen faucet heads interchangeable?
No, you should not assume that all Glacier Bay kitchen faucet heads are interchangeable. Different models may use different threads, quick connectors, seals, and spray controls. Check the exact faucet model and replacement part documentation before ordering.
Q
How do I remove a Glacier Bay pull-down faucet head?
Turn off the hot and cold water supplies, relieve pressure, and pull the head out over the sink while supporting the hose. Identify whether the joint uses threads, a release collar, or a retaining clip, then follow the model-specific instructions. Do not force the connector if it does not release.
Q
Why does my new faucet head leak at the connection?
Common causes include a missing or damaged O-ring, a misaligned connector, an incorrectly fitted retaining clip, or an incompatible replacement head. Shut off the water before inspecting the joint. If the connector or hose is cracked, replace the damaged component rather than trying to seal it with extra force.
Q
Can I replace the spray head without replacing the hose?
Yes, when the hose is in good condition and the faucet design allows the head to be removed separately. Confirm that the replacement matches the hose connector and that the seal is sound. If the hose leaks, is damaged, or has a failed connector, a head-only replacement will not fix that problem.
Q
Why is my Glacier Bay faucet spray weak after replacement?
The new head may be restricted by debris, may not be compatible, or may have an obstructed inlet screen. A kinked hose or partly closed supply valve can also reduce flow. Check the manual for approved cleaning steps and inspect the hose route before replacing more parts.
Q
Should I use plumber’s tape on a replacement spray head?
Only if the faucet manufacturer specifies it for that exact connection. Many spray-head joints seal with an O-ring or washer, so extra tape is unnecessary and may interfere with proper seating. Check the instructions and use the specified sealing method.
Q
What should I do if the original Glacier Bay head is discontinued?
Ask the retailer or the support contact listed in the faucet documentation to confirm whether a compatible substitute exists. Provide the model number, photos, and details of the hose connection. Do not rely on a similar shape or a generic compatibility claim without checking the actual fitting.
✦ Wrapping Up
Conclusion
A Glacier Bay kitchen faucet head replacement can solve a cracked spray head, a failed selector, or some persistent spray problems without replacing the entire faucet. The key is to identify the exact faucet model and confirm that the replacement matches its connector and seal. A head that looks similar is not always the right part.
Turn off the water before disconnecting anything, inspect the hose end, and follow the model-specific removal and installation instructions. After fitting the new head, test every spray mode, check for leaks, and make sure the hose retracts smoothly. If the hose or connector is damaged, or the water cannot be shut off safely, stop and seek professional help.
💡 Key Takeaway
Before ordering, photograph your Glacier Bay faucet and its model label, then verify the replacement head’s part number and connector type. Keep the old head until the new one passes a full leak and spray test.