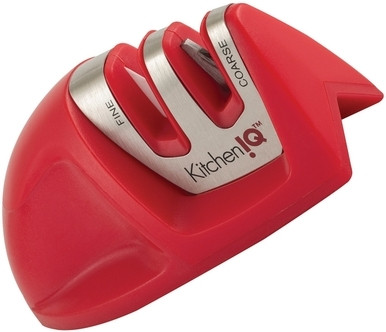
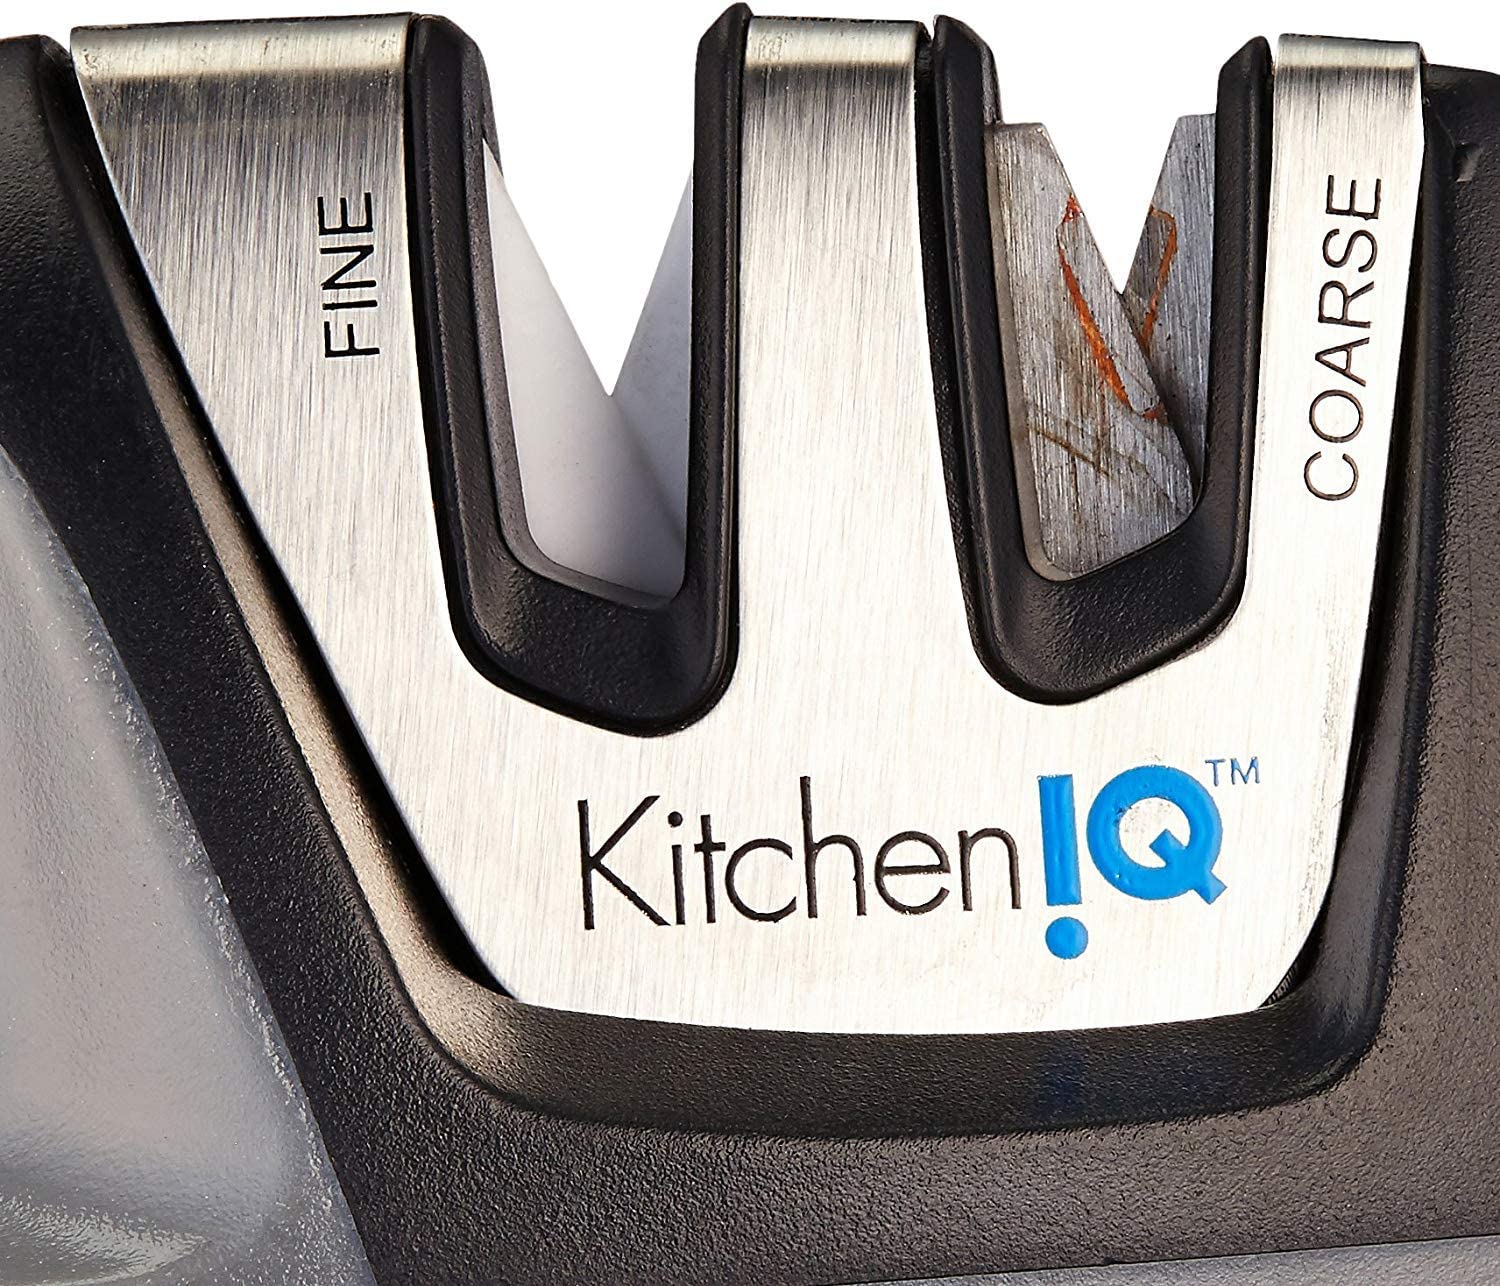
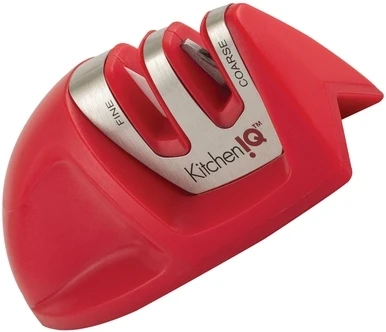
The kitcheniq Edge Grip is a compact, manual knife sharpener with two stages. Its coarse carbide slot helps restore a dull edge, while its fine ceramic slot refines the edge and supports routine care. The V-shaped base can rest on a counter or grip its edge, making the tool useful for many home kitchens.
In American homes, a sharp kitchen knife can make daily food prep easier. It helps when you slice tomatoes, chop onions, cut meat, or prep fresh herbs for dinner. A dull blade can crush soft foods and slip when you press too hard. The KitchenIQ Edge Grip offers a simple way to care for many common kitchen knives without learning the full skill of using a whetstone.
The Edge Grip is a manual, pull-through sharpener made by KitchenIQ, a brand associated with Smith’s Consumer Products. The common black model is listed as item 50009. It uses carbide sharpening parts for the coarse stage and ceramic rods for the fine stage. Its V-Grip base is made to sit on a flat worktop or catch the edge of a table or counter.
This guide explains how the tool works, how to use each slot, and which knives need more care. It also covers cleaning, safety, common mistakes, and when a different sharpener may be a better fit. The details here are based on product documentation and published product information, not a new hands-on test. Model versions can differ, so check the markings and instructions on the sharpener you own.
The KitchenIQ Edge Grip is a small manual tool that sharpens a knife as you draw its blade through a slot. Unlike an electric sharpener, it does not need a power outlet or a motor. You guide the knife by hand while the built-in sharpening parts work against the cutting edge.
The common 50009 model has two stages and a compact body. It includes a handle, a V-shaped grip base, a coarse carbide slot, and a fine ceramic slot. The fixed guides help keep the blade at the sharpener’s intended angle, which can make the process easier for people who have never used a whetstone.
The main appeal is convenience. A home cook can keep a manual sharpener in a kitchen drawer and bring it out when a knife starts to drag through food. Still, easy operation does not mean every knife is suitable for it. Blade shape, steel type, edge damage, and the maker’s care instructions all matter.
Source: simposh.com
Manual design
The sharpener works through hand pressure and controlled pulling strokes. It does not need batteries or electricity.
Two sharpening stages
The coarse stage uses carbide parts to shape the edge more quickly. The fine stage uses ceramic rods to refine the edge.
V-Grip base
The base is designed for use on a flat surface or along a suitable counter or table edge.
Compact storage
Its small body takes up less room than many bench stones or powered sharpening systems.
What Does Edge Grip Mean?
Edge Grip refers to the shaped base that can catch the edge of a counter or table. This design gives the user another way to position the tool while pulling a knife through the slot. It can also help keep the knife tip from running into the vertical face of the counter during a stroke.
The base is not a substitute for care. Check that the counter edge is firm, the sharpener is seated well, and the handle remains under your control. If the tool rocks, slides, or sits at an odd angle, move it to a flat, stable worktop instead.
Flat surface
Place the base on a dry, stable counter when this gives you the best control.
Counter edge
Use the grip feature only when the edge fits the base well and the tool stays steady.
Which Model Should You Check?
KitchenIQ has sold Edge Grip versions in more than one color and product configuration. Listings may use names such as Edge Grip 2-Stage Knife Sharpener, Edge Grip 2-Step Knife Sharpener, or a model number such as 50009. Some related products have different features, so do not assume every item in the range has the same blade guide or sharpening parts.
Look at the model number on the package or product label before buying replacement items or following instructions found online. If the package says the tool handles straight-edge knives only, follow that limit even if a seller’s description makes a broader claim.
Check the item number
Confirm the model number and color before comparing specifications or instructions.
Read the blade guide
Use the blade types listed by the manufacturer for your exact version.
How the Two Sharpening Stages Work
The two slots serve different jobs. The coarse stage removes metal to form or restore a cutting edge. The fine stage uses ceramic rods to refine that edge and can help maintain a blade that is already in fair shape. Choosing the right stage is more useful than pulling every knife through both slots each time.
A knife edge becomes less effective through normal use. Small changes along the edge can make a blade feel dull even when it looks fine from the side. Sharpening removes some metal to create a more useful edge, so frequent heavy sharpening is not a good habit. Use the least aggressive stage that meets the need.
Source: shopallinoneofficial.blogspot.com
Coarse carbide slot
Use this stage when a compatible knife is dull and needs more substantial edge work. It removes metal more quickly than the fine stage.
Fine ceramic slot
Use this stage for light touch-ups and edge refinement. It is the less aggressive choice for routine care.
Preset angle
The fixed guides help position the blade at the sharpener’s intended angle, reducing the need to set an angle by hand.
When Should You Use the Coarse Slot?
Choose the coarse slot when a suitable straight-edge knife has become clearly dull and the fine slot alone is not enough. A dull blade may need more than a light touch-up before it can cut food with less effort. The coarse stage is designed to reset the edge more quickly than the ceramic stage.
Use a small number of gentle passes, then check the knife with a careful cutting task. Do not keep pulling the blade through simply because you expect a certain number of strokes. Too much sharpening can remove more metal than needed and may shorten the useful life of the blade.
Use it sparingly
Reserve the coarse slot for blades that need more work rather than using it as the default for every touch-up.
Check as you go
Stop when the edge performs well enough for the task. Avoid needless extra passes.
When Should You Use the Fine Slot?
The fine ceramic stage is a practical choice for light upkeep on a compatible knife that still has a usable edge. It can refine the cutting edge after coarse sharpening. It may also improve the feel of a knife that has started to lose its bite during regular food prep.
A fine slot cannot fix every problem. A badly chipped blade, a bent tip, or a heavily worn edge may need a different method or professional service. If the knife still performs poorly after careful use, stop rather than forcing it through the sharpener again and again.
Routine upkeep
Use the fine stage when a compatible blade needs a light touch-up.
After coarse sharpening
Use the fine stage to refine the edge when the model instructions call for it.
How to Use the KitchenIQ Edge Grip Safely
Start with a clean, dry knife and a stable work area. Read the instructions supplied with your model, since blade compatibility and use directions can vary. Keep children and other people away from the work area while the knife is exposed.
The basic process is simple: secure the sharpener, place the blade in the correct slot, and pull the knife through in a controlled stroke. The cutting edge should travel through the slot in the direction described in the manual. Do not push the blade back and forth through the opening unless your model instructions explicitly say to do so.
Source: nextingifts.com
Before you begin
Check the knife for chips, cracks, a loose handle, or other damage. Do not sharpen a knife with a loose or unsafe handle.
Keep the area dry
A dry worktop and dry hands can help reduce the risk of the sharpener or knife slipping.
Use light control
Let the sharpening parts do the work. Excessive force can reduce control and may damage the blade or sharpener.
Step 1: Set Up the Sharpener
Place the sharpener on a flat, stable counter or fit its V-Grip base over a suitable counter edge. Hold the handle firmly and check for movement before bringing the knife near the slot. If the base slides, rocks, or does not sit securely, change its position.
Do not place the sharpener on a wet cloth or a loose cutting board. A support that shifts during a stroke can make it harder to control the knife. Choose a spot with enough space for the full length of the blade.
Check stability
Give the tool a gentle check before sharpening. It should remain in place without rocking.
Plan the stroke
Make sure the knife tip has room to move through the full stroke without hitting a wall or nearby object.
Step 2: Choose the Right Slot
Use the coarse slot only when the compatible knife needs substantial edge work. Choose the fine slot for light upkeep or the finishing step after coarse sharpening. If you are unsure, read the model guide before you begin.
Do not assume that a blade needs both stages just because the sharpener has two openings. A knife that cuts well may need no sharpening at all. Each pass removes or changes material at the edge, so unnecessary work has little benefit.
Dull edge
Start with the coarse stage when the blade is compatible and needs more substantial sharpening.
Minor loss of bite
Try the fine stage for a light touch-up when the edge is still in good shape.
Step 3: Pull the Knife Through
Insert the heel of the blade into the selected slot as directed by the manual. Draw the knife through toward the tip in one smooth, controlled motion. Keep your free hand on the sharpener handle or in the position shown in the instructions, well away from the blade path.
Avoid pressing down hard. Do not rush, twist the knife, or drag the blade sideways against the slot. If the knife catches, feels stuck, or does not fit freely, stop and check the model instructions rather than forcing it through.
One controlled pass
Use a steady motion from the heel toward the tip, following the supplied directions.
Keep fingers clear
Never place fingers near the slot or along the knife’s cutting edge.
Step 4: Check the Cutting Edge
After a small number of passes, clean away loose metal dust and test the knife with an appropriate food-prep task. A ripe tomato or a piece of paper may help you assess cutting performance, but keep the test controlled and your fingers clear of the edge. Never test sharpness by running a finger along the blade.
If the knife cuts cleanly with light pressure, stop. If it remains dull, review the slot you chose, the blade’s condition, and the model’s instructions. A damaged or incompatible knife may need a professional sharpening service instead.
Look for clean cuts
The knife should cut the test material with less dragging or crushing than before.
Stop when ready
Do not add more passes once the blade performs well for its intended task.
Which Knives Can You Sharpen With It?
The correct answer depends on the exact Edge Grip model. Product documentation for some 50009 versions describes sharpening straight-edge knives and serrated knives, with the ceramic stage intended for finishing serrated edges. However, other retailer listings mark the 50009 model as suitable for straight-edge knives only. This difference makes the instructions supplied with your exact unit the safest guide.
A pull-through sharpener is not a universal tool for every knife in a drawer. Blade material, coating, edge shape, and manufacturer care rules can change what is suitable. If the maker says not to use a pull-through sharpener, follow that advice rather than relying on a broad product listing.
Source: walmart.com
Standard straight-edge knives
These are the main intended use for compatible Edge Grip models. Check that the blade fits freely in the slot.
Serrated knives
Compatibility depends on the model and sharpening stage. Use the fine ceramic slot only if the instructions for your unit permit it.
Ceramic knives
Do not assume compatibility. Ceramic blades often require a sharpening method designed for their material.
Scissors and specialty tools
The standard Edge Grip is not a general-purpose sharpener for scissors, garden tools, or other blades.
Coated or premium knives
Check the knife maker’s care guidance before using a pull-through sharpener, as its abrasive action may not suit every edge.
Can You Sharpen a Serrated Knife?
Serrated knives have teeth and recessed areas along the edge. They need a different approach from a smooth, straight blade. Some KitchenIQ instructions identify the fine ceramic stage as suitable for serrated knives, but product listings for related models do not always agree.
Check the manual and markings for your exact model before trying it. If the instructions do not clearly permit serrated blades, do not experiment with the coarse carbide slot. A knife shop may be a better option for a serrated bread knife that has lost its bite.
Follow the exact guide
Use the serrated-knife instructions that match your model number.
Avoid the wrong stage
Do not use coarse carbide on a serrated blade unless the manufacturer explicitly permits it.
What About High-End Kitchen Knives?
A premium knife may have a thin edge, a special grind, or a maker’s recommended sharpening angle. A fixed-angle pull-through tool may not preserve every design detail. The same concern can apply to knives with delicate coatings or unusual edge shapes.
If the knife is costly or has special care rules, read the manufacturer’s instructions first. A whetstone used by a skilled sharpener or a suitable professional service may offer more control over the edge geometry.
Check the warranty terms
Some makers limit which sharpening methods they recommend or cover.
Consider the edge design
A knife with a special edge may need a method that preserves its original shape.
How to Clean and Store the KitchenIQ Edge Grip
Clean the sharpener after use so food bits and metal dust do not build up around the slots. Product instructions for the 50009 model call for a damp cloth or a mild brush. They also say not to rinse the tool, so avoid putting it under a running tap or leaving it to soak.
Let the sharpener dry fully before placing it in a drawer. Store it where the slots cannot catch your hand when you reach for another utensil. Keep it out of the reach of children, and do not leave a knife sitting in the slot.
Source: simposh.com
Wipe the body
Use a damp cloth to remove dust and surface residue from the outside.
Brush the slots gently
Use a soft brush when needed. Keep fingers away from the sharpening parts.
Avoid soaking
Do not immerse or rinse the sharpener unless the instructions for your exact model expressly allow it.
Store it dry
Place the tool in a safe drawer or cabinet once it is clean and dry.
Why You Should Not Wash It Like a Knife
A knife can often be washed according to its own care instructions, but the sharpener has small abrasive parts and openings that can trap moisture or debris. Running water through those openings may make cleaning harder and may conflict with the maker’s directions.
A damp wipe is a better starting point for the standard model. If residue remains, use a soft brush with care. Avoid harsh chemicals, abrasive pads, and strong force that could damage the body or sharpening parts.
Use gentle tools
Choose a soft cloth or brush rather than a metal pick or hard scouring pad.
Inspect before use
Check for cracks, loose parts, or other visible damage before sharpening another knife.
Common Problems and How to Fix Them
Most problems begin with the wrong stage, a moving base, an incompatible blade, or too much pressure. Check these points before repeating the sharpening process. If the tool is damaged or the knife does not fit as intended, stop and seek guidance instead of forcing either item.
The sharpener cannot fix every kind of edge damage. Deep chips, a bent tip, a loose handle, or a badly misshapen blade may need a skilled repair or professional sharpening. Repeated passes through a pull-through slot can remove extra metal without fixing the root problem.
Source: eknives.com
The knife still feels dull
Confirm that the blade is compatible, choose the proper stage, and use a few controlled passes. If the result does not improve, stop and reassess.
The sharpener moves
Stop immediately. Dry the surface, reposition the base, and use a flat worktop if the counter edge does not hold it securely.
The knife catches in the slot
Do not force it. Check the blade shape and the model instructions. The tool may not suit that knife.
The edge looks uneven
Stop repeated passes and inspect the knife. A damaged edge or a mismatch between the blade and sharpener may require another method.
The blade has chips or a bent tip
A basic pull-through sharpener may not repair this damage. Seek a suitable sharpening service if the knife is worth restoring.
Why Is My Knife Still Dull After Sharpening?
A blade may remain dull if it needs more substantial edge work than the fine slot can provide. The issue may also come from a damaged edge, a blade that does not fit the guides, or a sharpening method that does not suit the knife.
Check the knife maker’s care instructions and the sharpener’s blade guide. If the blade is compatible, try the recommended stage with a small number of careful strokes. Do not keep adding pressure or passes when the result is not improving.
Check the starting condition
A heavily worn or chipped edge may need more than a light touch-up.
Check compatibility
A knife that does not fit the slot freely should not be forced through it.
How Often Should You Sharpen Your Knives?
There is no single schedule that suits every home cook. A knife used each day to prep firm vegetables may need attention more often than a knife used only now and then. The type of cutting board, the food being cut, storage habits, and blade steel also affect how long an edge lasts.
Use cutting performance as your guide. When a compatible knife begins to drag, crush soft foods, or need more force than usual, inspect it and decide whether a light touch-up is needed. Avoid using the coarse slot on a calendar schedule when the edge still works well.
Watch how it cuts
A clear change in performance is more useful than a fixed sharpening date.
Use proper storage
A knife block, blade guard, or suitable drawer insert can help protect the edge between uses.
KitchenIQ Edge Grip Compared With Other Sharpening Methods
The Edge Grip suits cooks who want a small, manual tool with preset guides. Other sharpening methods offer different trade-offs. An electric sharpener can reduce manual effort, while a whetstone gives a skilled user more control over the edge angle and amount of material removed.
No single method is right for every knife. The best fit depends on your skill, the blade’s design, how damaged the edge is, and how much time you want to spend on upkeep. For an inexpensive everyday knife, a basic pull-through sharpener may be practical. For a premium or unusual blade, a more controlled method may be worth the extra effort.
Source: arenade.com.ph
KitchenIQ Edge Grip
A compact choice for routine home use on compatible knives. It has fixed guides and two manual sharpening stages.
Electric sharpener
May speed up the process and reduce hand effort, but it needs power and may cost more. Check the model’s blade compatibility.
Whetstone
Offers more control over the edge when used correctly. It takes practice and careful angle control.
Professional sharpening
Can be a good option for expensive knives, deep chips, unusual edges, or blades that need repair.
Which Option Makes Sense for Your Kitchen?
Choose the Edge Grip if you want a compact tool and mostly use compatible everyday knives. It can fit a busy kitchen where speed and easy storage matter more than fine control over the sharpening angle.
Consider a whetstone if you want to learn a hands-on method and maintain knives with specific edge requirements. Consider professional service when a knife has damage you cannot safely correct or when the manufacturer recommends a specialized method.
For simple upkeep
A manual pull-through tool can be convenient for compatible household knives.
For special blades
Use a method recommended for the knife’s material, edge shape, and care requirements.
For serious damage
Get advice from a qualified sharpening service rather than repeatedly using the coarse slot.
What to Check Before Buying a KitchenIQ Edge Grip
Before buying, confirm the model number, permitted blade types, condition, and seller’s return policy. Similar product names can refer to different versions, and online descriptions may disagree about serrated knives. A clear model label and matching instructions are more useful than a broad claim that the tool sharpens every kitchen knife.
Price and stock can change by seller and location. A product may also be listed under an older model name or appear as a discontinued item at one store while another seller still has stock. Check the exact item being sold instead of assuming that every listing refers to the same version.
Source: nextingifts.com
Model number
Look for the exact number on the product or package, such as 50009, and match it to the instructions.
Blade compatibility
Confirm whether the version supports straight-edge knives, serrated knives, or other listed blade types.
Condition
For a used sharpener, check for cracks, a damaged handle, a loose base, or worn sharpening parts.
Seller details
Review return terms, shipping costs, and warranty information before placing an order.
Care instructions
Make sure the cleaning and use directions are available for the exact model you plan to buy.
Is the KitchenIQ Edge Grip Worth Considering?
It is worth considering if your main goal is simple upkeep for compatible household knives. The compact design, preset slots, and V-Grip base address common needs in a home kitchen. The two-stage setup also gives you a choice between more substantial sharpening and lighter edge care.
It may not be the best fit if you own knives with strict care rules, need to repair deep chips, or want precise control over the sharpening angle. Those needs can call for a different tool or a skilled sharpening service. The right decision comes from matching the tool to your knives rather than judging it by the number of features.
Good fit
Home cooks who value simple operation, compact storage, and routine care for compatible knives.
Less suitable
People who need specialist edge repair, a method for every blade type, or precise manual control.
Frequently Asked Questions
Q
Is the KitchenIQ Edge Grip easy for beginners to use?
The KitchenIQ Edge Grip is designed to be simple to use. Its fixed sharpening guides reduce the need to set a blade angle by hand, and the handle gives you a place to hold the tool steady. Beginners should still read the instructions, secure the base, and use slow, controlled strokes.
Start with a compatible knife and the stage that matches its condition. Stop if the knife catches or the sharpener moves.
Q
Should I use both slots every time?
No. The coarse slot is intended for more substantial edge work, while the fine ceramic slot supports finishing and light touch-ups. A knife that already cuts well may not need sharpening.
Use the least aggressive stage that meets the need. Extra passes remove more material without always improving the result.
Q
Can the KitchenIQ Edge Grip sharpen serrated knives?
The answer depends on the exact model. Some KitchenIQ instructions identify the fine ceramic stage for serrated knives, while some retailer descriptions list the common 50009 model as suitable only for straight-edge blades.
Check the blade guide and manual for your unit. If serrated knives are not clearly listed as compatible, do not use the sharpener on them.
Q
Can I wash the sharpener under running water?
The published instructions for the common 50009 model recommend cleaning with a damp cloth or mild brush and say not to rinse the tool. Wiping it is the safer choice for that version.
Avoid soaking the sharpener or putting your fingers into the slots. Let the tool dry before storing it, and follow the care directions supplied with your exact model.
Q
Why does my knife still cut poorly after sharpening?
The blade may need a different sharpening stage, may be damaged, or may not be compatible with the tool. A knife with deep chips or a badly worn edge can need more work than a compact pull-through sharpener can provide.
Check the blade guide, the knife maker’s care instructions, and the sharpener’s setup. If a few careful passes do not help, stop and consider a suitable professional sharpening service.
Q
Does the KitchenIQ Edge Grip work on ceramic knives?
Do not assume that it does. Ceramic blades have different sharpening needs from common steel kitchen knives, and the standard Edge Grip is not automatically suitable for them.
Check the knife manufacturer’s care instructions and use a sharpening method designed for that blade material.
Q
How can I tell when my kitchen knife needs sharpening?
Look for changes in cutting performance. A knife that starts crushing soft foods, dragging through tomato skin, or needing more force may need attention.
Check the blade and use a safe cutting test rather than touching the edge with your fingers. If the knife cuts cleanly with light pressure, more sharpening may not be needed.
✦ Wrapping Up
Conclusion
The KitchenIQ Edge Grip is a compact manual sharpener made for routine care of compatible kitchen knives. Its coarse carbide slot helps restore an edge, while its fine ceramic slot supports finishing and light upkeep. The V-Grip base gives you the option of using the tool on a flat counter or a suitable counter edge.
Its simple design can suit home cooks who want a basic sharpening tool without a motor or a long learning process. Still, the exact model matters. Check the blade guide before using it on serrated, ceramic, coated, or specialty knives, and avoid trying to fix deep chips with repeated passes.
Safe use comes down to a stable setup, a suitable blade, light pressure, and careful cleaning. When a knife remains dull after proper use or shows clear damage, stop and choose a method that suits the blade.
💡 Key Takeaway
Before using or buying a KitchenIQ Edge Grip, confirm your model number and blade compatibility. Secure the sharpener, choose the correct slot, pull the knife through with control, and stop once the edge cuts well. Clean it with a damp cloth or soft brush, then store it dry and safely.